When a vehicle rolls into your bay with brake concerns, the rotor condition tells only part of the story. While surface rust and light scoring might seem like straightforward rotor replacement jobs, experienced technicians know that rotor wear patterns often reveal underlying caliper, sliding pin, or hydraulic issues. The Reddit thread analyzing heavily grooved rotors highlights a common scenario: visible rotor damage that prompts the question of replacement, but the real diagnostic work involves determining why the rotors degraded prematurely and what other brake components need attention. This guide synthesizes professional practices for rotor inspection, replacement decisions, and the complete brake system diagnosis that prevents comebacks.
Understanding Rotor Wear Patterns and What They Reveal
Rotor surface condition provides diagnostic clues beyond simple wear. Deep circumferential grooves indicate prolonged operation with worn pads, but uneven wear patterns point to caliper problems. When inspecting rotors, examine both the friction surface and the hat section for these indicators:
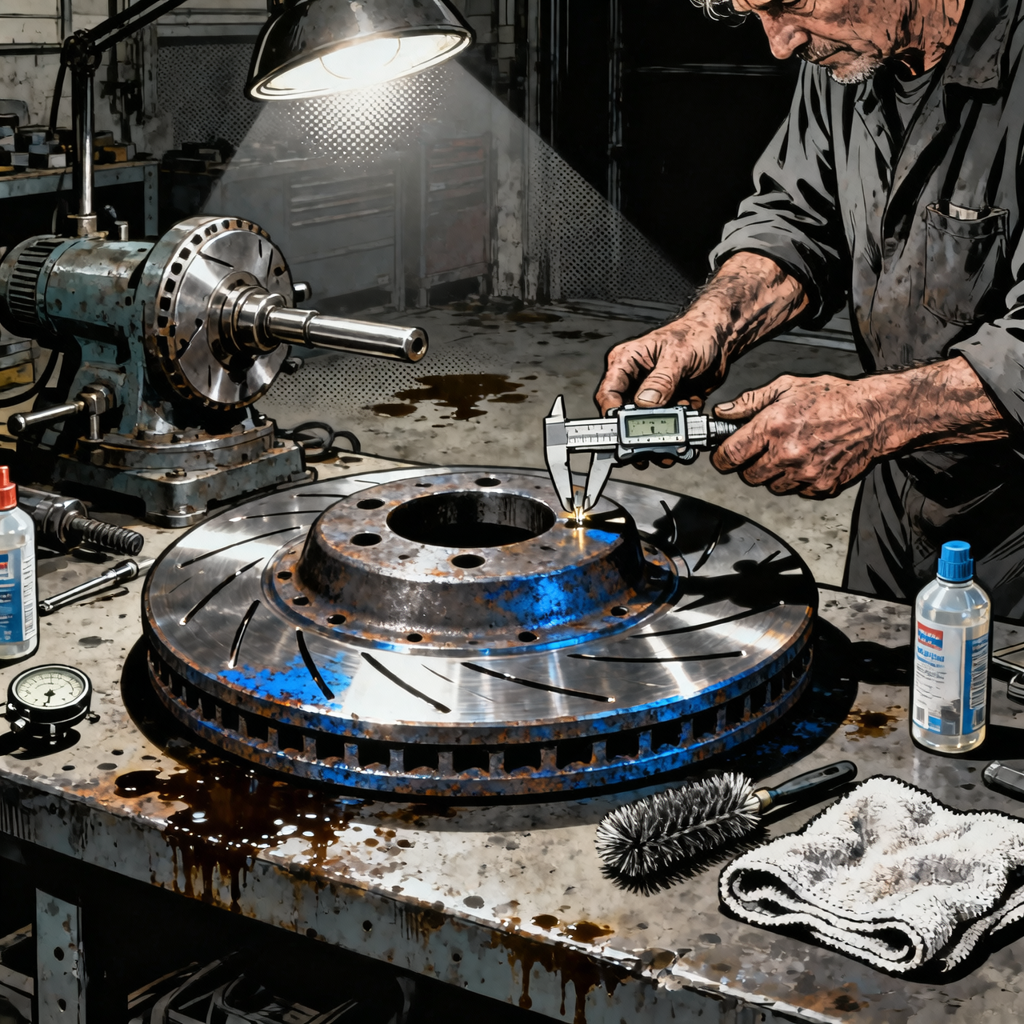
Surface rust on the friction face is normal after the vehicle sits, but rust that persists in the swept area after test driving indicates the pad isn’t making full contact. This typically results from seized caliper slide pins or a stuck piston. Deep grooves that you can catch with a fingernail—often 1mm or deeper—mean the rotor has lost significant material and the pads have been metal-to-metal or contaminated with debris.
Heat damage manifests as blueing, hard spots, or visible cracks radiating from the friction surface. These rotors have exceeded their thermal limits, usually from aggressive driving or a dragging caliper. The metallurgical changes from overheating make the rotor prone to warping and inconsistent friction, so replacement is mandatory regardless of thickness measurements.
Uneven pad deposits create the sensation customers describe as pulsing or vibration during braking. Run your hand across the rotor surface—smooth, consistent texture is what you want. Raised areas or valleys indicate uneven material transfer from the pads, often caused by caliper issues preventing even pad pressure.
The critical measurement is rotor thickness. Use a micrometer at multiple points around the rotor, including the thinnest visible section. Compare against the minimum thickness specification stamped on the rotor hat or listed in service data. If you’re within 0.5mm of minimum spec, replacement is the only option. Many shops use a policy of replacing rotors that are within 1mm of minimum to avoid the liability of rotors wearing to minimum before the next service interval.
Rotor Replacement vs. Resurfacing: Making the Right Call
The economics and physics of modern rotors have shifted the replacement versus resurfacing decision heavily toward replacement. Rotors manufactured in the past 15 years are generally thinner than their predecessors—engineered for weight reduction and thermal management rather than multiple resurfacing cycles. The cost of quality replacement rotors has dropped significantly due to mass production, while labor rates for resurfacing have increased.
Resurfacing made economic sense when rotors were thick castings that could be cut multiple times and new rotors were expensive. Today, an economy rotor set might cost $40-60, while the time to remove, resurface, and reinstall adds $80-120 in labor depending on your door rate. The math rarely justifies resurfacing unless you’re working with premium rotors on high-performance or heavy-duty applications.
From a technical standpoint, resurfacing removes material and brings the rotor closer to minimum thickness. Even if a rotor measures above minimum spec now, removing another 0.5-1mm for resurfacing might leave insufficient material for the life of the new pads. Thinner rotors also have reduced thermal mass, making them more susceptible to warping under heavy use.
The condition of the rotor matters too. Light surface rust and minor scoring can be cleaned up with resurfacing if thickness permits. Deep grooves, hard spots from overheating, or cracks cannot be machined away safely. Some shops maintain a brake lathe for European or performance vehicles with thick rotors where resurfacing remains viable, but for the majority of passenger vehicles, replacement is the standard recommendation.
If you do choose to resurface, both rotors on an axle must be machined to the same final thickness to prevent pull during braking. After resurfacing, final thickness must be above the minimum discard specification, and the surface finish should meet the pad manufacturer’s requirements—typically 60 RA or smoother.
Complete Brake System Diagnosis: Beyond Pads and Rotors
Premature rotor wear indicates problems elsewhere in the brake system. A thorough inspection prevents the comeback scenario where new pads and rotors wear out quickly because the underlying issue wasn’t addressed. Start with the calipers and slide mechanism.
Remove the caliper and inspect the slide pins or bushings. They should move smoothly through their full range of travel with light finger pressure. Seized or binding pins prevent the caliper from centering over the rotor, causing uneven pad wear and rotor damage. Clean the pins with a wire brush, inspect the bores in the caliper bracket for corrosion or damage, and apply the appropriate lubricant. Use synthetic brake caliper grease on pins and the caliper-to-bracket contact points—never petroleum-based grease, which degrades brake seals.
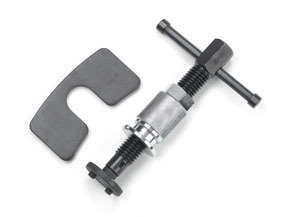
Inspect caliper pistons for smooth operation. Push the piston back into the bore and watch for even, straight movement. Cocked or binding pistons indicate internal corrosion or damaged seals. On floating calipers, a seized piston on one side causes constant pad contact and rapid rotor wear. On fixed calipers, any piston that doesn’t retract fully creates drag.
Examine brake hoses, especially on vehicles with significant age or mileage. The rubber interior can delaminate, creating a one-way valve effect—pressure reaches the caliper during application but doesn’t fully release. This causes brake drag, heat buildup, and accelerated pad and rotor wear. If the vehicle is over eight years old or shows signs of caliper drag, replace the hoses as preventive maintenance.
Brake fluid condition affects caliper function. Old fluid absorbs moisture, lowering the boiling point and corroding internal components. If the fluid is dark brown or hasn’t been changed in three years, flush the system while you have it apart. Fresh fluid ensures proper hydraulic function and extends caliper life.
Check the master cylinder for proper operation. A failing master cylinder can cause uneven brake application or a spongy pedal, leading to inconsistent pad contact and rotor wear. While you’re bleeding the system after the brake job, pump the pedal and verify firm, consistent response.
Rotor Selection: Matching Components to Application
Rotor selection impacts brake performance, noise, and longevity. Economy rotors from auto parts store house brands work adequately for standard passenger vehicle use, but quality varies. OE-equivalent rotors from manufacturers like Zimmerman, Brembo, or Centric provide better metallurgy and tighter tolerances.
Rotor design—blank, slotted, cross-drilled, or combination—should match the vehicle’s original specification unless the customer has specific performance requirements. Blank rotors are the standard for most passenger vehicles, providing good performance and rotor life at the lowest cost. Slotted rotors improve wet braking and help dissipate gases between pad and rotor, but they increase pad wear and can create noise. Cross-drilled rotors offer similar benefits but are more prone to cracking under hard use, especially on vehicles not originally equipped with them.
Installing slotted or drilled rotors on a vehicle that came with blank rotors from the factory often creates problems. The vehicle’s brake bias, ABS calibration, and pad compounds are engineered for the original rotor design. Changing rotor style can alter brake feel, increase noise, and accelerate pad wear. Some performance applications benefit from upgraded rotors, but for standard daily drivers, stick with the OE design.
E-coated or geomet-coated rotors resist rust on non-friction surfaces, improving appearance and longevity. The coating prevents corrosion on the hat, vanes, and edges while leaving the friction surface bare. These rotors cost slightly more but look better longer, particularly in salt-belt regions.
When selecting rotors, verify the correct part number for the specific vehicle. Many platforms use different rotor sizes for base models versus sport packages or larger engine options. Installing the wrong size creates safety issues and potential ABS problems.
Proper Installation Procedures for Long-Lasting Results
Correct installation technique prevents comebacks from noise, vibration, and premature wear. Start with clean mating surfaces. Use a wire brush or abrasive pad to remove all rust and scale from the hub face where the rotor seats. Even a thin layer of rust creates runout when you torque the lug nuts, leading to pedal pulsation. Some technicians use a light coating of anti-seize on the hub face to prevent corrosion and ease future rotor removal, though opinions vary on this practice in salt-belt versus dry climates.
Clean new rotors thoroughly before installation. They’re shipped with a preservative oil coating that must be removed completely. Use brake cleaner and lint-free towels, wiping both sides of the friction surface until the towel comes away clean. Handling rotors with bare hands transfers oils that can cause uneven pad bedding and noise.
Install the rotor and verify runout before installing the caliper. Mount a dial indicator against the friction surface and rotate the rotor, checking for lateral runout. Specifications vary by vehicle, but most are in the 0.05-0.10mm range. Excessive runout causes pedal pulsation and uneven pad wear. If runout is excessive, remove the rotor, rotate it 180 degrees on the hub, and recheck—sometimes this simple step corrects the problem.
Install new brake pads with appropriate anti-squeal measures. Apply brake pad lubricant to the backing plate where it contacts the caliper bracket and piston, never to the friction material. Some pad sets include shims or anti-rattle clips—install all hardware as designed. Skipping these components invites noise complaints.
Torque all fasteners to specification. Caliper bracket bolts, caliper slide bolts, and wheel lug nuts all have specific torque values. Over-torquing can warp rotors or damage components; under-torquing allows movement and noise. Use a calibrated torque wrench and follow the service manual specifications.
Before lowering the vehicle, pump the brake pedal to seat the pads against the rotors. The pedal should firm up within a few strokes. If it remains soft, you have air in the system that needs bleeding. Verify proper pedal height and feel before returning the vehicle to the customer.
Bedding New Rotors and Pads for Optimal Performance
Proper bedding procedure transfers a thin layer of pad material onto the rotor surface, creating the friction interface for effective braking. Skipping this step or bedding incorrectly causes noise, reduced braking performance, and uneven wear. The bedding process varies by pad compound, but a general procedure works for most street applications.
Perform the bedding procedure on a clear road with no traffic. Make 8-10 stops from 50 mph down to 20 mph using moderate pedal pressure—about 50% of maximum braking force. Allow 30-60 seconds between stops for the rotors to cool slightly. Avoid coming to a complete stop during this process, as holding the pads against hot rotors can create pad material deposits.
After the initial bedding stops, drive at moderate speed for several minutes to allow the brakes to cool completely. Avoid hard braking during this cooling period. Once cooled, make 3-5 more aggressive stops from 60 mph to 20 mph using firmer pedal pressure—about 75% of maximum. Again, allow cooling time between stops and avoid complete stops.
Some brake pad manufacturers provide specific bedding procedures on the box or their website. Performance pads, in particular, may require more aggressive bedding or a specific number of heat cycles. Always follow manufacturer recommendations when provided.
Instruct customers to avoid hard braking for the first 200-300 miles after installation if possible. The bedding process continues during normal driving as the pad and rotor surfaces mate fully. Heavy braking before complete bedding can cause uneven material transfer and noise issues.
Quick Inspection Checklist
- Measure rotor thickness at multiple points; replace if within 1mm of minimum spec
- Check for deep grooves (>1mm), heat damage, cracks, or hard spots requiring replacement
- Test caliper slide pins for smooth movement; clean and lubricate if binding
- Inspect caliper pistons for even retraction and signs of leaking seals
- Examine brake hoses for age, damage, or internal delamination
- Verify brake fluid condition; flush if dark or over three years old
- Clean hub faces thoroughly to eliminate runout from rust buildup
- Remove protective coating from new rotors with brake cleaner
- Check lateral runout with dial indicator before final assembly
- Torque all fasteners to specification with calibrated torque wrench
- Pump pedal to seat pads before lowering vehicle; verify firm pedal feel
- Perform proper bedding procedure before returning vehicle to customer
Frequently Asked Questions
Can rotors be resurfaced instead of replaced?
Modern rotors are typically too thin to resurface cost-effectively. If the rotor measures above minimum thickness by at least 1mm and shows only light scoring without heat damage or cracks, resurfacing is technically possible. However, replacement usually makes more economic sense given low rotor costs and labor rates for machining. High-performance or heavy-duty rotors with substantial thickness may justify resurfacing.
Should I install slotted or drilled rotors on my vehicle?
Stick with the rotor design that came on the vehicle from the factory unless you have specific performance requirements. Installing slotted or drilled rotors on a car designed for blank rotors often increases noise and pad wear without meaningful performance benefits for street driving. Vehicles with factory performance brakes can use replacement rotors matching the original design.
Why do my new brakes squeal after installation?
Brake noise after installation typically results from incomplete bedding, contaminated rotors or pads, missing anti-squeal shims, or incompatible pad compounds. Verify you cleaned the rotors thoroughly before installation, used all supplied hardware, applied pad lubricant to backing plates only, and performed proper bedding procedure. Some pad compounds are inherently noisier than others, particularly performance-oriented ceramics or semi-metallics.
How do I know if brake fluid needs flushing during a brake job?
Flush brake fluid if it appears dark brown or black, tests above 3% moisture content with a brake fluid tester, or hasn’t been changed in three years. Old fluid absorbs moisture, lowering boiling point and corroding internal brake components. Since you’re already bleeding the system after opening it for pad and rotor replacement, flushing adds minimal additional time and provides insurance against future caliper problems.
What causes uneven rotor wear on one side of the vehicle?
Uneven wear between left and right sides indicates a caliper problem on the more worn side. Seized slide pins, stuck pistons, or collapsed brake hoses prevent full pad retraction, causing constant contact and accelerated wear. The affected caliper needs to be disassembled, cleaned, and rebuilt or replaced. Simply replacing pads and rotors without addressing the caliper issue leads to rapid repeat failure.
Is it necessary to replace rotors every time I change brake pads?
Rotor replacement at every pad change isn’t mandatory if the rotors measure above minimum thickness, have smooth surfaces without deep grooves or heat damage, and show no signs of warping. However, the low cost of rotors and labor efficiency of replacing both together makes it common practice. Reusing worn rotors with new pads can reduce pad life and may not provide a good friction surface for proper bedding, especially if the rotors have accumulated pad deposits or glazing.
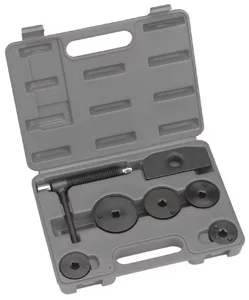
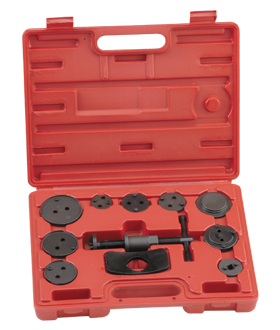
Essential Brake Tools for Inspection and Service
Proper rotor inspection and replacement require the right diagnostic and installation equipment. Our Brake System tools support the complete workflow outlined in this guide:
- Precision measurement tools like micrometers and dial indicators for rotor thickness and runout verification
- Caliper service equipment including cleaning supplies and lubricants for slide pin and piston inspection
- Installation tools such as torque wrenches and brake bleeders for proper assembly and hydraulic function
The Toolsource Technical Team blends decades of real-world automotive service experience with up-to-date technical research. Our writers collaborate with professional mechanics, shop owners, and diagnostic specialists to deliver practical, workshop-ready guidance you can trust.


Follow us on social media