Technicians don’t need platitudes—they need repeatable steps, safe methods, and clear standards. This article distills shop-floor wisdom into practical routines you can apply today: a diagnostic playbook, hard safety lines, torque and fastener discipline, communication habits that prevent comebacks, and a training cadence that keeps you sharp. Print it. Post it. Use it.
Build a Diagnostic Routine You Can Repeat
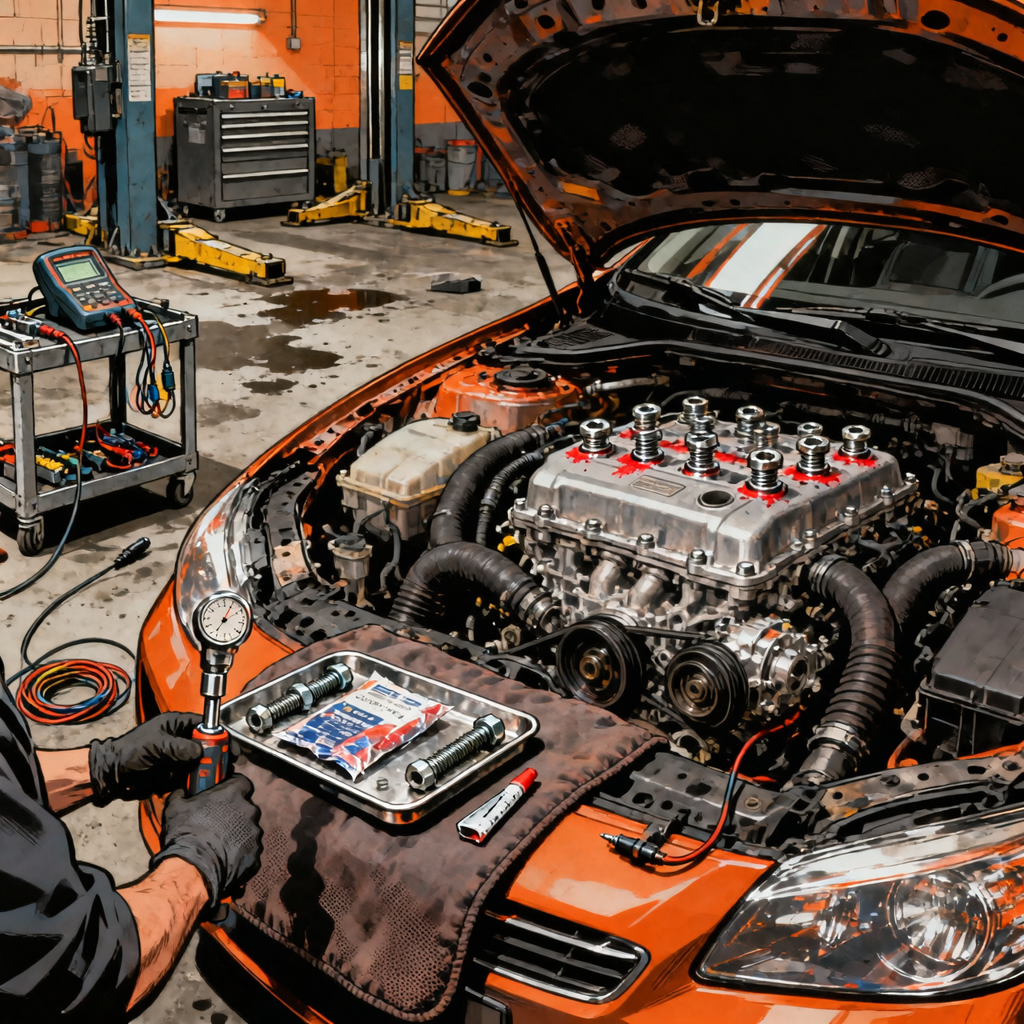
Consistency prevents comebacks and wasted hours. Use this structured flow on every job, from intermittent faults to complex drivability complaints.
- Verify the concern exactly as reported. Reproduce the symptom under matched conditions (temp, load, speed, accessory use). If you can’t reproduce, gather data logs with a scan tool, note customer conditions, and set a plan to reattempt.
- Check service info and TSBs first. Pull OEM procedures, specifications, wiring diagrams, and known issues. TSBs can save hours and prevent parts darts.
- Baseline the vehicle. Quick global scan for DTCs; check freeze frame; inspect battery health and grounds; verify fluid levels and quality; look for obvious mechanical issues before electronics.
- Plan your test path. Build a fault tree: which inputs/outputs and subsystems are needed for the symptom? Decide which tests will confirm or eliminate each branch with minimal intrusion.
- Start with non-intrusive tests. Use scan data, mode $06, bi-directional controls, and a graphing multimeter/oscilloscope to observe live behavior before unplugging or disassembling.
- Test under the same load the failure needs. Voltage drop tests under load; scope signals during crank, acceleration, or thermal soak; use a test light/current clamp to confirm circuit capacity, not just presence of voltage.
- Isolate root cause, not symptom. Confirm that the failed part, circuit, or mechanical condition directly explains the complaint and associated DTC logic. Beware of collateral codes from low voltage, bad grounds, or network faults.
- Perform the least invasive valid fix first. Fix the root cause using OEM procedures, torque specs, and sealing methods. Avoid harness strain, mixed hardware, or short cuts that create new faults.
- Verify the repair. Clear codes; re-run drive cycles; confirm readiness and operating conditions; document post-repair values and screenshots.
- Document the story. Note complaint, cause, and correction with data: scan tool screenshots, scope captures, photos. Good documentation protects you and educates the customer.


OTC 3688 Genisys Scope Module w/ InfoTech 2006
Mfg: OTC Tools and Equipment
Part #: 3688


Work Safe Like a Pro: PPE, Lockouts, and High-Voltage Discipline
Safety is a procedure, not a suggestion. Treat every job with the same standards, especially hybrids and EVs.
- Establish a lockout/tagout routine. Disconnect 12V negative when required; tag the key; affix a steering wheel cover; verify no one can energize systems during your work.
- Respect hybrid/EV high-voltage (HV) systems. Follow OEM HV disable steps, verify zero potential with a CAT III/IV meter, and wait the specified capacitor discharge time. Use properly rated insulated gloves and tools; keep them tested and dated.
- Lift safely, every time. Verify official lift points; confirm pad contact; chock wheels. Reverify after initial lift and before standing under vehicle. Use jack stands for independent support.
- Control fire and fume risk. Use spark-proof ventilation for fuel vapors; keep Class ABC fire extinguishers accessible; never weld near fuel lines, HV batteries, or airbag modules; disconnect sensitive electronics per OEM guidance.
- Wear PPE matched to the task. Safety glasses, gloves appropriate to chemicals/heat, hearing protection for hammering/grinding, and respirators for brake dust and solvents.
- Battery and charging safety. Use battery maintainers with safe modes; connect and disconnect in the correct order; shield modules when welding; always follow OEM procedures for module reprogramming power support.
- Post and enforce safety boundaries. Cones, signage, and work orders should clearly indicate HV disable status, in-progress calibrations, and unsafe-to-start conditions.
Measure, Not Assume: Torque, Fasteners, and Repair Quality
Hardware discipline prevents comebacks, warped components, and leaks. Adopt a zero-guess fastener policy.
- Use the correct specification—every time. Pull OEM torque specs. If torque-angle is specified, use an angle gauge. For stretch-to-yield (TTY) fasteners, replace as required. Note different specs for dry vs lubricated threads.
- Prepare the joint surfaces. Clean threads with chasers, not taps, unless repairing damage. Ensure gasket surfaces are flat and clean. Use OEM-approved sealants sparingly and only where specified.
- Control friction variables. If the spec assumes clean, dry threads, don’t add oil or anti-seize unless the OEM allows it, and adjust torque if required. Misapplied lubricants change clamp load.
- Sequence matters. Follow cross or spiral patterns and multi-stage torque steps. On wheels, hand-start lugs, snug in sequence, torque to spec on the ground if required by OEM.
- Replace questionable hardware. Any bolt with corrosion, stretch, galling, or damaged head/threads gets replaced with correct grade/length. Use stud installers and thread lockers per OEM.
- Verify critical assemblies. For brakes, steering, suspension, and engine internals, mark fasteners after torque with paint or witness marks as an internal QC practice.
- Document final values. Note torque specs and procedures on the RO. For engine builds and gearbox work, log bearing clearances, endplays, and torque-angle values.
Daily Bay Setup Checklist
- Calibrated torque wrench and angle gauge verified
- Charged scan tool with latest updates and OEM subscriptions active
- Meter and scope leads inspected; backprobe kit organized
- PPE staged: safety glasses, gloves, hearing protection, respirator as needed
- Lift points charts accessible; jack stands and chocks at bay
- Battery maintainer/power supply set for programming-safe mode
Communicate Clearly: From RO Intake to Delivery
Clear communication reduces friction, aligns expectations, and protects your time.
- Start with a structured intake. Capture complaint, conditions (hot/cold, speed, terrain), prior repairs, and warning lights. Photograph dash lights, odometer, and any damage before work.
- Provide a diagnostic plan and estimate. Quote time for testing, not for guessing. Explain that diagnostics are a process with milestones and call-backs for authorization.
- Use digital vehicle inspections (DVI). Include photos, short videos, and simple explanations tied to OEM specs. Color-code immediate safety concerns vs maintenance recommendations.
- Get clear approvals. No work proceeds without authorization. Document approvals with timestamps and who approved. Avoid partial verbal approvals without notes.
- Write findings in plain language. Complaint, cause, correction (3Cs) with supporting data: codes, PID ranges, scope captures, test results. Avoid jargon without definitions.
- Deliver and debrief. Show replaced parts if appropriate. Explain what was fixed, what to monitor, and next service intervals. Schedule follow-ups for rechecks after complex repairs.
- Close with warranties and conditions. Document part and labor coverage, exclusions for pre-existing conditions, and requirements (e.g., alignment after suspension work, retorque after heat cycles if specified).
Keep Training and Tools Aligned
Technicians are only as effective as their knowledge and equipment. Treat training and tool upkeep as scheduled maintenance.
- Maintain a training calendar. Book quarterly courses on evolving systems: ADAS calibrations, network diagnostics, hybrid/EV safety, direct injection, variable valve timing, and CAN/FlexRay/Ethernet diagnostics.
- Standardize diagnostic toolsets. Each bay should have: bi-directional scan tool with OEM coverage, graphing multimeter, 2–4 channel lab scope, current clamps, pressure transducers, smoke machine, and a reliable battery maintainer.
- Update and calibrate. Keep firmware/software current. Calibrate torque wrenches on schedule; date-test insulated gloves; function test gas analyzers and smoke machines.
- Build a known-good library. Save scope captures and PID snapshots from vehicles that are confirmed good. Label by year/make/model/engine and test conditions.
- Manage leads and adapters. Replace damaged probes; keep piercing probes and backprobes organized. Label custom harnesses and avoid ad-hoc splices that can mislead tests.
- Invest in information. OEM service information, wiring diagrams, programming access, and TSBs are not optional. Budget for subscriptions as part of shop overhead.
Protect Your Headspace: Workflow, Time, and Professional Standards
Technical excellence depends on mental bandwidth. Protect it with process and boundaries.
- Triage effectively. Quick checks identify safety issues, no-starts, or drivability problems that need immediate bay time vs maintenance that can be scheduled later.
- Block time for diagnostics. Reserve uninterrupted windows for complex work. Turn off non-essential notifications; use signage to prevent interruptions during programming and calibrations.
- Prioritize quality over speed. Time spent setting up valid tests is cheaper than repeating a repair. Measure twice, torque once.
- De-escalate with facts. When challenged, reference documented data: test results, specs, and photos. Stick to process, not emotion.
- Balance the board. Mix heavy diagnostics with known pattern jobs to maintain productivity without burnout. Know your limits and request assistance when a specialty tool or second set of eyes is warranted.
- Standardize comebacks handling. Inspect promptly, document findings, and communicate timelines. If the repair is within warranty, honor it; if a new issue is found, separate it clearly with its own estimate.
FAQs
How much diagnostic time should I quote before starting?
For basic drivability or electrical issues, start with 1.0–1.5 hours and define milestones (e.g., code analysis and baseline testing). For network faults, intermittent stalls, or EV/hybrid HV issues, set expectations for 2.0–3.0 hours with a mid-point update. Always document scope and customer approval.
When should I replace torque-to-yield bolts?
Replace any TTY fastener once removed or when specified by OEM during procedures like cylinder head, main bearing cap, rod cap, and some axle or suspension bolts. Don’t mix old and new fasteners in critical assemblies. If in doubt, source OEM replacements and document part numbers on the RO.
What’s the minimum toolset for reliable electrical diagnostics?
A bi-directional scan tool with OEM-level data, a graphing multimeter, a 2-channel scope (4-channel preferred), a low-amp current clamp, a smoke machine for intake/EVAP leaks, a battery/charging system analyzer, quality backprobes, and an adjustable power supply/battery maintainer.
How do I avoid damaging modules during welding or programming?
Use a clean power supply in programming-safe mode; maintain stable voltage per OEM spec. For welding, disconnect or shield sensitive modules, disconnect the battery as instructed by OEM, clamp ground close to the weld site, and avoid welding near HV components or fuel lines.
What documentation best protects me from comebacks?
Before/after photos, screenshots of codes and PIDs, scope captures with time/date stamps, torque specs used, replaced part numbers, and detailed notes of approval times and conversations. Summarize with the 3Cs: complaint, cause, correction.


MaxiFLASH VCMI Kit with VCMI, power supply, cables, leads, probes, pickup, clips, attenuator
Mfg: Autel.us
Part #: MFVCMIKIT

Shop Automotive Diagnostic Tools
Keep your bay ready with reliable Automotive Diagnostic Tools—from scan data to scope work, the essentials that support a repeatable diagnostic routine.
- Scan tools, graphing multimeters, and lab scopes for data-driven testing
- Current clamps, pressure transducers, and backprobe kits for accurate measurements
- Smoke machines and battery maintainers for leak checks and stable programming power
The Toolsource Technical Team blends decades of real-world automotive service experience with up-to-date technical research. Our writers collaborate with professional mechanics, shop owners, and diagnostic specialists to deliver practical, workshop-ready guidance you can trust.


Follow us on social media