If a job doesn’t require a lift, engine support, multiple jacks, or dealer-only tooling—and you can finish it without immobilizing your daily—there’s a good chance it’s viable in a home garage. This guide synthesizes hard-won technician tips into a practical framework: how to decide, what to prepare, where DIY stops paying off, and how to split work with a shop to save time and money.
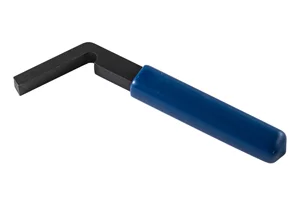
142540 36700 Cal-van Tools CV36700 CV36700 2-In-1 S-Cam Brake Tool
Mfg: Cal-van Tools
Part #: 36700
A Technician-Grade Decision Framework
Use these criteria before you pull a single fastener. The goal is to control risk, not courage-test.
- Tooling: Can it be done with hand tools plus common service tools (jack, stands, torque wrench, scan tool)? If it needs a lift, engine crane/support bar, shop press, or refrigerant machine, plan to farm out or split the job.
- Time window: Can you finish it in a day with a buffer? If not, do you have a second vehicle? If the answer is no, reconsider.
- Parts path: Are all likely-wear items available locally today? If special-order parts are probable, pre-stage or plan to hand off.
- Safety and access: Will your head/torso live under a vehicle on stands? If you’re not set up for that, choose another route.
- Complexity and rework risk: Tasks with many similar fasteners, shims, timing marks, seals, or coding requirements raise error risk. Only proceed if you can document and torque-spec everything.
- Environment: Rust-heavy regions add time, heat, extraction, and replacement hardware. Adjust your plan.
Pre-Job Short Checklist
- Confirm torque specs, procedures, and tool list.
- Stage all likely parts (and return what you don’t use).
- Have fresh hardware, hub nuts, cotter pins, clips, and fluids.
- Penetrating oil and heat source ready for rust.
- Backup transport available or a hard stop-time with a buffer.
Bread-and-Butter DIY Jobs with High Success Rates
These procedures usually fit the home-garage tool set and a single workday. Build your confidence and tool collection here.
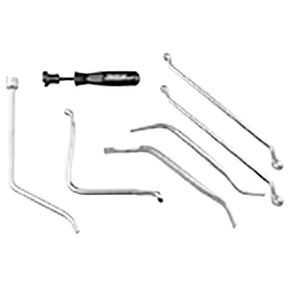
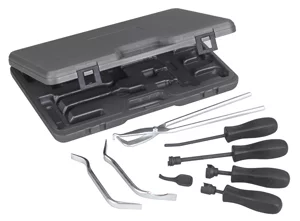
Brakes and Hydraulics
- Pad/rotor service: Clean hub faces, verify rotor runout if needed, lube slide pins with high-temp synthetic grease, torque lugs properly. Use a pressure or vacuum bleeder to flush fluid every 2–3 years.
- Drum adjustments: Replace hardware kits, clean backing plates, lube pivot points sparingly, and adjust for light drag.
- Lines and hoses: In rust regions, nicopp (CuNi) hard line flares easier, resists corrosion, and is DOT-approved. Use line/flare-nut wrenches to prevent rounding.
Fluids and Cooling
- Engine oil and coolant service: Use a spill-free funnel to purge air on cooling system refill; always verify thermostat bleed points.
- ATF/transfer/diff service: Follow OEM fill procedures (temperature windows for some transmissions). Avoid overfilling sealed units.
Ignition and Air/Fuel Basics
- Plugs, coils, filters, MAF/throttle cleaning: Use anti-seize only if OEM specifies; torque plugs correctly to avoid thread damage. Clean throttle plates without flooding the motor.
Suspension Bolt-ons
- Shocks/struts (complete assemblies): Quick-struts avoid spring compression. Mark cam bolts and eccentric positions, torque at ride height, and plan a final alignment.
- Sway links/bushings: Anti-seize on non-locking threads; hold the stud with a hex/Torx if needed.
High-Risk Tasks and How to De-Risk Multi-Day Work
Some jobs will sprawl because of rust, surprises, or parts discoveries. Control the variables and you’ll finish with fewer weekend casualties.
- Pre-stage parts the pro way: If a brake job might need calipers, hoses, and hardware, stage them. Returning unused parts is cheaper than immobilizing a car.
- Dry-run the procedure: Watch multiple videos, read the factory/manual steps, note torque sequences, sealant types, and one-time-use fasteners.
- Hardware strategy: Keep assortments of flange bolts, clips, exhaust clamps, hub nuts, cotter pins, and crush washers. Have thread chasers, tap/die set, and helicoils/time-serts for inevitable rescues.
- Rust protocol: Start soaking fasteners days ahead. Heat stubborn hardware with a torch, then use a breaker bar with six-point sockets. Have extractors for rounded hardware.
- Time-boxing: If progress stalls (broken bolt, seized sleeve), pivot: remove the subassembly and take it to a press or machine shop. Splitting work often wins.
- Workspace and neighbors: If you can’t leave a car on stands, plan jobs you can finish within daylight and weather. In HOA settings, keep work discreet and clean.
Wheel, Tire, and Alignment: What’s Reasonable at Home
Wheels and alignment are doable at home with caveats. Decide based on equipment and tolerance for fine adjustment.
Tire Mounting and Balancing
- Mounting: A manual tire changer and good technique can handle many passenger tires. Use bead lube, long levers, rim protectors, and a bolted or well-anchored base. A duckhead attachment reduces rim damage.
- Balancing: Static balancing can be done with a bubble balancer for basic steel wheels, but a dynamic balancer is required for best results—especially on modern alloys and highway speeds.
- Storage and mobility: Bolt a changer to anchors during use and remove when done, or mount equipment to a heavy pallet and move it with a pallet jack. Stability matters—reinforce pallets and lock casters to prevent movement.
DIY Alignment (Temporary vs Final)
- Toe: Toe plates and two tape measures can get you within spec enough to drive to a shop. The string method around the car also works with patience and level ground.
- Camber: A digital angle gauge against a straight edge on the wheel face is accurate enough to identify gross errors. Mark cam bolts before disassembly to return close to baseline.
- Caster: Often non-adjustable on many MacPherson strut cars; where adjustable, it’s sensitive and best finalized on an alignment rack.
- Plan a final alignment: Use DIY as a stopgap after suspension work. Get a professional alignment for tire life and safety.
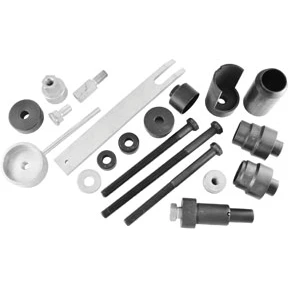
Bearings, Press-Fit Components, and Smart Shop Splits
Know when to remove a subassembly and let a press do the heavy lifting.
- Unitized hub vs pressed bearings: Many vehicles use bolt-in hub assemblies—simple R&R plus an ABS connector. That’s a solid DIY job. For knuckles with pressed bearings, remove the knuckle and pay a shop to press bearings in/out. This avoids fighting snap rings and risking bore damage.
- Axle and hub nuts: Replace one-time-use axle nuts. Torque to spec with the vehicle on the ground (or with brakes locked and proper support), then stake if required.
- Ball joints and bushings: A rental C-frame press can handle many jobs, but seized sleeves, offset bushings, and eccentric shells can consume hours. Pulling the arm for a shop press is often faster and cheaper.
- Clutch and driveline: Clutch swaps on RWD can be DIY-friendly with the right transmission jack and stands. FWD subframe drops or AWD packaging often favor a lift and a team—consider a shop.
Rust-Belt Reality: Tools, Techniques, and Time Savers
Corrosion changes the job. Budget 2–3x time and carry the right arsenal.
- Penetrants and heat: Soak days in advance. Apply heat to the surrounding boss, not just the fastener. Quench cycles can break rust bonds.
- Impact wisely: Use quality six-point impact sockets. If a bolt starts to round, stop and switch to extraction sockets. Add a breaker bar and cheater with controlled force, not speed.
- Cut and replace strategy: Exhaust studs, sway bar links, and brake line fittings are consumables in rust country. Cutting and replacing beats hours of salvage attempts.
- Thread rehabilitation: Chase threads after rust cleanup. Replace compromised hardware. Use anti-seize on exhaust and hub faces where appropriate (never on lug studs—use correct dry torque unless OEM specifies otherwise).
- Brake hard lines: Replace entire rusty sections with nicopp. Practice double flares on scrap first. Route lines along OEM paths and secure with new clips.
- Fastener inventory: Keep assortments of metric/SAE flange bolts, washers, pinch bolts, and exhaust clamps. When the parts counter is closed, spares save the day.
Where a Shop (or Machine) Makes More Sense
Some tasks are slow, tool-heavy, or risky without the right equipment.
- AC evacuate/charge: You can replace components with a vacuum pump and gauges if the system is empty, but accurate charging requires a scale; reclaiming refrigerant and recovering oil require a service machine and are regulated.
- Glass and body: Windshields and bonded glass include consumables, adhesives, and leak/flex risks. Mobile services are fast and often include labor in part pricing.
- Transmission internals: Automatic rebuilds demand specialized fixtures, measurements, and cleanliness. Most DIYers stop at external service and R&R.
- Complex coding: Late-model modules, keys, and some ABS/EPB procedures need advanced scan tools and subscriptions. Verify you can complete coding before you start.
- Heavy lifts: Engine swaps, subframe drops, or jobs requiring an engine support bar or lift are doable, but if you don’t have the gear or workspace, book a shop.
Practical Workflow Example: De-Risking a Front-End Refresh
- Assessment: Inspect for play, torn boots, leaking struts. Photograph eccentric/cam positions. Measure tire wear and steering wheel center.
- Parts staging: Order control arms (with bushings pre-installed if available), tie rods, sway links, struts (complete assemblies), new hardware, and axle nuts if applicable.
- Tooling: Torque wrench, impact, ball joint separator or C-frame press, paint marker, angle finder, toe plates/string kit.
- Rust plan: Start penetrant three days prior. Have torch, extraction sockets, and spare pinch bolts.
- Execution: Mark cam bolts, disassemble, replace components, torque at ride height, set rough toe with toe plates/string. Verify steering wheel center.
- Finalize: Drive gently, then get a professional alignment within a few days.
FAQs
- Do I need a wheel balancer to mount my own tires?
- For best results, yes. You can mount at home and take wheels to a shop for dynamic balancing. Static/bubble balancers can work for basic setups but won’t match a modern spin balancer on alloy wheels and highway speeds.
- Can a string alignment or toe plates get me by safely?
- Yes, as a temporary measure. You can set toe accurately enough to drive to a shop. Use a digital level for rough camber check. Always follow with a rack alignment for tire life and braking stability.
- Pressed-in bearings: replace the bearing or buy a complete hub?
- If your vehicle uses a bolt-in hub assembly, replacing the whole unit is faster and often cheaper than paying for press work. If it’s a pressed bearing in the knuckle, remove the knuckle and have a shop press the new bearing to avoid bore damage and misalignment.
- My AC leaked down—can I just pull vacuum and recharge?
- If the system is empty, you can replace the failed part, pull a deep vacuum (30+ minutes), confirm it holds, and recharge by weight using a refrigerant scale. If refrigerant remains, recovery is required by law. A full-service machine ensures accurate oil and refrigerant quantities.
- How do I avoid immobilizing my only vehicle?
- Pick one-day jobs, stage all likely parts, have spare hardware, start early, and pre-treat rust. If a task depends on machine work (pressing bearings), plan to remove the subassembly and take it in immediately, or schedule the whole job with a shop.
Bottom Line
Most maintenance, brakes, bolt-on suspension, and a surprising amount of wheel/tyre work can be done at home with predictable results—if you plan like a pro. Save the tool-heavy, code-dependent, and high-risk tasks for shops, or split the job at logical boundaries (remove-and-replace at home; pressing and machine work at the shop). Preparation, parts staging, and rust-aware techniques are what keep a weekend project from turning into a week without wheels.
Shop Lifting & Support Equipment
Getting under the car safely is the foundation of every job in this guide. Stock up on the lifting and safety gear that makes inspections, maintenance, and upgrades predictable and repeatable.
-
Lifting: floor jacks and low-profile jacks for lowered cars and tight front fascias.
-
Support: properly rated jack stands to keep the vehicle stable once it’s in the air.
-
Safety: wheel chocks to prevent any movement during lifting or when working on inclines.
The right jack, solid stands, and correctly placed chocks turn routine work into controlled, professional-grade service – at home or in the shop.
The Toolsource Technical Team blends decades of real-world automotive service experience with up-to-date technical research. Our writers collaborate with professional mechanics, shop owners, and diagnostic specialists to deliver practical, workshop-ready guidance you can trust.


Follow us on social media