
These Chevrolet Advance-Design trucks (roughly 1947–1955 first-series) are famously resilient, especially their inline-six engines. The early 216 uses a low-pressure oiling system and splash lubrication; later 235/261 variants move toward full-pressure oiling and are generally more forgiving. If you’re determined to keep it period-correct—or you’re simply waking a long-stored truck to evaluate condition—use the technician steps below to start it safely, protect the engine, and make the truck stop and steer like it should before any real road time.
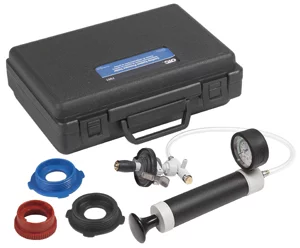
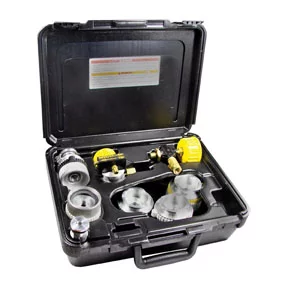
OTC 7991 Radiator Cooling System Pressure Tester
Mfg: OTC Tools and Equipment
Part #: 7991

1) Identify Your Baseline: Engine, Oiling, Transmission, and Electrical
- Confirm the engine family and oiling type. Locate casting numbers and date codes on the block/head to identify 216 vs 235/261. The 216 is splash/low-pressure. Early 235s can be splash (except many Powerglide-equipped 235s which are full-pressure); the 261 is full-pressure. This matters for acceptable oil pressure and driving habits.
- Check oil pressure expectations. Low-pressure 216s often show single-digit to low-teens psi at hot idle and modest psi at cruise. Don’t lug the engine at very low rpm under load. Later full-pressure engines should carry higher psi; compare to the shop manual for your year/engine.
- Identify the transmission. Many original 3-speeds and 4-speeds are non-synchronized in at least first gear. Expect to double-clutch on downshifts. These gearboxes want GL-1 straight mineral gear oil, not modern EP GL-5 in the transmission (to protect yellow metals).
- Note crank-start provisions. Many early trucks retained a hand-crank provision through the early 1950s. If present, use extreme caution (thumb alongside your fingers) and only for controlled rotation checks, not routine starting.
- Electrical system check. Most Chevy trucks of this era are 6-volt, negative ground. Use 0 or 00 gauge battery cables and clean engine-to-frame grounds. If equipped with a generator, plan to polarize it after service (momentarily jump BAT to ARM at the regulator).
2) Pre-Start Inspection, Lubrication, and First Rotation
- Drain and assess the crankcase. Capture the oil in a clean pan and inspect for metal, water, or fuel smell. Many of these engines used a bypass oil filter canister (if present); it doesn’t filter 100% of the oil. Replace the filter element if equipped.
- Refill with appropriate oil and consider a short detergent flush. Use a conventional oil appropriate for flat-tappet cams (many prefer an oil with robust ZDDP content). For sludge-prone low-pressure 216s, you can run a short cleaning interval with up to 10% ATF mixed in the oil. Limit this to a gentle, brief run (15–30 minutes) and drain while hot. Do not use ATF long-term.
- Pre-lube the engine. Remove spark plugs and add a teaspoon of light oil or fogging oil to each cylinder. If possible, pressure-prime the system via the oil pressure sender port with a hand oiler to push oil into galleries. On 216s, also oil the rocker shaft and valve stems manually under the cover.
- Free rotation by hand. With plugs out, rotate the crank with a breaker bar or cautiously with the hand crank. Feel for tight spots. If stuck, stop; soak cylinders and revisit later. Do not force the crank through a rust ring.
- Valve and top-end check. Verify valves move freely and return. Old fuel varnish and moisture can stick valves. If lash is wildly tight/loose, correct per the shop manual (typical lash specs vary by engine/year; set cold as a starting point, then hot-adjust after warm-up).
- Ignition baseline. Inspect cap, rotor, points, condenser, and wires. Clean and set point gap/dwell per manual (common point gap is around 0.019 inch; verify spec). Replace aged plugs and set gap (often 0.030–0.035; verify). Confirm firing order 1-5-3-6-2-4 and correct distributor rotation.
3) Fuel and Spark: Make It Run Without the Old Tank
- Bypass the stale tank. Do not feed from a varnished or rusty tank. Rig a clean external container (marine/boat tank works well) with fresh fuel. Use new ethanol-rated hose (e.g., SAE J30R9 or better) and an inline filter ahead of the pump.
- Fuel pump and lines. Hand-prime if possible. If the pump has a failed diaphragm, replace it before running. Replace any cracked rubber lines and inspect steel lines for corrosion and pinholes.
- Carburetor prep. Old carbs collect white crust and sludge. At minimum, open and clean the bowl, replace the needle/seat and gaskets, and verify float height. If the throttle shaft is sloppy, plan a professional bushing service to eliminate vacuum leaks.
- Vacuum and crankcase ventilation. Early engines use a road draft tube instead of a PCV valve. Expect some fumes and condensation. If you drive in varied conditions, consider a PCV retrofit kit that replaces the draft tube with a calibrated PCV routed to manifold vacuum to reduce sludge formation.
- Static timing and first spark test. With plugs out, static-time the distributor per the manual. Confirm strong spark at the plugs before attempting to start. On 6-volt systems, ensure battery is fully charged and cables are heavy gauge.
- First start procedure. Install fresh plugs, verify your temporary fuel supply is secure, and have a fire extinguisher ready. Crank with no throttle at first, then crack the throttle slightly. If it lights, bring rpm to a fast idle for oil splash and start monitoring oil pressure and leaks.
4) Cooling and Sealing: Fix Leaks the Right Way
- Cooling system flush. Drain the radiator and the block (there’s often a block drain petcock). Back-flush to remove scale. Consider a chemical flush if heavy rust is present.
- Thermostat and hoses. Replace the thermostat (commonly 160–180°F for these trucks; choose based on climate) and both radiator hoses, plus the bypass if equipped. Inspect the radiator cap and neck; verify correct cap pressure for the system.
- Water pump. Check for wobble or noise and coolant weep. Replace if suspect; many pumps for these engines are readily available or rebuildable.
- Use proper gaskets, not sealant-only repairs. Prior owners sometimes used silicone in lieu of gaskets. Replace paper/fiber gaskets on the water pump, thermostat housing, valve cover, and side cover. Use a thin film of non-hardening sealant where appropriate, not excessive RTV.
- Exhaust leaks. Inspect manifold-to-pipe connections and the intake/exhaust manifold gasket. Warped manifolds are common; machine or replace as needed to prevent vacuum and exhaust leaks that hurt drivability.
5) Brakes: Inspect, Rebuild, and Convert to a Safer Dual-Circuit Master
Original trucks used a single-reservoir master cylinder feeding all four drum brakes. A failure anywhere can mean total brake loss. Upgrading to a dual-circuit drum/drum master dramatically improves safety while keeping drums.
- Initial inspection. Pull all drums. Replace any soaked or cracked shoes. Inspect and rebuild/replace wheel cylinders. Clean and repack front wheel bearings; replace races if pitted. Replace grease seals.
- Replace all rubber flex hoses. Each front wheel and the rear axle use a short rubber hose to allow suspension travel. Old hoses can split or internally swell (acting like check valves). Replace all three.
- Steel lines and flares. Replace corroded steel lines and any that twist on removal. Use double-inverted flares on 3/16 inch lines unless your system or chosen master specifies otherwise. Secure lines with proper clips and avoid kinking.
- Dual-circuit master selection. Choose a dual-reservoir master for 4-wheel drums with the correct bore (often around 1 inch) and compatible mounting/pushrod geometry for the underfloor location. Many builders use late-1960s GM drum/drum masters that interface with adapters/brackets available for AD trucks. Verify pedal ratio and pushrod free play.
- Residual and distribution valves. Drum brakes typically need 10 psi residual valves in each circuit to maintain shoe-to-drum proximity if the master does not include them. Add a distribution/proportioning valve or simple junction block as required. Mount a remote reservoir if access under the floorboard is poor.
- Bench bleed and system bleed. Bench-bleed the master on the bench. Install and bleed RR, LR, RF, LF in that order (farthest to nearest). Use fresh DOT 3 or DOT 4. If you rebuild every rubber component and want DOT 5 silicone for reduced moisture absorption, only use it in a completely clean, dry system and never mix types.
- Adjustment and testing. Adjust star wheels at each drum so the wheel just drags, then back off slightly. Verify 1 inch of pedal free play (as specified), ensure a firm pedal, and test in a safe area at low speed before any road exposure.
6) Driveline Fluids, Chassis Lube, and First Drive
- Transmission and rear axle fluids. Fill manual transmissions with GL-1 SAE 90 mineral oil. Avoid GL-5 in these gearboxes due to yellow metal compatibility. For the rear axle, GL-4 is generally safe; verify spec for your axle. Check and replace the crush washers or gaskets at fill/drain plugs.
- Chassis lubrication. Grease all zerks: kingpins, tie-rod ends, drag link, spring shackles, and U-joints (if equipped with fittings). Use NLGI #2 chassis grease. Verify steering box fluid (often a thick gear lubricant or steering box grease).
- Tires and wheels. Replace cracked or flat-spotted tires. Inspect wheels for rust at the bead. Torque lug nuts to spec and recheck after the first few miles.
- Clutch and linkage. Inspect the clutch linkage, pedal bushings, and free play. Adjust per the manual. Verify the parking brake functions and fully releases.
- First fire and break-in. After your first start and initial warm-up, set timing with a light and fine-tune idle mixture/speed. Watch oil pressure, temperature, and charging. If you ran an ATF cleaning mix, drain it hot and refill with fresh oil and a new filter element (if equipped). Re-torque manifold fasteners after a few heat cycles.
- Road test. Start with short loops and low speeds. Practice double-clutching when downshifting into non-synchronized gears. Listen for driveline clunks, brake pull, or fade. After the test, recheck for leaks, re-adjust brakes, and verify fluid levels.
First Fire-Up Quick Checklist
- Fresh oil in engine; optional short ATF flush only for cleaning
- Pre-lube cylinders and galleries; rotate engine by hand
- New plugs, set points and timing; confirm strong spark
- Temporary clean fuel source with new ethanol-rated hose and filter
- Cooling system flushed; new thermostat and hoses; water pump inspected
- Replace all three brake flex hoses; inspect wheel cylinders and shoes
- Install dual-circuit drum/drum master; bench-bleed and system-bleed
- Correct gear oils: GL-1 in transmission; GL-4 in rear axle
- Grease chassis; confirm steering and parking brake function
- Fire extinguisher on hand; monitor oil pressure and temperature
FAQs
Q: Why are the 235 and 261 considered superior to the 216?
A: The 235 and especially the 261 evolved toward full-pressure oiling and use modern insert bearings, which handle sustained speeds and loads better. The 216’s low-pressure/splash system works when maintained and driven within its design limits, but it’s less tolerant of poor oiling or high RPM/lugging.
Q: What oil pressure should I expect?
A: On a healthy 216, hot idle can be low (single digits to low teens psi) with a moderate rise at cruise; that’s normal for the design. Full-pressure 235/261 engines should show higher hot idle and cruise pressures. Always compare against the factory manual for your exact engine and gauge calibration.
Q: What engine oil should I run?
A: Use a conventional oil appropriate for flat-tappet cams; many builders favor oils with robust zinc/phosphorus (ZDDP) levels. Select viscosity based on climate and bearing clearances (commonly 10W-30 or 15W-40). Change oil frequently on splash-lubed engines and after any short cleaning runs.
Q: Do I need to retrofit a PCV system?
A: Not required, but recommended for engines driven regularly. The original road draft tube vents vapors only when the vehicle is moving; a PCV retrofit reduces moisture and sludge, improves cabin air quality, and can help ring seal longevity. Use a calibrated PCV valve matched to the engine’s vacuum.
Q: Should I keep 6 volts or convert to 12 volts?
A: A healthy 6-volt system with heavy cables, clean grounds, and good components starts these trucks reliably. Converting to 12 volts can improve accessory options and cranking speed, but it requires lamps, regulator/alternator, and gauge/ballast changes. Decide based on your goals and component condition.
Q: Which dual master cylinder fits?
A: Many use a late-1960s GM drum/drum dual master with an adapter bracket for underfloor mounting on AD trucks. Verify bore size, pushrod length, pedal ratio, and residual valves. Use a distribution/proportioning valve as needed and bench-bleed before installation.
Shop Engine Diagnostic Tools
Now that you’ve walked through the steps to safely wake, evaluate, and road-test an Advance-Design inline-six, make your inspections easier with the right diagnostic gear. These tools help confirm oiling health, identify sealing issues, and verify the engine’s true condition before you invest in deeper repairs.
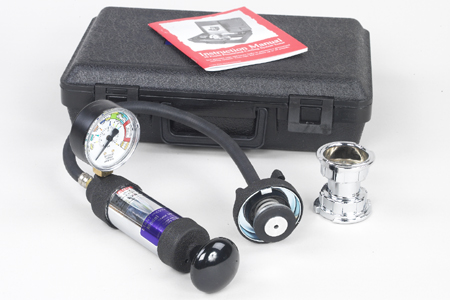
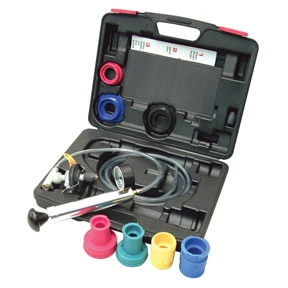
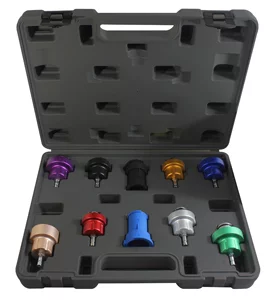
- Cooling system pressure testers and combustion leak (block) test kits.
- Compression and leak-down testers for cylinder sealing checks.
- Mechanical oil pressure gauges, oil filter cutters, and borescopes for inspection.

The Toolsource Technical Team blends decades of real-world automotive service experience with up-to-date technical research. Our writers collaborate with professional mechanics, shop owners, and diagnostic specialists to deliver practical, workshop-ready guidance you can trust.


Follow us on social media