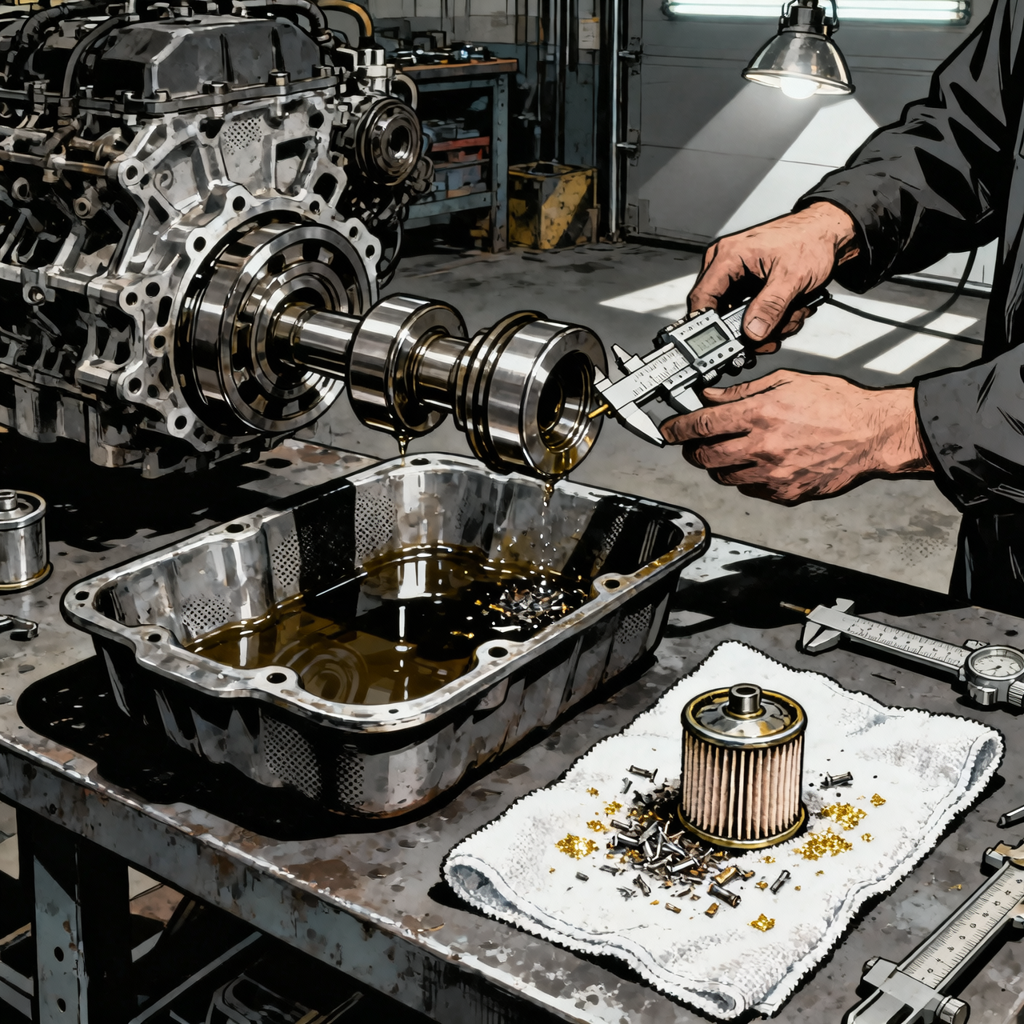
When you cut open an oil filter during routine maintenance and find what looks like gold or silver glitter coating the filter media, you’re looking at bearing material from inside the engine. This metallic debris represents worn bearing surfaces—typically rod bearings, main bearings, or camshaft bearings—that have been abraded away and carried through the lubrication system. While the glittery appearance might seem almost decorative, it signals serious internal engine damage that requires immediate attention. This article provides a systematic approach to diagnosing the extent of damage, identifying root causes, and determining the most cost-effective repair path forward.
Identifying the Type and Source of Metallic Debris
Not all metallic debris looks the same, and the appearance can provide important clues about which engine components are failing. Gold or bronze-colored glitter typically indicates bearing material, specifically the softer bearing surface alloys like copper-lead or aluminum-tin that coat steel bearing shells. Silver-colored debris might suggest steel-on-steel contact where bearings have completely failed and the crankshaft journal is contacting the bearing shell backing material. Fine, sand-like particles indicate advanced wear, while larger flakes or chunks suggest catastrophic failure is imminent or has already occurred.
To properly assess what you’re dealing with, inspect the oil filter media carefully under good lighting. Use a magnet to determine if the debris is ferrous (magnetic) or non-ferrous. Bearing material won’t stick to a magnet, but steel shavings from cam lobes, crankshaft journals, or cylinder walls will. Spread the filter media out on clean shop towels and look for patterns—is the debris evenly distributed throughout the filter, or concentrated in certain pleats? Uniform distribution suggests a gradual wear process, while concentrated areas might indicate a sudden failure event.
Check the oil itself, not just the filter. Pour a sample into a clean container and look for suspended particles. Swirl it gently—metallic debris will settle to the bottom relatively quickly, while oil that’s simply dark from normal contamination will remain uniformly colored. If you’re seeing visible metallic particles in the bulk oil, not just trapped in the filter, the contamination level is severe and the engine has likely sustained significant damage.
Conducting a Systematic Engine Damage Assessment
Once you’ve confirmed metallic contamination, the next step is determining how far the damage has progressed. Start with the least invasive diagnostics first. Pull the dipstick and check oil level and condition—if the level is low, that’s a significant clue that oil starvation may have contributed to the bearing failure. Listen to the engine at idle and under load. Rod bearing failure typically produces a distinct knocking sound that increases in frequency with RPM and becomes louder under load. Main bearing failure creates a deeper, rumbling knock. Lifter or cam bearing issues will create ticking or tapping sounds from the valve train area.
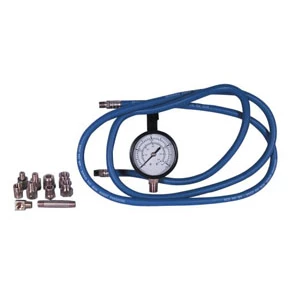
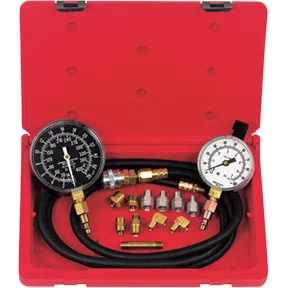
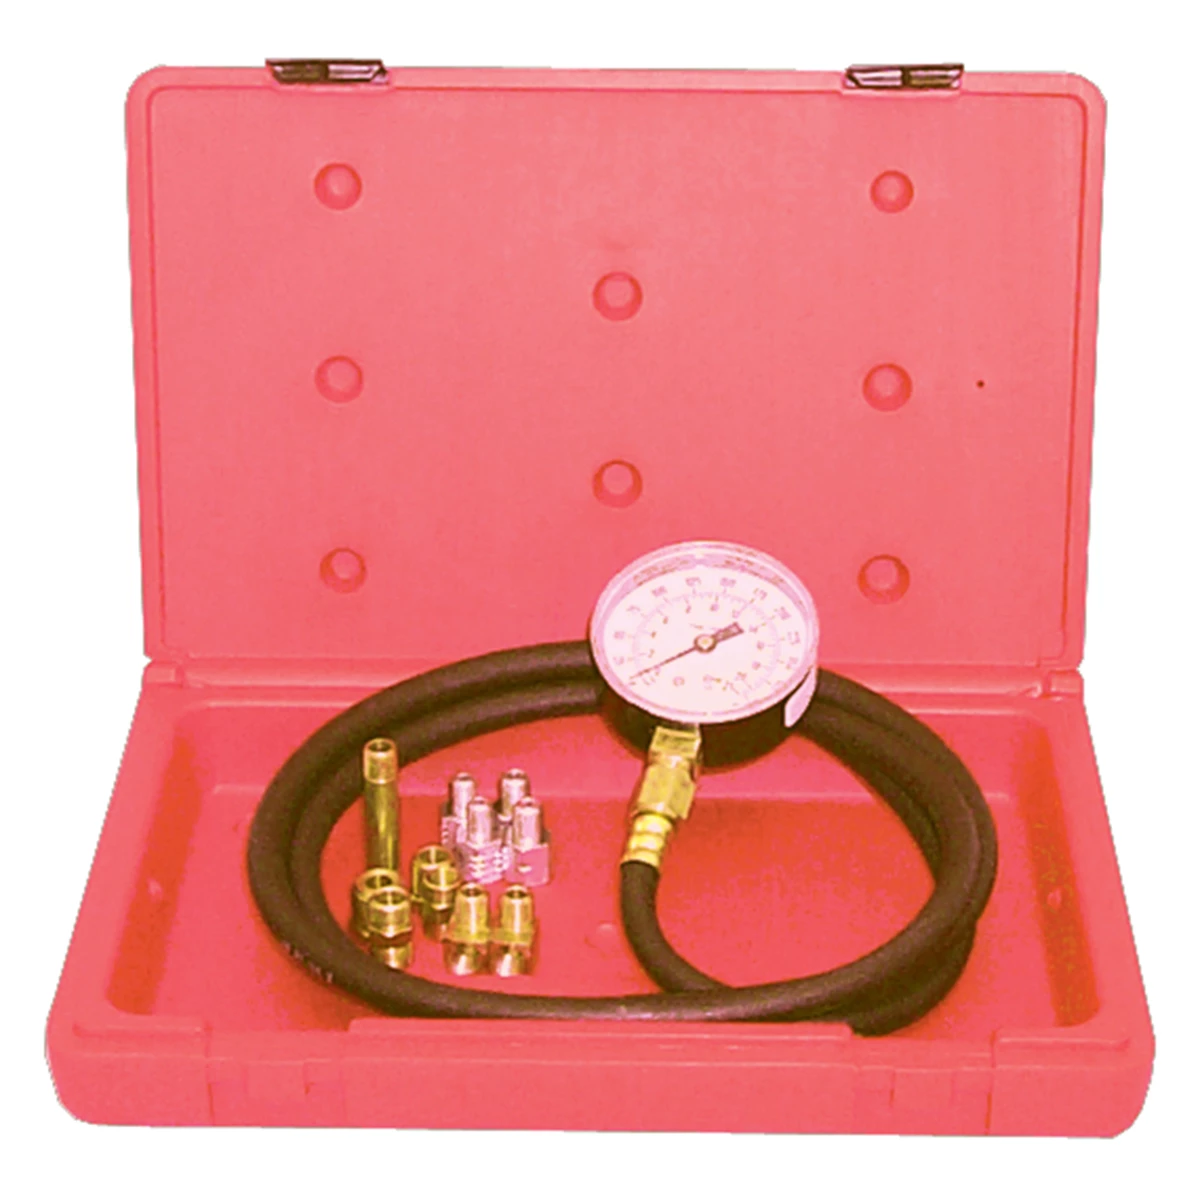
Perform an oil pressure test at idle and at 2,000 RPM using a mechanical gauge, not the dashboard idiot light or even the factory gauge. Compare your readings to factory specifications. Low oil pressure—particularly oil pressure that drops below specification at idle when the engine is fully warmed up—strongly suggests bearing clearances have opened up due to wear. If you’re seeing less than 10 PSI at hot idle, you’re looking at severe bearing wear.
If the vehicle is still drivable and the customer authorizes further diagnostic work, consider sending an oil sample to a laboratory for analysis. Oil analysis can quantify the exact metals present and their concentrations, helping pinpoint whether you’re dealing with bearing wear, cylinder wall wear, valve train issues, or multiple simultaneous failures. Labs like Blackstone or Polaris provide automotive analysis with technician-friendly reports that identify elevated wear metals and their likely sources.
For a more definitive assessment, you’ll need to drop the oil pan and inspect the bearings directly. This involves significant labor but provides clear answers. Look for scoring on the bearing surfaces, loss of the bearing material layer exposing the steel backing, or complete bearing disintegration. Inspect the crankshaft journals with a flashlight—scoring, heat discoloration, or out-of-round wear means the crankshaft will need machining or replacement even if you install new bearings.
Root Cause Analysis: Why Did the Bearings Fail?
Bearing failure doesn’t happen in isolation—there’s always an underlying cause. Identifying and correcting the root cause is essential; otherwise, you’ll install fresh bearings only to have them fail again within hundreds or thousands of miles. The most common culprit is oil starvation due to low oil level. Engines that have been run low on oil—even once—can sustain bearing damage because the oil film thickness becomes insufficient to prevent metal-to-metal contact. Ask the customer about their oil change history and whether they’ve noticed oil consumption or warning lights.
Contaminated oil is another frequent cause. If the previous oil changes used the wrong viscosity, or if the oil wasn’t changed at appropriate intervals, the oil loses its protective properties. Sludge buildup restricts oil passages, starving bearings of lubrication. Pull the valve cover if possible and inspect for sludge deposits. Heavy sludge indicates neglected maintenance and suggests the oil pickup screen and passages may be partially blocked, reducing oil flow.
Failed or weak oil pumps can also cause bearing failure. If the pump isn’t generating sufficient pressure, bearings won’t receive adequate lubrication even if the oil level is correct and the oil is clean. On engines with timing chain-driven oil pumps, check for timing chain wear or stretch that might affect pump drive. Some engines have screen filters at the oil pump pickup that can become clogged, effectively starving the engine even with a functioning pump.
Coolant contamination is less common but catastrophic. If coolant enters the oil system through a failed head gasket, cracked head, or cracked block, it emulsifies with the oil and destroys its lubricating properties. Check for milky or chocolate-milk-colored oil, either on the dipstick or in the oil pan. If coolant contamination is present, you’ll need to address the coolant leak before any bearing replacement will be viable.
Finally, consider mechanical over-stress. Engines subjected to sustained high RPM operation, repeated neutral drops, or towing loads beyond their rating can exceed the design limits of the bearing surfaces. Performance modifications that increase horsepower without upgrading the lubrication system or bearings can also lead to premature failure.
Repair Options: Rebuild, Replace, or Walk Away
Once you’ve confirmed bearing failure and identified the cause, you need to present the customer with realistic repair options. The first question is whether the block and crankshaft are salvageable. If the crankshaft journals show scoring or heat damage, they’ll need to be measured with a micrometer and compared to factory specifications. Minor scoring can sometimes be polished out, but journals that are more than a few thousandths undersize will need to be turned down to the next undersize bearing specification—assuming undersize bearings are available for that engine.
A traditional in-frame rebuild involves removing the oil pan, rod caps, and main bearing caps, installing new bearings, and reassembling. This approach works if the crankshaft is within specification, the cylinder bores are still acceptable, and the damage is limited to the bearings. You’ll also want to replace the oil pump, timing components if they drive the oil pump, and thoroughly flush the lubrication system to remove any residual metallic debris. Budget-minded customers may opt for this route, but understand that if metallic debris has circulated through the engine, it may have scored cam bearings, cylinder walls, or other surfaces that won’t be addressed in an in-frame rebuild.
A complete engine rebuild is the more comprehensive option. This means disassembling the entire engine, machining or replacing all wear surfaces, replacing all bearings, seals, and gaskets, and reassembling to factory specifications. This approach addresses all potential damage but involves significant labor and machine shop costs. For many common vehicles, a rebuilt engine will cost between $3,000 and $6,000 in parts and machine work alone, plus 20 to 40 hours of labor depending on engine accessibility.
Engine replacement—either with a used engine from a salvage yard, a remanufactured long block, or a factory replacement—is often the most practical option. Used engines carry risk because you don’t know their internal condition, but they’re the cheapest option for older vehicles with low market value. Remanufactured engines from reputable suppliers come with warranties and are built to factory specifications, offering a middle ground between cost and reliability. Factory replacement engines are the most expensive but offer the best long-term reliability.
For some vehicles—particularly those with high mileage, body damage, or other significant issues—the most honest recommendation is to walk away. If the repair cost exceeds the vehicle’s value, or if the customer doesn’t have the budget for a proper repair, explain the risks of temporary fixes and help them understand their options. Some customers will choose to drive the vehicle until it fails completely, accepting the risk of being stranded. Others will opt to sell the vehicle as-is for parts or scrap value.
Preventive Measures: Protecting Engines From Bearing Failure
While you can’t prevent every bearing failure, educating customers about proper maintenance dramatically reduces the risk. Emphasize the importance of regular oil changes using the correct viscosity and meeting the required specifications—not just “any 5W-30” but oil that meets the specific API, ILSAC, or manufacturer standards. Many modern engines require low-SAPS oils or specific formulations that conventional oils don’t provide.
Teach customers to check their oil level regularly—at least monthly, and before any long trip. Many modern engines consume oil by design, and low oil level is the number one preventable cause of bearing failure. If a customer reports oil consumption, diagnose and repair the cause rather than just topping off repeatedly. Valve cover gasket leaks, rear main seal leaks, PCV system issues, and piston ring wear all contribute to oil loss.
Encourage customers to warm up their engines before heavy throttle application, especially in cold weather. Cold oil is thicker and flows more slowly, meaning bearings don’t receive full lubrication until the oil reaches operating temperature. Similarly, advise against extended idling in extremely hot conditions, which can lead to oil breakdown and reduced film strength.
For high-mileage engines or engines with known oiling system weaknesses, consider recommending slightly heavier oil viscosity within the manufacturer’s acceptable range, or high-mileage formulations that include seal conditioners and additional anti-wear additives. While you shouldn’t deviate from manufacturer specifications without good reason, moving from 5W-20 to 5W-30 (if both are listed as acceptable) can provide additional protection in a worn engine.
Diagnostic Checklist: Metallic Debris in Oil Filter
- Cut open the oil filter and inspect media for metallic debris under good lighting
- Use a magnet to determine if debris is ferrous (steel) or non-ferrous (bearing material)
- Check bulk oil for suspended metallic particles, not just filter contamination
- Verify oil level and condition; look for milky appearance indicating coolant contamination
- Listen for knocking, ticking, or rumbling noises at idle and under load
- Perform mechanical oil pressure test at idle and 2,000 RPM; compare to factory specs
- Review maintenance history: oil change intervals, oil type used, any reported oil consumption
- Consider oil analysis lab testing to quantify wear metals and identify source
- Drop oil pan if customer authorizes; inspect bearings and crankshaft journals directly
- Check for sludge deposits in valve cover and oil passages indicating neglected maintenance
- Inspect oil pump pickup screen for debris or blockage
- Measure crankshaft journals with micrometer if rebuilding; check against factory specifications

Frequently Asked Questions
Can I just change the oil and keep driving if I find a small amount of metallic glitter in the filter?
No. Any metallic debris in the oil filter indicates active wear of bearing surfaces or other internal engine components. While the engine may continue running for some time, the damage is progressive and will worsen. Continuing to drive risks catastrophic failure that could leave you stranded or cause additional damage to the crankshaft, block, or cylinder heads, significantly increasing repair costs. The responsible approach is to diagnose the extent of damage immediately and make an informed repair decision.
How can I tell the difference between normal wear particles and bearing failure?
Normal engine wear produces very fine, almost microscopic metallic particles that typically aren’t visible to the naked eye when inspecting a filter. If you can see distinct glitter, flakes, or chunks, you’re beyond normal wear. Lab oil analysis on a healthy engine will show single-digit PPM (parts per million) of wear metals; when bearings are failing, you’ll see readings in the hundreds or thousands of PPM. Visible metallic debris always warrants immediate investigation.
Will engine flush or oil additives help clean out metallic debris?
No. Metallic debris in the oil is not a contamination you can clean away—it’s physical material that has been abraded from bearing surfaces. Oil flush products are designed to dissolve sludge and varnish, not remove metallic particles. In fact, using aggressive flush products in an engine with bearing damage could dislodge additional debris and worsen the problem. The only proper solution is to address the mechanical failure causing the debris.
Is it worth rebuilding a high-mileage engine that has bearing failure?
It depends on the vehicle’s overall condition and value. If the body is rust-free, the transmission is good, and the vehicle otherwise meets the owner’s needs, rebuilding or replacing the engine can provide several more years of service at a fraction of the cost of a new vehicle. However, if the vehicle has multiple other issues, high mileage on other components, or low market value, investing thousands in engine work may not make financial sense. Evaluate the total picture and present honest options.
Can oil starvation cause bearing failure even if the oil level was only slightly low?
Yes. The oil pickup tube sits near the bottom of the oil pan, and even a quart low can cause intermittent oil starvation during hard acceleration, cornering, or going up steep hills when oil sloshes away from the pickup. Additionally, some engines have higher oil consumption rates by design or due to wear, meaning they can go from full to critically low between oil changes if not monitored. Even brief oil starvation events can damage bearing surfaces.
Should I replace just the rod bearings or all the bearings if I find metallic debris?
If metallic debris has circulated through the engine, it has passed through all the bearing surfaces—not just the ones that are actively failing. Best practice is to replace all bearings (main, rod, and cam) to prevent subsequent failures. Additionally, metallic debris can score surfaces, so if you replace only the obviously failed bearings, the contaminated oil may have already damaged other bearings that will fail shortly after reassembly. Half-measures rarely succeed with bearing failures; do the job completely or the engine will fail again.
Engine Repair Tools for Bearing Diagnostics
Properly diagnosing bearing failure requires the right diagnostic equipment and tools. Our Engine Repair Tools selection includes everything you need to perform thorough inspections and measurements.
- Mechanical oil pressure gauges for accurate readings beyond factory dashboard displays
- Precision measuring instruments including micrometers for crankshaft journal inspection
- Oil pan removal and bearing access tools for direct bearing and crankshaft assessment
The Toolsource Technical Team blends decades of real-world automotive service experience with up-to-date technical research. Our writers collaborate with professional mechanics, shop owners, and diagnostic specialists to deliver practical, workshop-ready guidance you can trust.


Follow us on social media