Tapered steering and suspension joints are designed to lock tight under load. That’s great on the road and frustrating at the bench. This guide covers three proven ways to separate a tie rod end or ball joint stud from a steering knuckle (or control arm) with minimal collateral damage. You’ll get the why, the how, the tooling that works, and when to change tactics—especially on rust-belt vehicles and aluminum knuckles.
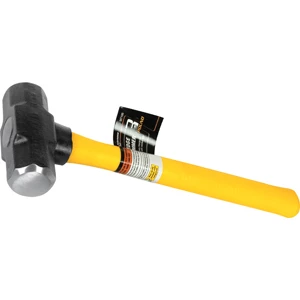
140028 M7104 Wilmar - Performance Tool PTM7104 WLMM7104 3lb Cross Pein Hammer
Mfg: Wilmar - Performance Tool
Part #: M7104
169931 4041 ATD Tools ATD-4041 3LB SLEDGE HAMMER FIBERGLASS
Mfg: ATD Tools
Part #: 4041
212003 M7100 Wilmar - Performance Tool WLMM7100 3LB. DOUBLE FACE HAMMER
Mfg: Wilmar - Performance Tool
Part #: M7100
169930 4042 ATD Tools ATD-4042 3LB CROSS PEIN HAMMER FBRGLASS
Mfg: ATD Tools
Part #: 4042

3LB two inch SOFT FACE DEAD BLOW W/ STEEL SHOT
Mfg: Vaughan & Bushnell Mfg.
Part #: 58516
Understand the Tapered Joint and Choose Your Method
A tapered stud seats into a matching tapered bore in the knuckle or arm. As you tighten the nut, the stud wedges in. Separating it requires a sharp radial shock or sustained separating force at the interface. Avoid striking the threaded stud directly—mushroomed threads turn a quick job into a fight. Pick your method based on whether you’re saving the joint/boot and how much rust you’re facing:
- Non-destructive, fast: Hammer shock on the knuckle boss (preserves boot and stud) when space allows.
- Controlled, minimal risk: Screw-type separator (aka ball joint/tie rod separator). Applies force mechanically; ideal for aluminum knuckles or tight access.
- Destructive, fastest when replacing the joint: Pickle fork (manual or air hammer). It will tear the boot; use only when the joint is being replaced.
Have a fallback: pre-load with a tool and add hammer taps to the knuckle ear; use penetrating oil and heat on cast iron/steel (not aluminum), and adjust suspension load with a jack to change the taper’s bite.
Prep the Vehicle and the Joint (Safety and Setup)
- Secure and support: Park on level ground, chock the rear wheels, break the lug nuts loose, raise the vehicle, and support it on rated jack stands under the frame or approved lift points. Keep the floor jack available for control-arm or hub support.
- Steering angle: Turn the steering wheel to position the knuckle so you have a straight, strong swing at the boss where the stud passes through. Often, turning full lock gives the best hammer access.
- Support the mass: Place a jack or stand under the lower control arm or hub to keep the knuckle from bouncing. Energy should go into the taper, not into moving the assembly.
- Protect threads: If the stud has a castle nut, remove the cotter pin and flip the nut upside down. Run it down flush with the stud tip to shield the threads, leaving a small gap between the nut’s underside and the knuckle. On flanged or nylock nuts, thread the nut to be flush with the stud end. Do not rely on the nut for support; it’s only protection if you slip.
- Penetrant and clean-up: Wire-brush exposed rust. Apply penetrating oil to the taper interface from above and below. Let it soak while you stage tools.
- Know your knuckle: If the knuckle or arm is aluminum, avoid heavy sledge blows on the ear. Prefer a screw-type separator for controlled force.
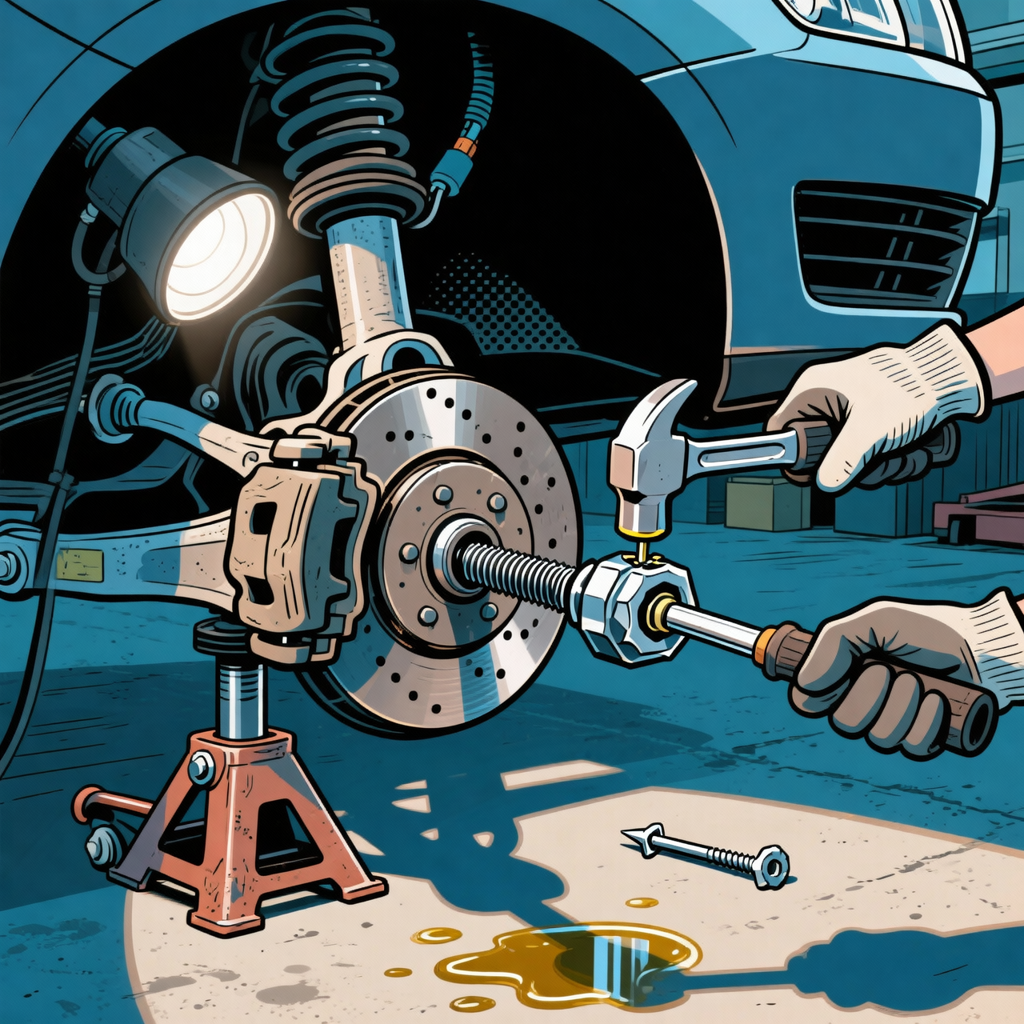
Method 1: Shock-Release on the Knuckle Boss (Non-Destructive)
This is a first-choice, boot-safe method when you have swing room and a steel or iron knuckle.
- Back up the ear if possible: If access allows, hold a heavy hammer (2–4 lb) or a steel drift against the opposite side of the knuckle boss to act as an anvil. This reduces bounce and focuses the shock.
- Target the right spot: Strike the solid boss of the knuckle around the hole where the stud passes through. Do not hit the stud. You’re looking to shock the tapered bore radially so it releases its grip.
- Use adequate mass: A 2–4 lb hammer (short-handle drilling or club hammer) delivers the needed impulse. Light trim hammers tend to bruise parts without transferring enough shock.
- Apply downward pressure: Add a pry bar from the control arm to the tie rod end or have an assistant push down on the control arm (with a safe lever). Preload helps the taper pop once shocked.
- Sequence: Give two to three firm, square blows on the boss. Reassess. If it doesn’t pop, re-angle the steering for a straighter shot and repeat. Add penetrant time between attempts.
- Rust-belt assist: Brief localized heat on an iron/steel knuckle ear (not the stud or boot) can expand the bore enough to relieve the taper. Use MAPP or propane with a heat shield for the boot. Do not heat aluminum knuckles.
Notes:
- If you accidentally nick the stud, replace the joint. Damaged threads are a safety risk.
- Don’t overstrike delicate ears or thin webs. Hit the substantial boss only.
Method 2: Use a Screw-Type Separator (Controlled Force, Boot-Safe)
Also called a tie rod end separator or adjustable ball joint separator, this U-shaped or fork-and-yoke tool uses a forcing screw to push the stud out while supporting the knuckle. It’s the most controlled option and a great choice for aluminum knuckles, tight spaces, or when hammer clearance is poor.
- Set up the tool: Select a separator sized for tie rod ends or the joint you’re working on. Grease the forcing screw threads and the tip with high-pressure grease (moly if available) to reduce galling and improve torque transfer.
- Position the jaws: Place the “fingers” under the joint housing or the yoke around the boss so that the forcing screw will push directly on the stud end or on the flipped nut. If using a castle nut, flip it and run it down to present a flat surface for the screw. Ensure the tool loads the stud straight.
- Preload: Snug the screw with a ratchet or wrench until the assembly is under clear tension. Do not use an impact unless the manufacturer rates the tool for it.
- Add a shock: With the screw preloaded, tap the knuckle boss lightly with a hammer. The combination of steady force and a small shock usually releases the taper with a loud pop.
- Increase tension gradually: Tighten a quarter turn, tap, pause, repeat. When the joint pops, back off the screw and remove the tool. Keep hands clear; releases can be sudden and loud.
- If the tool walks: Reposition for square alignment. Protect boots and brake hoses from the jaws and screw.
Tips:
- Loaner programs at parts stores often include tie rod separators if you don’t use this tool frequently.
- Always grease the forcing screw and threads. Dry threads bind, gall, and break tools.
- On stubborn joints, combine a small amount of heat on iron/steel knuckles with the preloaded separator to speed the release.
Method 3: Pickle Fork or Air Hammer Fork (Destructive, Use When Replacing the Joint)
A wedge-style separator (pickle fork) forces the joint apart by driving a tapered fork between the joint housing and the knuckle. It will tear the dust boot. Use this only if the joint is being replaced or the boot is already damaged.
- Choose the right fork: Match the fork opening to the joint size. Heavy-duty forks resist bending; air hammer-compatible forks speed stubborn jobs.
- Protect nearby parts: Position the fork so you’re driving parallel to the stud, between the joint housing and the knuckle boss. Keep the fork away from brake hoses, ABS wiring, and thin knuckle webs.
- Drive the wedge: Use a 2–4 lb hammer or an air hammer with a long-throw chisel gun to drive the fork until the taper pops.
- Air hammer technique: Keep steady pressure and let the tool do the work. If the fork rebounds, re-seat and change the angle slightly.
- Finish and remove: Once separated, remove the nut and lift the joint free. Expect a torn boot; replace the joint.
Notes:
- A pickle fork can deform lower-quality tools. Use quality forks for repeated use, especially with air hammers.
- Keep spares: New joints come with new nuts and often fresh cotter pins; plan replacement accordingly.
Supporting Tactics: Preload, Heat, and Access
- Preload with a jack: Lightly jack under the control arm to alter the angle of the stud and relieve bind. Don’t lift the vehicle off its stands; you just want to change geometry.
- Pry bar assist: Maintain downward pressure on the tie rod end or ball joint housing while striking the knuckle. Preload helps the taper pop.
- Steering angle: Turn the wheel to maximize strike angle and hammer swing. Removing the brake rotor can gain swing clearance in tight wheel wells—if time allows.
- Heat on iron/steel: Apply brief, localized heat to the knuckle boss only, with a heat shield protecting boots. Avoid heating aluminum knuckles and avoid open flame near fuel/brake lines.
- Double-hammer technique: Hold a heavy hammer on one side of the boss and strike directly opposite with another. This concentrates the shock and is handy on thick, rusted bosses.
Reinstall Correctly and Protect the Alignment
- Clean and inspect: Clean the tapered bore and stud with brake cleaner and a brass brush. Do not sand or grease the taper. Inspect for cracks in the knuckle ear and for elongated bores. Replace damaged parts.
- Set toe reference (if removing tie rod ends): Before disassembly, count exposed threads or measure the tie rod length from a fixed reference. On reassembly, match your reference to keep toe close enough to drive to an alignment shop.
- Seat and torque: Install the stud, seat it by hand, and torque the nut to factory specification. If the stud spins, apply upward pressure with a jack or use a small C-clamp on the joint housing to seat the taper so the nut can snug and torque. Use a new nut if the old one deformed or was a prevailing-torque type.
- Cotter pin: If using a castle nut, align to the nearest slot above the torque spec (never loosen to align) and install a new cotter pin.
- Final checks: Verify boot integrity (or replace the joint if torn), reattach any brackets or ABS wiring clips, torque wheel fasteners, and road-test. Schedule an alignment after steering component replacement.
Quick Checklist
- Support vehicle with stands; add a jack under the arm/hub to control movement.
- Flip or flush the nut to protect threads; never strike bare threads.
- Method order: hammer shock on knuckle boss → screw-type separator → pickle fork (replace joint).
- Preload and tap: combine tool tension with light hammer taps for stubborn joints.
- Avoid heavy blows on aluminum knuckles; use controlled separators.
- Clean taper, torque to spec, install new cotter pin, and plan for an alignment.
FAQs
Will hammering the knuckle damage it?
Striking the solid boss where the stud passes through is standard practice on iron/steel knuckles. Use a 2–4 lb hammer, square blows, and avoid thin sections or ears. For aluminum knuckles, use a screw-type separator instead of heavy hammering.
Can I hit the stud if I put the nut on?
Directly striking the stud risks mushrooming threads and damaging the taper fit. If you must apply force to the stud, keep the nut flush and use a screw-type separator to push against the nut—not a hammer. Replace any joint that has damaged threads.
Do I need an alignment after removing a tie rod end?
Yes if you replace or disturb outer/inner tie rod length. Counting threads or marking jam nuts can keep toe close, but an alignment is recommended after steering component work. If you only separated a joint to swing the knuckle and did not change tie rod length, an alignment may not be necessary—but verify toe.
Why won’t the joint pop even after heavy blows?
Common causes: inadequate hammer mass, poor strike angle, bouncing knuckle (no support), severe corrosion, or aluminum knuckle. Correct it by supporting the knuckle, turning the wheel for access, using a heavier hammer, preloading with a screw-type separator, adding penetrant time, and applying controlled heat to an iron/steel boss.
Is heat safe near the boot?
Use heat only on iron/steel knuckles and shield the boot with a heat blanket or wet rag. Keep flame off the joint housing and boot. Do not heat aluminum knuckles.
Pickle fork vs. screw-type separator—which should I buy?
If you frequently replace joints, a quality pickle fork set (manual and air hammer shanks) is fast. If you often need to save boots or work on aluminum knuckles, a screw-type separator is safer and more controlled. Many techs carry both.
Shop Automotive Paint & Finishing Tools
Tools to separate a tie rod end or ball joint Ball Peen Hammers.
- Surface prep: sandpaper, scuff pads, and cleaning supplies.
- Coatings: primers, paints, and applicators for corrosion protection.
- Finishing: masking, tack cloths, polishers, and compounds.
The Toolsource Technical Team blends decades of real-world automotive service experience with up-to-date technical research. Our writers collaborate with professional mechanics, shop owners, and diagnostic specialists to deliver practical, workshop-ready guidance you can trust.

Follow us on social media