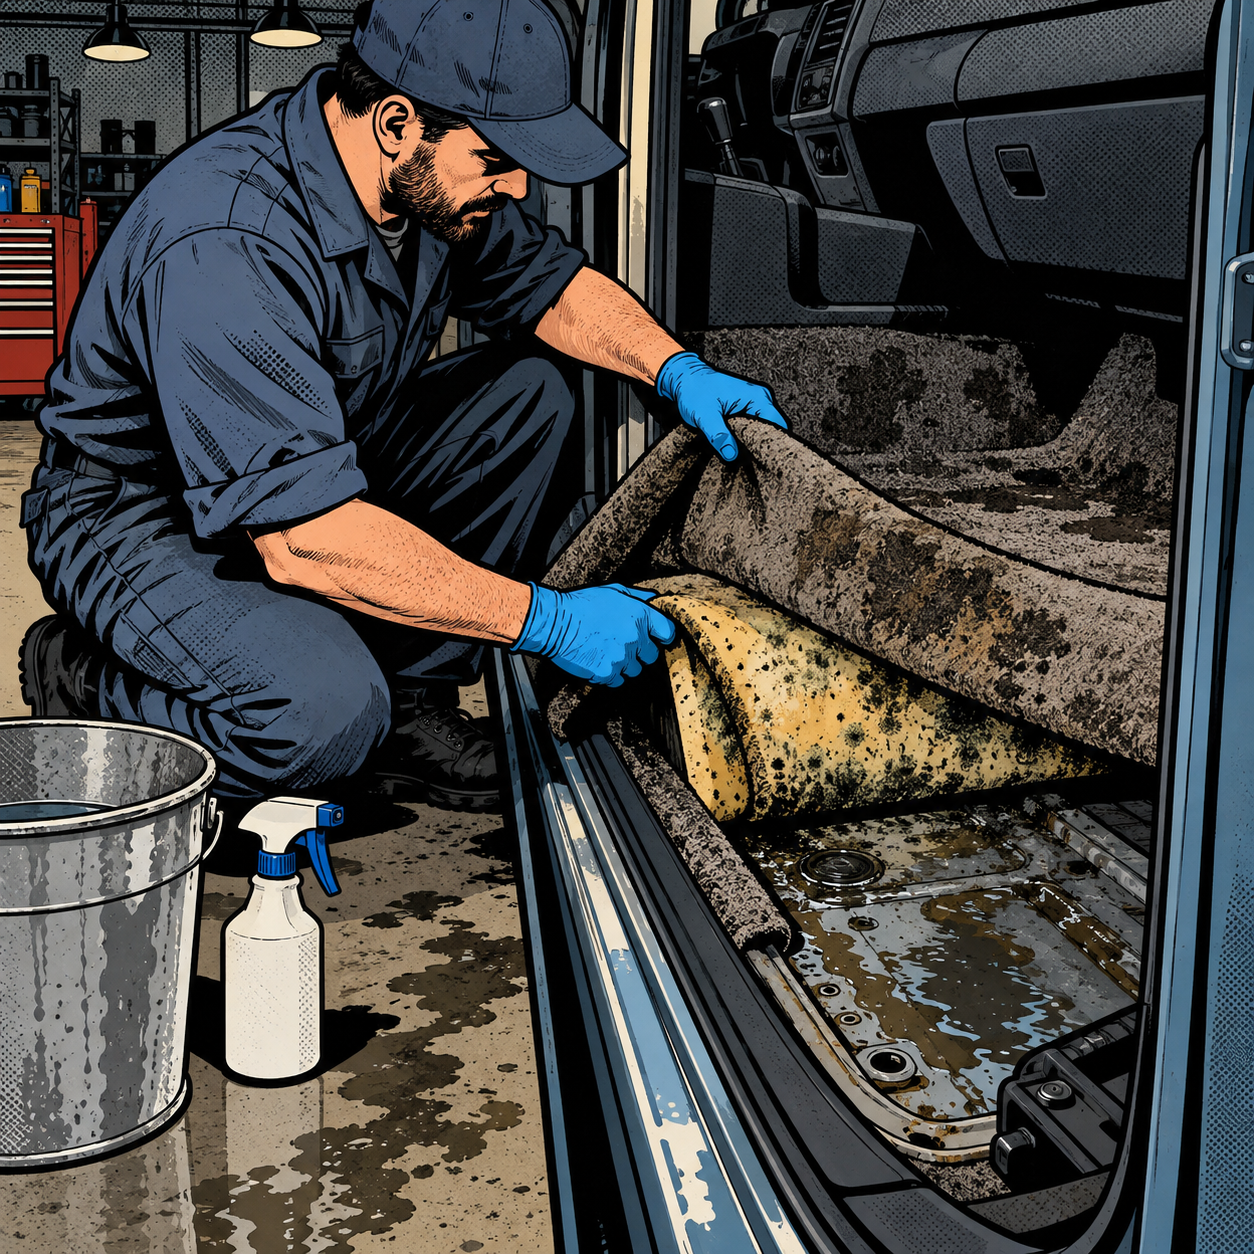
A moldy interior almost never starts as a mold problem — it starts as a water problem. A clogged sunroof drain, a dried-out door seal, a cracked windshield gasket, or a sitting vehicle with a cracked cowl can quietly soak carpet, padding, and seat foam for weeks before anyone notices the smell. By the time black or green growth is visible on seats and headliner, the fix isn’t a quick wipe-down — it’s a structured remediation job. This guide covers how to find the water source, safely strip and treat contaminated interiors, and prevent the problem from recurring, based on techniques used by both DIY owners and biohazard remediation shops.
Find the Water Intrusion Source Before You Clean Anything
Cleaning mold without stopping the leak is a waste of labor — it will be back within weeks. Start every job with a leak diagnosis, not a cleaning plan.
- Sunroof-equipped vehicles: Check all four corner drain tubes for clogs. These run from the sunroof track down through the A- and C-pillars (sometimes through the doors) and exit near the wheel wells. A clogged drain backs water straight into the headliner and down the pillars into the carpet.
- Door and window seals: Dried, cracked, or compressed weatherstripping lets water track down the inside of the door skin and pool in the sill.
- Windshield and rear glass seals: A failed urethane bond or aftermarket glass install is a common, often-missed source — water enters at the top of the dash and migrates under carpet.
- Spare tire well and trunk seals: On sedans and hatchbacks, check the spare tire well for standing water and inspect the trunk weatherstrip and taillight gaskets.
- Cowl and HVAC drain: A plugged HVAC condensate drain or cracked cowl panel can introduce water directly into the footwell or blower housing.
Pressure-test suspect areas with a low-pressure hose or a water-intrusion test while someone watches inside with a flashlight. Don’t move to remediation until you’ve identified and corrected the entry point — otherwise you’re treating a symptom on a schedule that will repeat.
Prep and Protect Yourself Before Teardown
Mold remediation is a respiratory hazard job, not a detailing job. Treat it that way from the start.
- Work with doors and windows open, or outdoors/in a ventilated bay — never in a closed garage.
- Wear an N95 or better respirator, nitrile gloves, and eye protection. Disposable coveralls are worth it for heavy contamination.
- Bag and remove loose debris, trash, and visibly rotted padding before any wet cleaning — this cuts down airborne spore count before you start disturbing surfaces.
- Photograph the interior before removing panels; it documents the extent of damage for insurance or resale disclosure and helps you reassemble trim correctly.
===PRODUCT_SEARCH_1===

medium Intouch black nitrile glove Powder Free Exam 6MIL
Mfg: Atlantic Safety Products
Part #: B311-M


Strip What Needs to Come Out
Surface wiping will not reach mold growing under carpet, in seat foam, or behind trim. For moderate-to-heavy contamination, plan on a partial teardown:
- Seats: Most seat bolts are M10 or M12 and respond well to a Torx or hex bit set — don’t force a standard socket, you’ll strip the head. Pull seats out fully so you can clean both the seat frame/foam and the floor underneath.
- Carpet and padding: Pull the carpet to check the padding underneath. Padding that’s been saturated usually needs to be replaced — it holds moisture and spores even after the carpet looks clean.
- Headliner: Easier to remove than most techs expect; sags and stains are rarely fixable without pulling and either cleaning or reupholstering it.
- Center console, door panels, kick panels: Pull these if there’s visible growth or if water tracked behind them. Full dash removal is only necessary for severe cases and is a two-person job.
- Cabin air filter and HVAC: Replace the cabin filter and clean the intake plenum. Mold in the HVAC system will keep reintroducing spores into the cabin every time the blower runs, regardless of how clean the rest of the interior is.
- Seat belts: Mold grows readily in the webbing. Clean with an enzyme or appropriate upholstery cleaner; replace if the webbing shows UV damage or won’t come clean.
Treat and Clean: Chemical Options Compared
There’s a lot of conflicting advice about ozone generators online — know what each method actually does before you commit to one.
- Chlorine dioxide vapor/fumigation: The most effective option for knocking down spore counts throughout the cabin, including inside vents and behind panels, before you start physical cleaning. This is standard practice in professional auto biohazard remediation and makes the teardown safer for whoever’s doing the work.
- Diluted bleach or EPA-registered fungicide: Effective on hard, non-porous surfaces (plastic trim, glass, metal) and can be used cautiously on leather with a spot test first — bleach will discolor fabric and some dyed leather, so always test an inconspicuous area.
- Enzyme-based cleaners or diluted vinegar: A safer option for fabric and porous trim; breaks down organic residue and odor without the discoloration risk of bleach. Works well as a follow-up wipe-down after disinfecting hard surfaces.
- Ozone generators: Useful for odor elimination and killing surface-level spores on exposed areas, but they do not meaningfully penetrate carpet, foam, or porous fabric — treat ozone as a finishing/deodorizing step, not a primary kill method. Run with the car on, cabin air set to recirculate, for the shortest effective cycle, then air out 16-24 hours before use. Ozone degrades rubber and plastic trim with repeated or extended exposure, and it is harmful to breathe — never run it with anyone inside the vehicle.
A realistic sequence for moderate-to-heavy contamination: fumigate with chlorine dioxide first to knock down airborne spores and make teardown safer → clean all surfaces with diluted bleach (hard surfaces) or enzyme cleaner (fabric/leather) with aggressive brushing → reassemble → finish with a short ozone cycle for residual odor.
Dry It Out and Keep It From Coming Back
Mold needs moisture to return — cleaning without addressing humidity is a temporary fix.
- Run a dehumidifier in the cabin for 24-48 hours after cleaning, especially before reinstalling padding or carpet.
- Place moisture-absorbing products (DampRid-style canisters or silica gel packs) in the cabin if the vehicle will sit unused for extended periods, and swap them monthly.
- If the car isn’t garaged, use a breathable waterproof cover — but check under it periodically; covers can trap rodent activity and moisture if left unchecked for months.
- Drive the vehicle regularly with the defrost or AC running when possible; normal cabin airflow does a lot of the dehumidifying work passively.
- Re-check the repaired drain/seal after the next rain or wash to confirm the original leak is actually fixed.
===PRODUCT_SEARCH_2===
Quick Reference Checklist
- Diagnose and fix the actual water entry point (drains, seals, cowl, HVAC) first
- Ventilate the space and wear respirator, gloves, and eye protection
- Remove loose debris, then pull seats, carpet, padding, and headliner as needed
- Fumigate with chlorine dioxide before heavy cleaning on moderate/severe cases
- Clean hard surfaces with diluted bleach or fungicide; use enzyme cleaner on fabric/leather
- Replace cabin air filter and clean HVAC intake
- Dry fully with a dehumidifier before reassembly; use ozone only as a final odor step
- Add moisture absorbers and recheck the repaired leak point after the next rain
When to Call a Professional Remediation Service
DIY remediation is realistic for light-to-moderate cases where growth is limited to a few panels and the owner is comfortable pulling trim. Call a dedicated auto biohazard remediation service when: the growth is extensive and dark/fuzzy in texture, anyone in the household has respiratory issues, allergies, or immune compromise, the leak source isn’t obvious after basic inspection, or the vehicle has sat wet for months rather than weeks. Professional shops have access to chlorine dioxide equipment, HVAC cleaning methods that don’t require stripping the duct system, and the experience to judge what’s salvageable versus what needs to be replaced outright — a second opinion is cheap insurance against redoing the job.

FAQs
Can mold in a car actually be fully eliminated, or does it always come back?
If the moisture source is fixed and the cabin is thoroughly cleaned and dried, mold will not return on its own — recurrence almost always means the original leak wasn’t actually resolved, not that the mold was “unkillable.”
Is an ozone generator enough on its own?
No. Ozone is effective for odor and surface-level spores but doesn’t penetrate carpet, padding, or foam deeply enough to be a standalone treatment for established growth. Use it as a finishing step after physical cleaning, not a replacement for it.
Will bleach ruin my seats?
Diluted bleach is generally safe on leather with a spot test first, but it will discolor most fabric upholstery. For cloth seats and carpet, use an enzyme-based or diluted vinegar cleaner instead.
Do I need to replace the carpet padding, or can it be cleaned?
Padding that’s been saturated for any length of time usually needs replacement — it holds moisture and spores that are very difficult to fully extract, even after the carpet surface looks clean.
How long should I run a dehumidifier or let the car air out?
Plan on 24-48 hours with a dehumidifier before reinstalling trim, and if using ozone, air the cabin out for 16-24 hours afterward before anyone rides in the vehicle regularly.
What’s the single most common cause of interior mold in sunroof-equipped cars?
Clogged sunroof drain tubes. They’re the first thing to check on any sunroof-equipped vehicle with unexplained water intrusion or mold.
Essential Safety Gear for Mold Remediation
Mold work is a respiratory hazard job — a quality respirator, nitrile gloves, eye protection, and disposable coveralls are essential when stripping contaminated interiors and handling fungicides. Browse our Shop Safety and Apparel selection to find the protective equipment needed to stay safe during chemical treatment and remediation work.
- N95 and higher-grade respirators for airborne spore protection during teardown and treatment
- Chemical-resistant nitrile gloves and eye protection when handling fungicides and cleaners
- Disposable coveralls for heavy contamination jobs and when airborne spore risk is high

The Toolsource Technical Team blends decades of real-world automotive service experience with up-to-date technical research. Our writers collaborate with professional mechanics, shop owners, and diagnostic specialists to deliver practical, workshop-ready guidance you can trust.


Follow us on social media