The internet loves a quick fix, and videos of people pouring hot water on dented bumpers and watching them pop back into shape rack up millions of views. As technicians, we see the aftermath when these DIY attempts go wrong, but we also recognize there’s some legitimate material science behind the technique. Thermoplastic bumper covers can be manipulated with controlled heat under specific conditions. The question isn’t whether it can work, but when it’s appropriate, what the risks are, and how to properly execute or advise against this approach. This guide breaks down the hot water dent removal method from a professional perspective, examining the mechanics, limitations, and when customers should be steered toward proper body shop services instead.
Understanding Thermoplastic Bumper Cover Materials
Modern bumper covers are predominantly made from thermoplastic olefins (TPO), polypropylene (PP), or polyurethane, specifically engineered to absorb low-speed impacts and return to shape. These materials have a glass transition temperature—the point at which they become pliable without melting—typically between 130°F and 180°F depending on the specific polymer blend and additives. Boiling water at 212°F provides enough thermal energy to soften the molecular structure temporarily.
The elastic memory of these plastics is why the hot water method can work at all. When a bumper cover is struck, the plastic deforms but the molecular chains want to return to their molded shape. If the deformation isn’t too severe and the material hasn’t been stressed beyond its yield point, applying heat reduces internal resistance and allows those polymer chains to relax back toward their original configuration. The plunger or manual pressure simply assists this process.
However, this only applies to the plastic substrate. The paint system—typically a flexible basecoat/clearcoat system over an adhesion promoter—has different thermal and mechanical properties. Paint doesn’t have the same elastic memory. Once it cracks, no amount of heat will fuse those fractures. This is the fundamental limitation techs need to explain to customers who see these videos and assume their damaged bumper can be restored to factory condition with a kettle and a toilet plunger.
Age and UV exposure also matter. A five-year-old bumper that’s been baking in the sun has degraded plasticizers and reduced flexibility. The same heat application that works on a newer vehicle might cause an older bumper to crack further or develop stress whitening that wasn’t visible before. Material condition assessment is critical before attempting any heat-based repair.
When Hot Water Dent Removal Actually Works
The technique has a legitimate but narrow application window. It works best on fresh, shallow dents in flexible bumper covers where the paint hasn’t visibly cracked. The impact must have been distributed enough that the plastic deformed without puncturing, tearing, or stretching beyond its elastic limit. Typically, this means parking lot speed impacts—someone backing into a pole, a shopping cart hit, or a low-speed tap in traffic.
The dent geometry matters significantly. Broad, smooth deformations respond better than sharp creases. If you can see a defined fold line or the plastic has taken a permanent set with visible stress whitening, heat alone won’t restore the original contour. The bumper cover also needs accessible backside access. Many modern designs have complex internal structures, mounting brackets, and sensor housings that prevent reaching behind the dent to apply counter-pressure safely.
Temperature control is where most DIY attempts fail. Boiling water works because it’s a consistent 212°F at sea level, but the application method matters. Pouring from too high creates uneven heating. Pouring too much too fast can thermal shock the paint. The water needs to contact the damaged area long enough to penetrate the plastic’s thickness—typically 3-5mm on most covers—without pooled water running into electrical connectors, sensors, or the trunk seal.
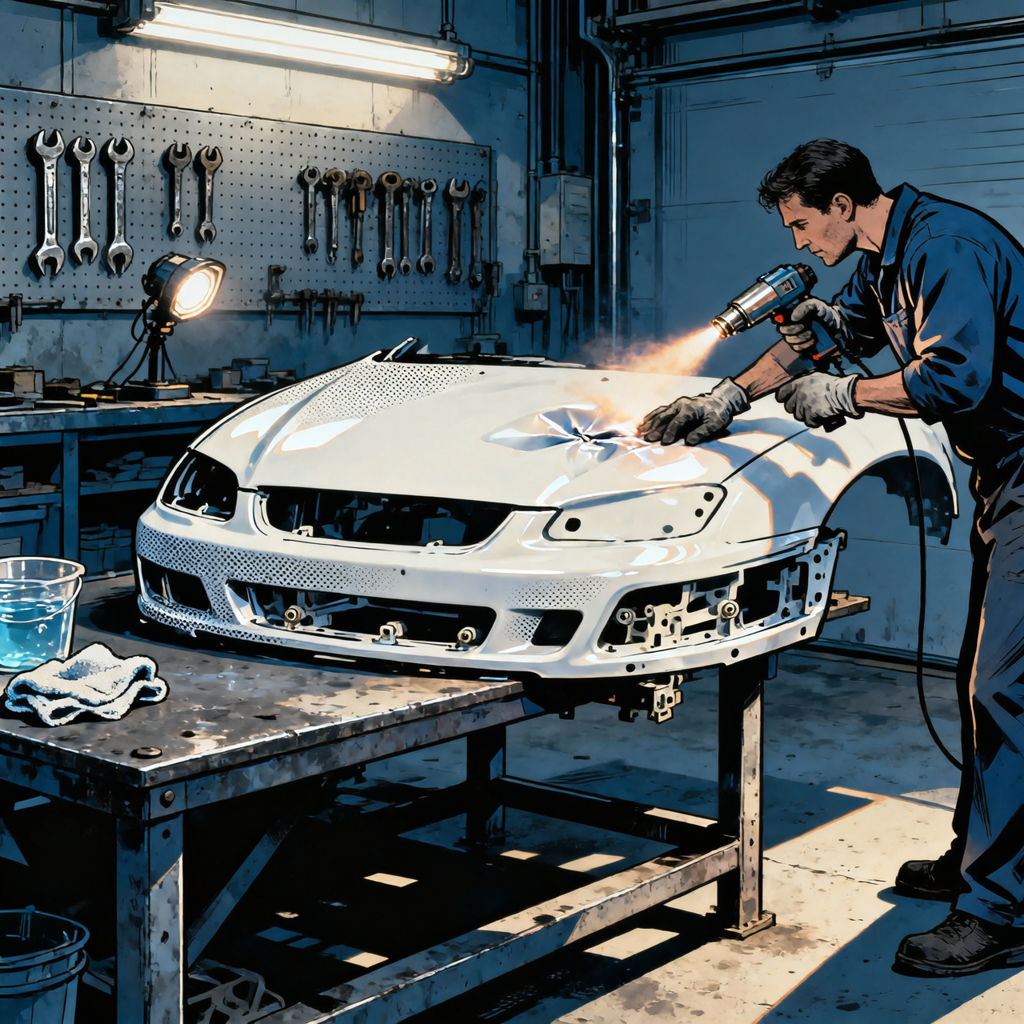
Timing is equally critical. The plastic is only workable for 30-60 seconds after water application before it cools below its glass transition temperature. If you’re not ready with your pushing/pulling method, you’ve wasted the heating cycle. Multiple rapid heat cycles increase paint damage risk exponentially. This is why professionals use heat guns with temperature control rather than boiling water—precision matters.

Step-by-Step Execution and Safety Protocols
If you’re guiding a customer through this process or demonstrating why it’s not appropriate for their damage, here’s the proper execution method. First, clean the area thoroughly and inspect for paint cracks using a bright light at multiple angles. Any visible cracking means the method will only make cosmetic damage worse. Document the current state with photos.
Remove or protect any electrical components behind the bumper. Park sensor wiring, camera connectors, and LED assemblies don’t appreciate boiling water. Disconnect the battery if there’s any risk of water intrusion into electrical systems. Verify there’s adequate access to the backside of the dent—you may need to remove the bumper cover entirely, which defeats the quick-fix appeal but is the only safe approach on many modern vehicles.
Heat application should be methodical. Boil water in a clean container and pour slowly from 6-8 inches above the surface, concentrating on the deepest part of the dent first and working outward. Use approximately one gallon for a typical fist-sized dent. The plastic should feel noticeably softer to the touch. Immediately apply counter-pressure from behind while using a padded tool or gloved hand on the front to guide the contour. A suction cup or plunger can work for pulling, but only if the paint is intact—you’re gambling with every pull attempt.
The cooling phase is often ignored in viral videos. Once the dent is reduced, apply cold water or ice packs to lock the plastic in its new position. This rapid cooling can set the shape, but it also risks creating internal stresses that may cause the dent to partially return over the next 24-48 hours. Professional methods use controlled cooling rates to minimize this rebound effect.
Personal safety cannot be overlooked. Second-degree burns from splashing boiling water are common in DIY attempts. Wear long sleeves, gloves rated for thermal protection, and eye protection. Work in a ventilated area in case any plastic additives or paint components offgas at elevated temperature. Have a clear exit path in case of spills. The number of ER visits from botched bumper repairs would surprise most people.
Paint Integrity and Why Cracking Ruins Everything
This is where the viral videos mislead people. The bumper might pop back to shape, but if the paint cracked during the initial impact, you now have a ticking time bomb. Hairline cracks that aren’t visible immediately after the hot water treatment will propagate over the next weeks and months. Temperature cycling, flex during normal driving, and UV exposure all work to extend those fractures.
Paint cracking occurs because the coating system can’t stretch as far as the thermoplastic substrate. Flexible bumper paints have elastomeric additives specifically to increase elongation before failure, but they still have limits. A dent that deformed the plastic 10mm might only crack paint that can handle 5mm of elongation. Once those molecular bonds break, they don’t heal. You can push the bumper back to shape, but the cracked paint remains cracked.
The crack pattern tells the damage story. Spiderweb cracking radiating from the impact point indicates the paint system failed during the initial hit. If you proceed with heat treatment, you’re likely to see paint delamination where entire flakes separate from the substrate. Linear cracks following stress lines suggest the paint was already at its limit. Applying heat and mechanical force will extend these cracks into previously undamaged areas.
Here’s the repair cost reality techs need to communicate: a dent with intact paint might be repairable for $150-300 depending on severity. Once paint cracks, you’re looking at bumper removal, sanding to substrate, primer, paint, clear coat, and blending—easily $800-1500 at typical shop rates. If the DIY hot water attempt damages paint that was previously intact, the customer just quadrupled their repair cost. That’s a tough conversation to have after the fact.
Some shops are seeing customers arrive with heat-damaged bumpers that now need full replacement rather than repair. The plastic itself can develop micro-fractures from repeated heating or excessive temperature. Polyurethane bumpers are particularly susceptible to thermal degradation. What might have been a $400 repair becomes a $1200 bumper replacement because the substrate integrity is compromised. This is why professional estimators document paint condition before any repair attempt.
Professional Alternatives and When to Recommend Them
Body shops have tools that make the hot water method look primitive. Heat guns with digital temperature readouts allow precise thermal control without waterlogging the vehicle. Induction heating systems can warm specific areas of the bumper from behind without affecting the paint surface. These technologies give professionals far better outcomes with minimal paint damage risk.
Paintless dent repair (PDR) techniques adapted for plastic bumpers use specialized pushing tools and leverage points that DIYers don’t have access to. A skilled PDR tech can massage a bumper dent out over 20-30 minutes using graduated pressure and strategic heating, preserving intact paint that a single plunger yank would have cracked. The cost difference between PDR and conventional repair makes this approach attractive for the right damage profile.
For deeper dents or older vehicles, bumper cover replacement is often the most cost-effective solution. Aftermarket covers for common vehicles run $150-400, and installation is straightforward. When you factor in the labor hours to properly repair a severely damaged bumper versus bolting on a new one and painting it, replacement frequently wins. This is especially true when sensor recalibration time is considered on vehicles with integrated ADAS systems.
The insurance consideration changes the equation entirely. Many comprehensive policies cover bumper damage with deductibles in the $250-500 range. If professional repair costs $600 and the deductible is $500, paying $100 for guaranteed work with warranty makes more sense than gambling with boiling water. Techs should help customers run this math rather than assuming DIY is always cheaper.
Mobile bumper repair services have emerged as a middle ground. These operations bring professional tools to the customer’s location and can often repair minor bumper damage for $200-400 without the overhead of a traditional body shop. For customers tempted by the hot water method, this is a better risk-adjusted option that still delivers convenience without the downside exposure.
Quick Reference: When to Attempt vs. When to Avoid
- Attempt conditions: Fresh dent (less than 48 hours), shallow deformation (less than 1 inch deep), no visible paint cracks under bright light inspection, flexible bumper cover material, easy backside access, owner accepts cosmetic imperfection risk
- Avoid conditions: Any visible paint cracking or chipping, dent with sharp creases or fold lines, damage near sensors or cameras, hard plastic or fiberglass bumpers, limited backside access, vehicle older than 7 years with UV-degraded plastic, impact damage combined with scratches through to substrate
- Safety requirements: Thermal-rated gloves, eye protection, long sleeves, ventilated workspace, electrical disconnect if water intrusion risk exists, clean water source, ice or cold water for cooling phase, fire extinguisher nearby
- Documentation needs: Pre-repair photos from multiple angles, close-ups of any existing paint damage, note of temperature and weather conditions, video of technique if performed professionally, written disclaimer if customer performing DIY against advice
Frequently Asked Questions
Will hot water damage the bumper’s structural foam or absorber?
Boiling water applied to the outer cover shouldn’t reach the energy absorber foam or aluminum/plastic beam behind it. However, if water intrudes through cracks or gaps and contacts the foam, it can degrade some types. EPP foam handles moisture better than EPO. The bigger risk is cracking mounting tabs on the cover itself during manipulation, which compromises how the bumper system functions in the next impact.
Can I use a hair dryer or heat gun instead of boiling water?
Yes, and it’s actually preferred if you understand temperature control. A quality heat gun set to 300-350°F gives more controlled, even heating without the water intrusion risk. Keep the gun moving to avoid hot spots and maintain 6-8 inches of distance. Hair dryers typically don’t generate enough heat to reach the plastic’s glass transition temperature throughout its thickness. Professional bumper repair techs use heat guns almost exclusively.
How many times can I reheat the same area if the dent doesn’t come out?
Limit yourself to two heating cycles maximum. Each heat/cool cycle stresses the paint system and can degrade the plastic’s properties. If two attempts don’t significantly improve the dent, the damage is beyond what thermal manipulation can fix. Continued heating increases the certainty of paint delamination and may cause permanent plastic deformation in the opposite direction—creating a bulge instead of a dent.
What’s the difference between TPO and polyurethane bumpers for heat repair?
TPO (thermoplastic olefin) bumpers are more forgiving with heat application and have better shape memory. They’re found on most Asian and domestic vehicles. Polyurethane bumpers, common on European luxury vehicles, are more sensitive to heat and can develop permanent damage or discoloration more easily. They also have different paint systems that may not tolerate thermal cycling. Always verify material type before attempting heat repair—there’s usually a recycling code on the bumper’s backside.
Should I remove the bumper cover before attempting this repair?
If you want the best chance of success, yes. Removal allows complete access to the backside, eliminates water intrusion risk to electrical components, and lets you inspect for hidden damage. It also means you’re already halfway to a professional repair, so the time-saving argument for the quick fix diminishes. Most modern bumper covers require removal of wheel well liners, lower panels, and multiple clips—it’s not a five-minute job. Weigh the removal time against just taking it to a shop.
Will this technique work on painted-to-match aftermarket bumpers?
The plastic substrate should respond the same way, but aftermarket paint jobs vary wildly in quality. Some use single-stage paints without the flexibility additives of OEM systems. Others may not have proper adhesion promoter, meaning the paint is already marginal. I’d be more cautious with aftermarket bumpers unless you know the paint shop’s quality. Factory bumpers have more consistent paint systems designed specifically for that substrate. If the aftermarket bumper is several years old, the paint has likely hardened and become more brittle, increasing crack risk substantially.
Related Tools & Materials
Proper bumper repair—whether you’re assessing damage or executing professional fixes—requires the right materials and tools. Our Paint & Body category stocks everything from thermal protection gear to precision application equipment.
- Safety equipment: thermal-rated gloves, eye protection, and heat-resistant apparel
- Professional tools: heat guns, padded pushing tools, and diagnostic lighting
- Paint and finishing supplies: primers, basecoats, clearcoats, and adhesion promoters
The Toolsource Technical Team blends decades of real-world automotive service experience with up-to-date technical research. Our writers collaborate with professional mechanics, shop owners, and diagnostic specialists to deliver practical, workshop-ready guidance you can trust.


Follow us on social media