Dark metallic green presents deep gloss, dimensional flake, and timeless curb appeal on both modern SUVs and classic muscle cars. This guide covers the technical decisions and procedures that deliver consistent, professional-grade results whether you repaint in basecoat/clear, install a cast vinyl wrap, or add high-contrast white stripes. You’ll find practical steps, tooling guidance, application technique, and maintenance tactics to maximize color depth and durability.
Plan the Finish: Paint System, Wrap Film, and Stripe Strategy
Start by defining the end-use and durability target. A Land Cruiser that sees trail time and wash bay abuse needs a resilient clearcoat system and possibly paint protection film (PPF) on impact zones. A classic with white rally stripes may favor paint for authenticity or cast vinyl for serviceability. Align your materials to the use case and shop capabilities.
- Paint chemistry: For metallics, a two-stage basecoat/clear is standard. Single-stage metallics are harder to correct and blend. Choose a base system compatible with your region’s VOC rules; use the recommended reducers for shop temperature.
- Color selection: Source a color code when possible. If you’re choosing a custom dark metallic green, request spray-out cards in different ground coat shades (value shade). Darker sealers often reduce coats and help depth. Verify flop (angle-dependent color) under multiple light sources.
- Flake size: Medium to fine metallic flake is easier to orient uniformly and reduces mottling risk compared to coarse flake.
- Clearcoat: High-solids clears provide build and UV resistance. If vehicle sees off-road use, select a clear with strong chip resistance and consider PPF on leading edges.
- Wrap film: Use a premium, cast wrap film in dark metallic green (not calendered). Cast films offer conformability, color stability, and easier removability. Confirm recommended install and post-heat temperatures per manufacturer.
- Stripes: Decide paint versus vinyl. Painted white stripes offer seamless build under clear. Vinyl stripes are quicker to install and remove, with guaranteed symmetry via pre-cut kits. For muscle cars, use model/year-correct kits where accuracy matters.
Tooling baseline: a compliant HVLP/LVLP spray gun (1.3–1.4 mm for base and clear), a compressor with adequate CFM, PPS-style cups, panel wipes, sanding tools (DA with dust extraction, blocks), primers/sealers, masking materials, clean booth or a well-controlled spray space, and for wrapping: knifeless tape, felt-edge squeegees, heat gun, IR thermometer, adhesion promoter, and surface prep solvents that are film-safe.
Surface Prep: Foundation for Paint and Wrap


Metallic finishes and glossy wraps telegraph substrate defects. Invest the time here to avoid post-finish rework.
For Repaint
- Disassembly and documentation: Remove trim, handles, lights, badges. Bag/label hardware. Paint edges and recesses properly to avoid masking cut lines in metallic transitions.
- Degrease/decontaminate: Use a wax/grease remover followed by a panel wipe. Remove silicones and road film to prevent fisheyes.
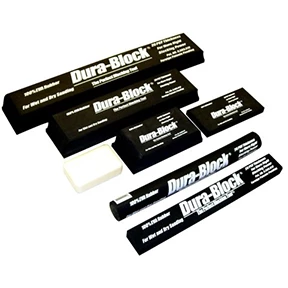
- Repair and leveling: Perform metal or plastic repairs, filler work, and glaze. Block-sand progressively (e.g., 80–120 for shaping, 180–220 for refining, 320–400 before primer). Keep block strokes long and consistent to maintain panel contours.
- Prime and guide coat: Apply epoxy or 2K primer as required. Use a guide coat and block to a uniform finish (e.g., 400–600 grit for basecoat). Any texture or pinholes will show under metallic.
- Sealer: Apply a compatible sealer in a value shade that supports the chosen dark green. Sealer evens absorption and dramatically improves metallic uniformity and hiding.
- Masking and static control: Use high-temp automotive tapes and clean paper. Blow off panels thoroughly; use anti-static panel wipes on plastics. A clean, humidified booth reduces dust.
For Wrap
- Decon: Wash, clay bar, and isopropyl-alcohol wipe. Remove waxes and sealants. Address tar/adhesive residue with wrap-safe solvents.
- Hardware removal: Remove trims, badges, mirrors, emblems where practical. The cleaner the edges, the better the longevity.
- Surface correction: Wraps hide color but not texture. Feather chips, nibs, or sharp edges; sand and polish any roughness that could print through. Touch up bare metals to prevent corrosion under the film.
- Edge prep: Apply adhesion promoter sparingly in deep recesses and critical edges per film manufacturer’s guidance. Mask adjacent paint if promoter risks staining.
- Layout planning: Determine seam locations, panel order, and relief strategies for complex curves. Pre-run knifeless tape for stripes and panel breaks.
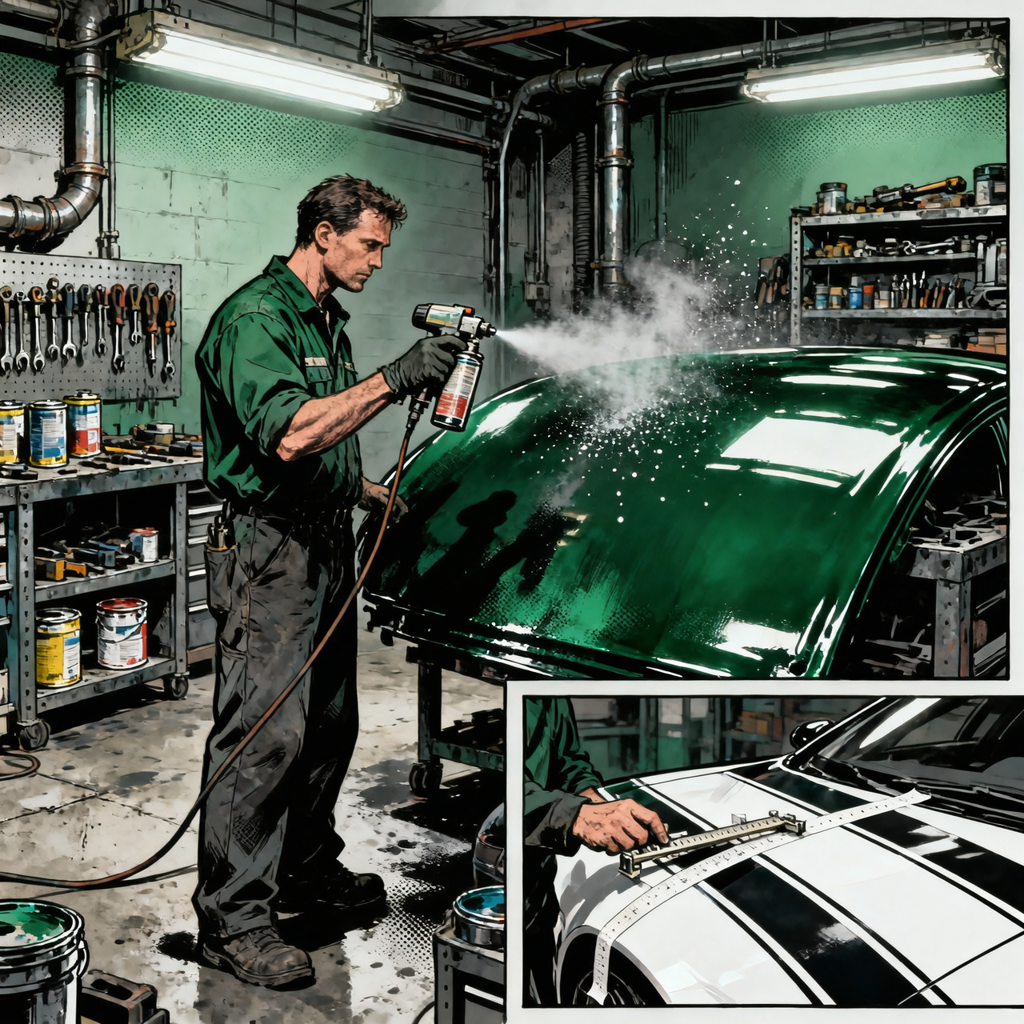
Spraying Dark Metallic Green: Gun Setup, Application, and Defect Control
Metallic orientation and evenness are everything in dark greens. Gun setup, environment, and sequence control your outcome.
- Environment: Target 68–75°F (20–24°C) and 40–60% RH. Use reducer/hardener that matches booth temps. Maintain clean intake filters and adequate lighting from multiple angles.
- Gun setup: 1.3–1.4 mm tip. Start around 18–24 psi at the gun for basecoat (per system data sheet), fan wide open, and adjust fluid for a medium-wet film without flooding. Verify atomization on a test panel.
- Sealer flash: Respect recoat window; matte, uniformly dull sealer improves wetting and flake lay.
- Basecoat application: Spray two to three medium-wet coats with 70–75% overlap. Maintain gun distance and speed. Keep each pass parallel to the panel to avoid tiger striping. Allow proper flash between coats (check dullness, no stringing on finger test).
- Orientation coat: If the system recommends, finish with a control/drop coat. Reduce fluid slightly, increase distance, and cross-coat at 90 degrees with a steady pace. This evens metallic distribution.
- Edge and jamb strategy: Spray edges first lightly to avoid heavy build; then do full passes to avoid halos. Keep panel orientation consistent during spraying to maintain flop match.
- Blending: For spot repairs, extend the base into adjacent panels and fade out with controlled coats. Use blending additives as directed. Dark metallic green is unforgiving; full-panel or adjacent-panel blends yield better matches.
- Clearcoat: Apply two to three coats of HS clear with correct flash intervals. Aim for uniform film build to support later finishing without risking cut-through. Manage booth airflow to prevent solvent trap and orange peel.
Defect troubleshooting:
- Mottling/tiger striping: Usually from uneven gun speed/distance or over-wet films. Correct by adding a uniform orientation coat at slightly higher distance and optimized atomization.
- Solvent pop: From trapping solvents under clear; increase flash times and verify booth temperature and airflow.
- Color mismatch: Verify sealer shade and mixing accuracy; check spray-out under sun and booth lights. Adjust reducer speed to fine-tune flop affect.
- Dust nibs: Improve booth housekeeping; tack lightly between coats (avoid dragging). Post-cure, nib and polish using compounds compatible with fresh clear.
Installing a Dark Metallic Green Wrap: Technique and Temperature Control
Cast films in deep metallic colors require precise handling to maintain flake orientation and surface uniformity.
- Temperature: Install at 60–75°F (16–24°C) ambient. Monitor panel and film temps with an IR thermometer. Avoid cold, which increases tension and adhesion issues.
- Panel order: Roof, hood, and large flat panels first for consistency; then sides, bumpers, and trim. Plan overlaps and seams away from direct sightlines.
- Application: Use a hinge method for large panels. Float the film to position, then squeegee with firm, even strokes. Work from center out, using felt-edge squeegees to avoid marring.
- Complex curves: Pre-stretch minimally. Add heat gradually and relax the film to conform rather than pulling hard. Avoid overstretching metallic films, which can distort flake appearance.
- Edges and recesses: Use heat and light tension to feed film into recesses. Post-heat stretched zones to manufacturer spec (commonly ~85–100°C) to set memory. Verify with IR thermometer.
- Knifeless tape: Use for stripe cuts and tight edges to avoid blade damage. Pull tape at a low angle for clean edges.
- Post-inspection: Recheck edges after cooling. Apply edge seal tape in high-risk areas as recommended. Allow 24 hours before aggressive washing.
Adding White Stripes: Painted vs. Vinyl on Dark Green

Prostripe one inch x 150' Solid Stripe Auto Pinstriping Tape Black Metallic
Mfg: Sharpline Converting
Part #: R54403

Prostripe Performance Graphics 5" X 70" Brickyard, Silver/Dark Charcoal
Mfg: Sharpline Converting
Part #: R67506
White stripes deliver high contrast on dark metallic green. Decide between painted stripes under clear or vinyl stripes over paint or wrap.
Painted White Stripes
- Layout: Establish vehicle centerline using masking tape and body reference points. Measure stripe width and gaps per your design or an OEM-correct template for classics. Verify symmetry at multiple points (leading/trailing edges, cowl, deck).
- Masking: Use high-quality fine-line tape for crisp edges. Bridge gaps with masking paper and standard tape. Burnish edges lightly.
- Ground coat: Apply a white or light gray ground to improve opacity, especially over dark green. Follow with white base until uniform coverage is achieved.
- Unmask and bury: Remove fine-line tape at a consistent angle once the white flashes. After proper flash, apply clearcoat over the entire panel set to bury edges.
- Blend strategy: Plan to clear entire panels with stripes to avoid edge mapping.
Vinyl White Stripes
- Material: Choose high-opacity cast white film designed for striping. Pre-cut kits for specific models ensure correct proportions and curvature.
- Surface: Paint must be fully cured and decontaminated. For wraps, ensure the base film is clean and cool.
- Install: Use the hinge method and light application fluid if the film allows (many modern films are dry-apply only—follow data sheet). Squeegee evenly, working from center out.
- Alignment: Use body centerline and datum points. Use knifeless tape for custom layouts. Double-check visual alignment from multiple angles before final squeegee.
- Post-heat: Warm and set edges where needed; do not overheat white films to prevent gloss change.
Aftercare: Cure, Protection, and Maintenance
Protect the finish to preserve depth and clarity in dark metallic green.
- Fresh paint: Avoid wax and sealants until the clear fully cures (often 30–90 days; follow product data sheet). Hand-wash with pH-neutral shampoo. Address nibs or dust inclusions after initial cure with careful color sanding and polishing.
- Ceramic coatings: Apply after full cure to enhance gloss and ease of washing. Ensure a silicone-free environment before any future repainting.
- PPF: Install on high-impact areas (hood front, fenders, rocker panels, A-pillars). Choose self-healing PPF for best chip resistance. Wrap film edges under trim when possible.
- Wrap maintenance: Wash with pH-neutral soaps; avoid petroleum solvents and aggressive brushes. Use wrap-safe sealants. Inspect edges periodically and re-seat or seal as needed.
- Storage and environment: Whenever possible, garage park. UV and heat accelerate degradation for both paint and vinyl. Regularly clean bug residue and tar.
Quick Checklist
- Confirm color system or wrap film, and obtain spray-out cards
- Prepare substrate: repair, prime, block, and seal to uniform finish
- Verify gun setup on a test panel and dial in overlap/flash
- Plan stripe layout with centerlines and reference measurements
- Control environment: temperature, humidity, clean airflow
- Post-finish protection: ceramic and/or PPF; wrap edge inspection
FAQs
Is paint or a wrap more durable for a daily-driven SUV?
A quality basecoat/clear with proper film build and a chip-resistant clear typically outlasts a wrap in impact zones. Adding PPF to leading edges boosts durability further. Wraps offer faster installation and easier color changes but usually have a shorter service life (often 5–7 years, climate dependent) and are more susceptible to edge wear and abrasion.
How do I prevent mottling and tiger striping in dark metallic green?
Use the correct sealer shade, ensure consistent gun distance/speed, maintain 70–75% overlap, and apply a control coat with slightly reduced fluid and increased distance. Keep each pass parallel to the panel and verify atomization on a spray-out card. Allow proper flash and avoid over-wet coats.
Can I install white vinyl stripes over a metallic wrap?
Yes. Use high-opacity cast white vinyl. Ensure the base wrap is clean and fully bonded. Lay out with knifeless tape or pre-cut kits, squeegee evenly, and post-heat edges per manufacturer specs. Avoid stretching the stripe over deep recesses; consider relief cuts or panel breaks.
What’s the typical time and cost difference between paint and wrap?
Full-color repaint with bodywork can take 40–100+ labor hours depending on vehicle condition and panel count, plus curing and finishing time. Material costs vary by system and clear. A full wrap often installs in 1–3 days once prep and disassembly are complete, with material cost driven by film grade and color. Actual pricing varies widely by region and vehicle complexity.
Can I blend a repair on a dark metallic green panel?
Blending is recommended rather than panel-edge matching. Extend basecoat into adjacent areas with controlled fades and then clear entire panels for uniform gloss. Maintain consistent panel orientation during spraying to keep flop matched. Always confirm with spray-outs and light checks.
Should I paint or wrap the white stripes on a classic muscle car?
Painted stripes under clear are closer to factory appearances on many classics and provide a seamless surface. Vinyl stripes are easier to install and replace, ideal when preserving original paint or when future changes are likely. Use model/year-correct templates to maintain authentic proportions and placement.
Essential Paint & Body Products for Your Project
Achieving that stunning dark metallic green finish requires the right tools and materials. Explore our complete Paint and Body category for everything you need to execute this transformation perfectly.
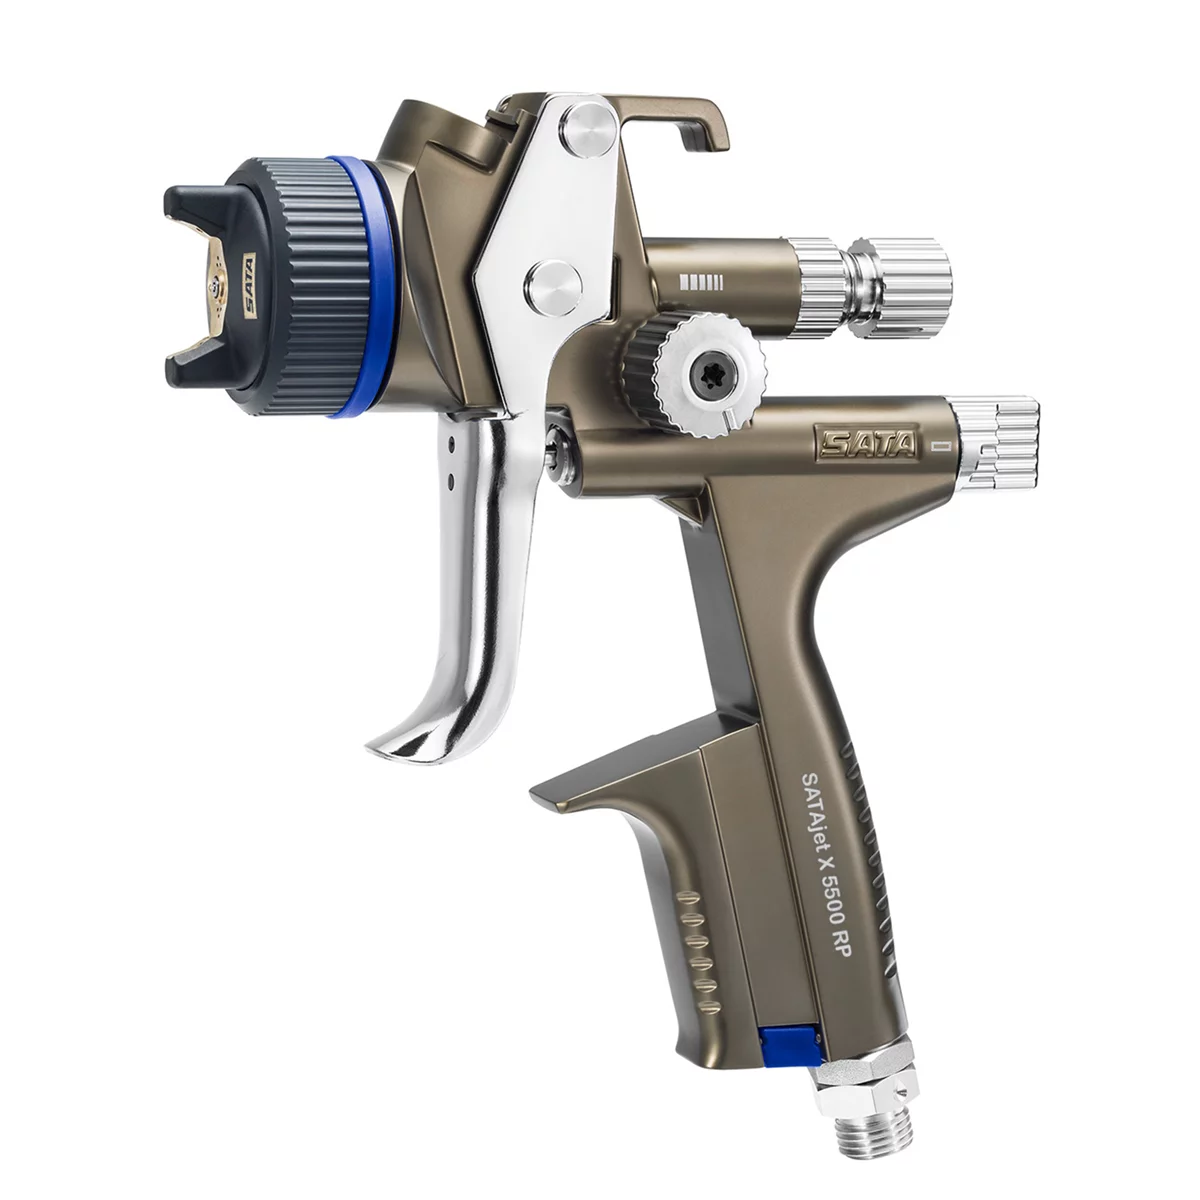
- Professional Paint Sprayers: Precision application tools for flawless metallic green coverage and consistency
- Prep and Protection Supplies: Masking tapes, primers, and sealers to ensure durability and professional results
- Detailing and Finishing: Buffers, polishes, and protective coatings to enhance the metallic sheen and longevity
The Toolsource Technical Team blends decades of real-world automotive service experience with up-to-date technical research. Our writers collaborate with professional mechanics, shop owners, and diagnostic specialists to deliver practical, workshop-ready guidance you can trust.


Follow us on social media