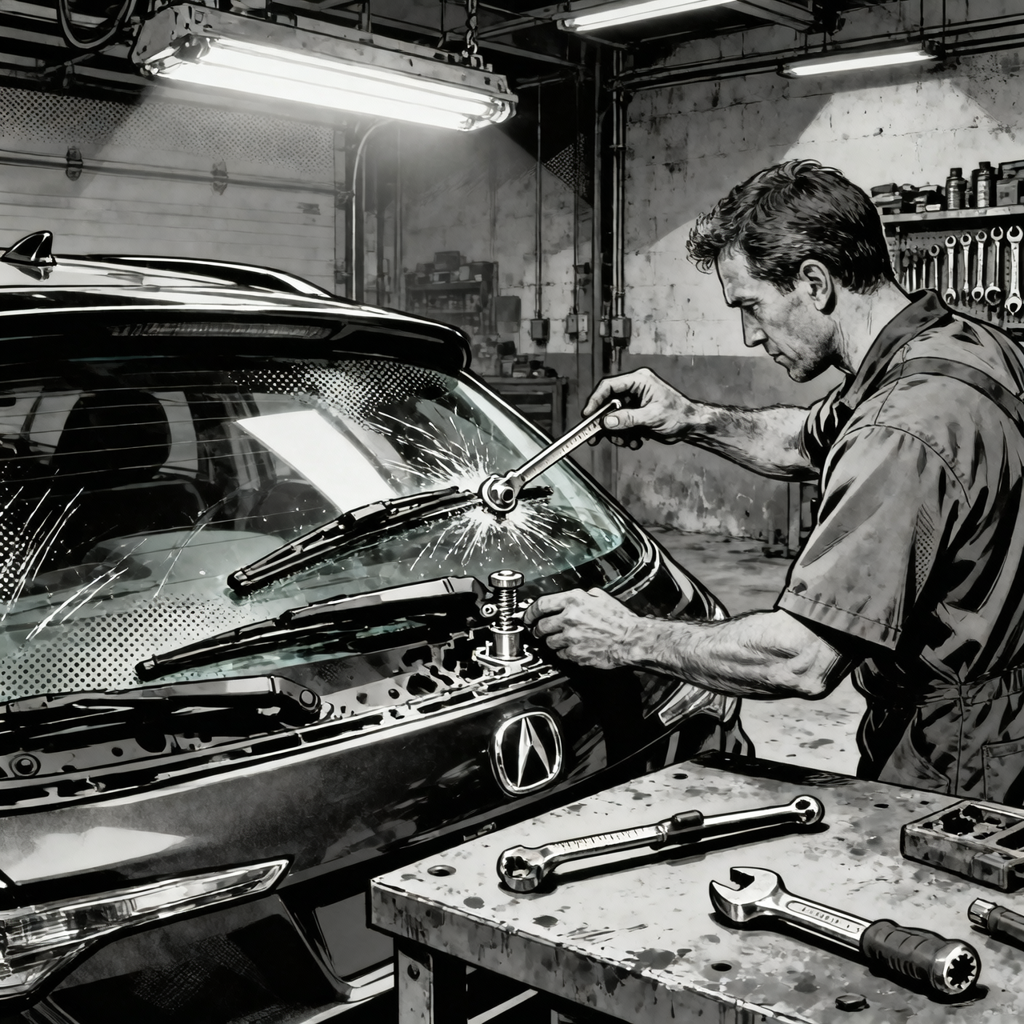
If you’re seeing repeat rear glass failures on 2019-2024 Acura RDX vehicles, you’re not alone. Service advisors and technicians across the country have documented a pattern of spontaneous rear glass shattering on these models, often with no visible impact point. While Honda/Acura has issued limited warranty extensions on some units, there’s no official recall as of early 2025, leaving shops to diagnose and repair these failures on customer dime. The root causes appear to be multifactorial: blocked cabin pressure vents creating internal pressurization, rear wiper assembly binding or sitting too tight against the glass, and thermal cycling stress from defrost elements interacting with the multi-layer acoustic glass design. This guide provides a systematic diagnostic approach to identify the failure mode and prevent recurrence after glass replacement.
Understanding the Cabin Pressure Vent System
Modern vehicles are designed with intentional pressure relief paths to equalize cabin pressure when doors close or when temperature changes occur. On the Acura RDX, these vents are typically located under the rear cargo area trim panels and carpeting, integrated into the body structure. When you slam a door shut, air needs to escape quickly to prevent pressure spikes that could stress sealed components—including the rear glass. If these vents become blocked with debris, dirt, or moisture intrusion, the cabin can’t breathe properly. During door closure or when heating/cooling systems cycle, pressure differentials build up and the rear glass becomes the weak point in the pressure vessel.
Start your diagnosis by inspecting the rear vent system. Remove the cargo area trim panels and carpeting to access the body vents. Look for leaves, dirt, rodent nesting material, or water damage that could obstruct airflow. Use compressed air to clear any debris, but be careful not to blow contaminants further into body cavities. Test the vent flow by having an assistant close a front door firmly while you hold a tissue or light ribbon near the vent opening—you should see immediate airflow as cabin pressure equalizes. If airflow is weak or absent, trace the vent path to identify blockage points. Some technicians report finding body plugs that were never removed during assembly, essentially sealing the vent system from the factory.
After clearing blockages, verify the system functions properly. Close all doors and windows, then open and slam the driver’s door while monitoring for unusual resistance or popping sounds. The door should close easily without excessive force required. If customers report that doors are hard to close or that they hear pressure release sounds when opening doors, the vent system is likely compromised. Document your findings with photos and flow test results, as this can support warranty claims or goodwill repairs from the manufacturer.
Inspecting the Rear Wiper Assembly for Binding and Contact
The rear wiper mechanism on the RDX has been implicated in multiple glass failure reports. Even if the customer doesn’t regularly use the rear wiper, the arm assembly can create stress points on the glass through improper installation, over-torqued mounting hardware, or binding in the pivot mechanism. Begin by removing the wiper blade and arm assembly completely. Examine the pivot stud where the arm attaches—look for witness marks, scratches, or contact points on the glass surface itself. If the stud has been contacting the glass during vehicle operation or temperature cycling, you’ll see circular scuff marks or stress fractures radiating from that contact point.
Check the torque specification for the wiper arm mounting nut and verify it hasn’t been over-tightened. Excessive torque can preload the pivot assembly and create constant pressure against the glass. The wiper motor and linkage should also be inspected for binding. Disconnect the wiper motor electrical connector and manually cycle the wiper arm through its full range of motion. It should move smoothly without catching, grinding, or unusual resistance. If you feel binding, the motor gear assembly or linkage bushings may be worn or damaged, causing the arm to push against the glass during operation rather than sweeping smoothly across the surface.
Pay special attention to the wiper arm’s rest position. When parked, the arm should sit in its detent position without any spring pressure forcing it against the glass. Some technicians have found that aftermarket or incorrectly installed wiper arms sit higher than spec, creating constant contact with the glass even when not in use. Install the arm and blade, then use a feeler gauge to check clearance between the blade and glass in the rest position—there should be light contact only, not pressure. If the arm is springing against the glass, replace it with an OEM unit and verify proper installation per service manual procedures. After glass replacement, consider leaving the wiper arm removed entirely if the customer doesn’t use it, eliminating this stress point.
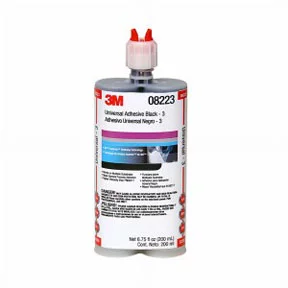
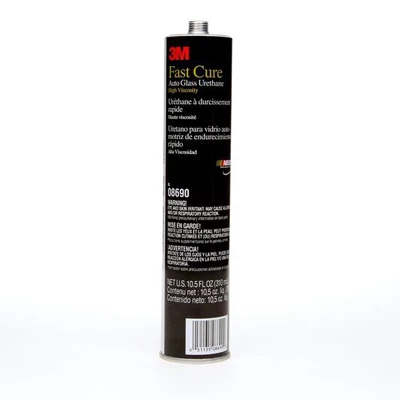
Fast Cure Auto Glass Urethane, 10.5 Fluid Ounce Cartridge
Mfg: 3M Automotive
Part #: 8690
Evaluating Thermal Stress from Rear Defrost Elements
The RDX rear glass uses a multi-layer construction with embedded heating elements for defrost function and acoustic dampening layers to reduce road noise. This complex laminate structure is more susceptible to thermal stress than traditional tempered glass. When the defrost system activates, it creates rapid localized heating across the glass surface while the perimeter remains cold—especially in winter conditions. Different layers expand at different rates, and if there are any pre-existing micro-cracks or manufacturing defects, thermal cycling accelerates crack propagation until catastrophic failure occurs.
Several technicians have reported success preventing repeat failures by advising customers to avoid using the rear defrost function, instead manually wiping condensation or frost from the exterior surface. While this isn’t a proper repair, it does reduce thermal cycling and can extend glass life if replacement isn’t immediately feasible. For diagnostic purposes, review the vehicle’s HVAC controller data to see how frequently the rear defrost has been activated. Some vehicles log defrost usage, which can help correlate failures with thermal cycling patterns.
When sourcing replacement glass, verify whether updated part numbers are available. Some technicians report that later production runs of the rear glass have modified heating element patterns or laminate specifications to address thermal stress issues, though Honda/Acura hasn’t officially acknowledged a running change. Contact your glass supplier and provide the VIN to ensure you’re getting the latest supersession. During installation, use a high-quality flexible urethane adhesive like DuPont Betaseal or 3M’s automotive windshield adhesive—not generic construction adhesive. The flexibility of premium urethanes helps accommodate thermal expansion and contraction without transmitting stress into the glass itself.
Installation Best Practices to Prevent Recurrence
Proper installation technique is critical to preventing repeat failures. Before setting new glass, thoroughly clean the pinch weld and verify it’s free of old adhesive residue, rust, or contamination. Use a dedicated automotive glass primer on the pinch weld to ensure proper adhesive bonding. If you’re working with a mobile glass service or sublet provider, verify they’re using OEM-equivalent materials and following Acura’s installation procedures, not generic glass shop practices.
Temperature control during installation matters more than many techs realize. The adhesive cures through a chemical reaction that’s temperature-dependent. If you’re installing glass in cold weather (below 50°F), the vehicle should be in a heated bay for at least two hours before installation and remain there for the full cure cycle specified by the adhesive manufacturer—typically 24 hours. Rushing the cure by returning the vehicle to the customer too early compromises bond strength and can allow the glass to shift or develop stress points. Conversely, in very hot conditions (above 90°F), adhesive can cure too quickly, trapping solvents and creating weak bonds. Follow the adhesive manufacturer’s temperature specifications precisely.
After setting the glass, verify it’s properly seated and aligned before the adhesive begins to cure. Check gap uniformity around the entire perimeter using a gap gauge or feeler stock. Uneven gaps indicate misalignment that will create stress concentration points. Don’t rely solely on the old glass’s position—some technicians report that factory-installed glass on problem vehicles was misaligned from day one, contributing to premature failure. Use the body opening dimensions and glass gasket specifications to verify correct positioning. Tape the glass in place per manufacturer instructions and avoid driving the vehicle or slamming doors during the cure period. Remind customers that full structural strength isn’t achieved for 24-48 hours, and to avoid car washes or extreme temperature changes during this window.
Diagnostic Checklist and Documentation
When a customer brings in an RDX with failed rear glass, especially if it’s a repeat failure, systematic documentation helps build a case for manufacturer goodwill coverage and ensures you don’t miss contributing factors. Use this checklist as a starting point for your diagnostic process:
- Record VIN, mileage, and exact date/time of failure if customer can provide it
- Photograph the fracture pattern—note whether it radiates from a point impact, edge, defrost elements, or wiper pivot area
- Remove cargo area trim and inspect cabin pressure vents for blockage; perform airflow test
- Remove rear wiper arm and inspect for contact marks on glass surface or binding in mechanism
- Check wiper arm mounting nut torque and verify proper rest position clearance
- Review customer usage patterns: frequency of rear defrost use, typical parking environment (garage vs. outdoor), climate conditions
- Pull HVAC system data logs if available to document defrost activation history
- Contact Honda/Acura dealer to check for open campaigns, service bulletins, or warranty extensions on the specific VIN
- Document any previous glass replacements and installation methods used
- Note any aftermarket accessories: tint, stickers, cargo organizers that contact glass, or audio system modifications
Submit detailed documentation to Honda/Acura’s customer relations along with your warranty claim or goodwill request. Multiple technicians report that comprehensive diagnostic documentation, especially photos showing blocked vents or wiper contact points, significantly improves the chances of manufacturer support even outside the standard warranty period. If the customer has already paid for one replacement and you identify a clear systemic cause, that documentation can support a partial or full reimbursement request.
Fast Cure Auto Glass Urethane, 10.5 Fluid Ounce Cartridge
Mfg: 3M Automotive
Part #: 8690
Frequently Asked Questions
Is there an official recall for RDX rear glass failures?
As of early 2025, Honda/Acura has not issued a formal recall for rear glass failures on 2019-2024 RDX models, despite widespread reports. Some vehicles have been covered under extended warranty programs on a case-by-case basis. There was a recall for similar issues on 2020 Subaru models related to windshield stress cracks, but Acura maintains that RDX failures are isolated incidents. Always check NHTSA’s database and Honda’s service portal for the most current information on specific VINs.
Can I prevent repeat failures by using aftermarket glass?
Aftermarket glass quality varies significantly. OEM glass is manufactured to Acura’s specifications including the multi-layer acoustic dampening and heating element pattern. Some aftermarket suppliers use simpler laminate structures that may be less prone to thermal stress but compromise noise reduction and defrost performance. If you go aftermarket, choose a reputable brand (Pilkington, Saint-Gobain) that specifically lists RDX fitment and verify it includes the heating elements and acoustic properties. Budget aftermarket glass often lacks these features entirely.
How long should I wait before releasing the vehicle after glass installation?
Follow the specific adhesive manufacturer’s cure schedule, which is typically 1-2 hours for safe drive-away (at 70°F ambient temperature) but 24-48 hours for full structural cure. In cold weather, extend these times significantly. Never release a vehicle with fresh glass installation at end of day on a Friday if it’s below 40°F—keep it in your heated shop through the weekend if necessary. Premature loading of the bond is a common cause of leaks and stress fractures.
Should I disconnect the rear defrost after replacement?
While some technicians suggest pulling the rear defrost fuse to eliminate thermal cycling stress, this creates a safety issue by disabling a federally mandated visibility feature. Instead, advise customers to minimize defrost use and manually clear the glass when possible. If the customer insists on deactivating it due to repeat failures, document their request in writing and ensure they understand the visibility and safety implications before pulling the fuse.
What’s the typical cost for RDX rear glass replacement?
OEM glass typically runs $400-$600 depending on supplier, with labor adding another $200-$400 for professional installation including proper adhesive cure time. Mobile glass services may charge less but verify they’re using appropriate materials and techniques. If pressure vent cleaning or wiper mechanism repair is needed, add 1-2 hours diagnostic and repair time. Always provide customers with an itemized estimate that separates glass, adhesive materials, and labor so they understand the value of proper installation versus quick-service alternatives.
How do I confirm the cabin pressure vents are working properly after clearing blockage?
The most reliable field test is the door close effort test: with all windows closed, attempt to close the driver’s door firmly. It should close easily with normal effort. If it requires slamming or unusual force, pressure isn’t venting properly. You can also use an inclined manometer or differential pressure gauge to measure cabin pressure during door closure, though most shops won’t have this equipment. A simpler method is the tissue paper test described earlier—visible airflow from the rear vents during door closure confirms the system is functional.
Windshield Tools & Auto Glass for RDX Repairs
Proper glass replacement requires the right tools and materials. Stock your shop with high-quality adhesives, primers, and installation accessories from our Windshield Tools & Auto Glass category to ensure lasting repairs.
- Automotive glass adhesives and primers rated for laminated multi-layer glass
- Installation tools including gap gauges, feeler stock, and glass setting blocks
- Surface preparation supplies for pinch weld cleaning and contamination removal

The Toolsource Technical Team blends decades of real-world automotive service experience with up-to-date technical research. Our writers collaborate with professional mechanics, shop owners, and diagnostic specialists to deliver practical, workshop-ready guidance you can trust.


Follow us on social media