Every shop has fielded the customer who drops off a car with a caved-in door and asks, “Is this frame damage, is it totaled?” The honest answer is almost always more nuanced than the customer wants to hear, and it starts with a distinction a lot of car owners never learned: modern unibody vehicles don’t have a separate frame running the length of the car. What looks like a simple door-and-quarter hit can hide damage to the rocker, the B-pillar, and the aperture itself — and that’s exactly the kind of damage that drives repair costs past a vehicle’s actual cash value. This guide breaks down how to diagnose that damage correctly, document it for an estimate, and recognize when you’re looking at a total loss instead of a repair job.
Frame Damage vs. Unibody Damage: Know the Difference Before You Quote
On a body-on-frame vehicle (most trucks and some SUVs), the frame rails run front to rear below the body and are a separate structural component from the sheet metal. On a unibody vehicle — which is the vast majority of sedans, crossovers, and compact cars on the road — the body itself is the structural member. There is no isolated “frame” to point to in the middle of the car. Rocker panels, pillars (A, B, C), and the floor pan are all high-strength or ultra-high-strength steel components that carry structural load, and damage to any of them is structural damage, full stop, even though it’s technically not “frame damage” in the body-on-frame sense.
This matters for two reasons. First, it affects what repair procedures and tooling are required — pillar and rocker work usually calls for OEM repair procedures, sectioning guidelines, and in many cases full replacement rather than pull-and-fill. Second, it affects how the damage gets written up. An estimate that says “door damage” when the real issue is a bent pillar and compromised rocker will get kicked back by an adjuster, or worse, create a liability issue if the car is repaired and sold without the structural work being properly addressed.
Diagnosing the Full Extent of Damage Before You Write the Estimate
A side-impact hit that looks contained to one door almost never is. Before writing anything, pull trim and inspect the full damage path:
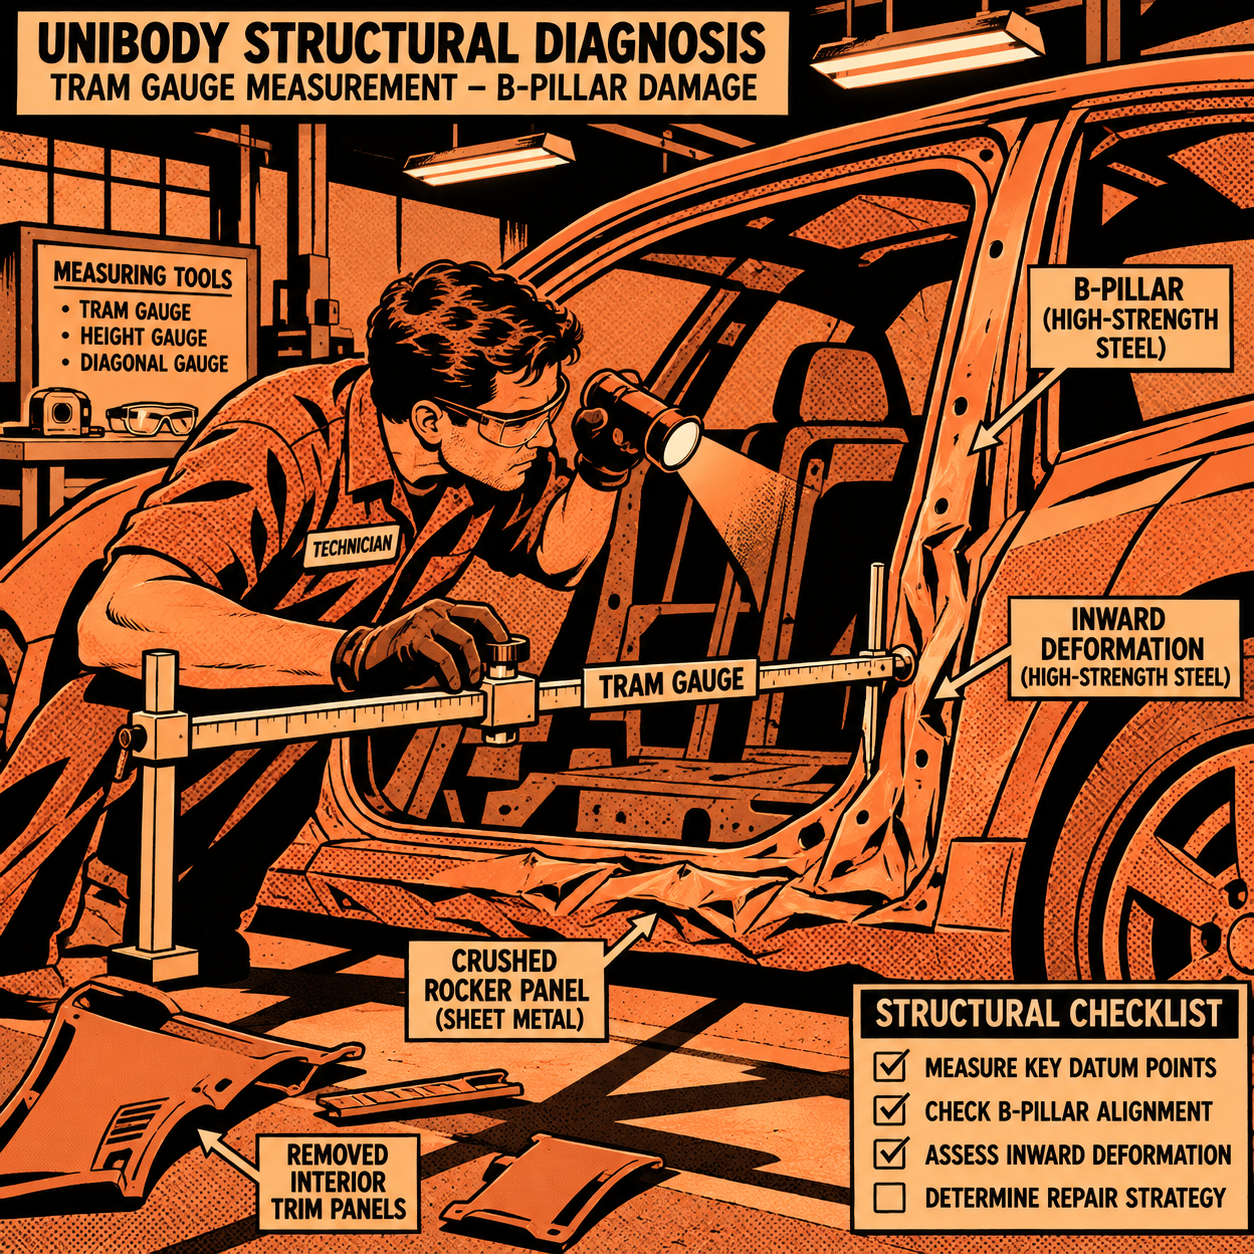
Start at the point of impact and work outward. Check the rocker panel for creasing or buckling along its length, not just at the impact point — rockers transmit load and can show secondary damage several feet from the hit. Check the B-pillar (or whichever pillar is nearest) for inward deflection, which affects door fit, latch engagement, and in a worst case, side-curtain airbag deployment geometry. Inspect the aperture — the opening the door sits in — for being pushed in or out of its designed shape; this is often called “aperture damage” and is distinct from a bent frame rail, but it is absolutely structural. Finally, check the quarter panel and rear door (or front fender and front door) for damage that extends past what’s visible from a single angle photo.
Don’t rely on a glance-and-guess from the exterior. Disassembly is what turns a guess into an estimate. Pull the interior trim panels, headliner edge, and weatherstripping to check pillar alignment, and put a tram gauge or electronic measuring system on the vehicle to compare actual points against OEM spec. This is also where you’ll catch things that aren’t visible at all from outside — a pushed floor pan, a cracked pillar weld, or a seatbelt pretensioner mount that’s been compromised.
[PRODUCT_SEARCH: unibody tram gauge measuring system]


Building a Teardown Estimate That Holds Up
Insurance adjusters and shop owners alike want a number that reflects the real cost, not a lowball visual estimate that balloons once the car is apart. Structure the estimate in this order:
Document pre-existing condition and mileage first, since that affects actual cash value (ACV) later. Photograph every damaged component before touching it, then again after trim removal exposes hidden damage. Write line items separately for replacement vs. repair — rocker panels and pillars are frequently full-replacement items per OEM procedure, not something to section and patch unless the OEM repair manual explicitly allows it for that model year. Include R&I (remove and install) labor for everything that has to come off to get at the structural repair, not just the visible panel. Factor in paint and blend time for adjacent panels, and don’t forget calibration costs if the vehicle has side-impact sensors, blind-spot radar, or cameras mounted near the damaged area — recalibration after structural repair is frequently required and frequently missed on first-pass estimates.
Once the full teardown estimate is written, that total — not the initial walk-around guess — is what gets compared against the vehicle’s ACV to determine whether the insurer repairs or totals it.
The Total Loss Math: How Insurers Actually Decide
Total loss determination is a numbers exercise, not a judgment call about whether the car “feels” fixable. Most insurers use a total loss threshold — commonly a percentage of ACV, varying by state and carrier, often in the 70-100% range — and compare it against your teardown repair estimate plus any diminished value or betterment adjustments. A 12-year-old economy sedan with 130,000 miles and an ACV of $7,000 gets totaled by a $6,000 structural repair. A two-year-old vehicle with a $28,000 ACV can absorb a $10,000 structural repair and stay in the repair column. Mileage, accident history (via vehicle history reports), regional market comps, and even how desirable that trim/color combination is in the local used market all factor into ACV, which is why two visually identical damaged cars can get different total loss decisions.
For techs, the practical takeaway is: write the estimate to reflect the actual required repair, including every hidden structural item you found in teardown. Padding or lowballing either direction creates problems — a lowball estimate that misses hidden pillar damage gets the shop in trouble later, and an inflated one damages trust with adjusters you’ll be working with again.
Repair Techniques When the Job Is a Go
If the repair is approved, structural work on rockers and pillars requires more than a frame rack and a MIG welder. Follow the OEM repair procedure for that specific make, model, and year — high-strength and ultra-high-strength steel sections often cannot be heated, straightened, or sectioned using the same methods as mild steel, and using the wrong method can compromise crash performance in ways that won’t show up until the next collision.
Use a calibrated measuring system (laser or mechanical) to confirm the unibody is within spec before and after any pulling. Replace rather than repair any component the OEM procedure marks as replace-only — this is almost always the case for pillars with side-curtain airbag mounting points. For panel damage adjacent to the structural repair that’s genuinely cosmetic — a crease in a quarter panel with no structural involvement — paintless dent repair (PDR) can be a legitimate, lower-cost option, but only after you’ve confirmed the underlying structure is sound. PDR is a cosmetic tool, not a structural repair method, and using it to “fix” damage that’s actually masking pillar or rocker deformation is how comebacks and liability claims happen.
Quick Structural Damage Assessment Checklist
- Confirm unibody vs. body-on-frame construction for the specific vehicle
- Remove trim to inspect rocker, pillar, and aperture before quoting
- Measure against OEM spec with a tram gauge or electronic system
- Check for secondary damage beyond the obvious impact point
- Identify any sensor/camera recalibration needs tied to the repair area
- Separate replace-only components from repairable ones per OEM procedure
- Compare final teardown estimate against ACV before committing to repair
[PRODUCT_SEARCH: collision repair structural tools]


FAQs
Is rocker panel or pillar damage the same as frame damage?
Not technically. On a unibody vehicle there’s no separate frame rail in that area — but rocker and pillar damage is still structural damage, and it’s treated with the same seriousness (and often the same OEM replace-only procedures) as frame damage on a body-on-frame vehicle.
Can a bent pillar always be straightened instead of replaced?
No. Many OEM procedures classify pillars, especially those with side-curtain airbag mounts, as replace-only. Always check the specific repair procedure for that make, model, and year before attempting to pull or straighten.
What’s “aperture damage” and how is it different from frame damage?
Aperture damage refers to the door opening itself being pushed out of its designed shape, usually from a side impact. It’s structural, but it’s a unibody/aperture issue rather than frame-rail damage — important to use the correct terminology on an estimate so the scope is understood correctly.
How do insurers decide whether a car is a total loss?
They compare the full teardown repair estimate (plus any diminished value) against the vehicle’s actual cash value, using a state- or carrier-specific threshold percentage. Mileage, condition, and local market comps all affect ACV.
Should PDR ever be used on structural-adjacent panel damage?
Only after the underlying structure has been inspected and confirmed sound. PDR is a cosmetic repair method; it should never substitute for structural repair on a rocker, pillar, or aperture.
Why does the same visible damage total one car but not another?
Because the decision is based on ACV, not visual damage severity. An older or higher-mileage vehicle with a lower ACV reaches the total loss threshold at a much lower repair cost than a newer vehicle with higher value.
Recommended Tools for Structural Assessment
Diagnosing structural damage accurately requires more than a visual inspection. Our Paint & Body category includes the measuring systems, gauges, and diagnostic tools needed for structural verification and damage documentation.
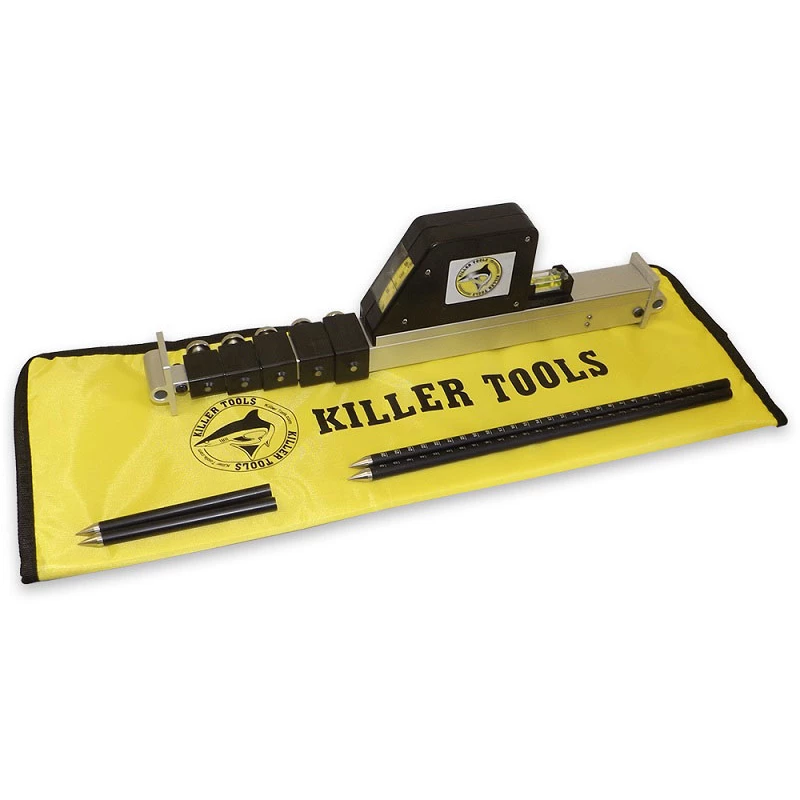
- Tram gauges and laser measuring systems for unibody alignment
- Electronic measuring tools for structural verification
- Diagnostic equipment for comprehensive damage assessment

The Toolsource Technical Team blends decades of real-world automotive service experience with up-to-date technical research. Our writers collaborate with professional mechanics, shop owners, and diagnostic specialists to deliver practical, workshop-ready guidance you can trust.


Follow us on social media