
Stud-weld dent pulling has been standard collision-repair practice for decades. Whether you’re in a fully equipped shop or working out of a home garage, you can pull metal efficiently with the right process and a realistic understanding of tool capability and panel metallurgy. This guide compares common methods—slide hammer, bridge/hand puller, and floor pull with a chain/winch—then walks you through setup, step-by-step procedures, best practices, and troubleshooting.
1) Know Your Options: Pulling Methods and When to Use Them
Choosing the right approach depends on access, metal type, and the severity/location of the damage.
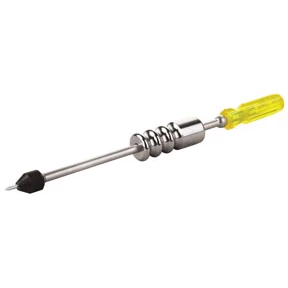
- Stud welder + slide hammer: Fast setup on small to moderate dents and local lows. Ideal for door skins, quarter panels, and roofs where backside access is limited. Good for tight spots and isolated lows.
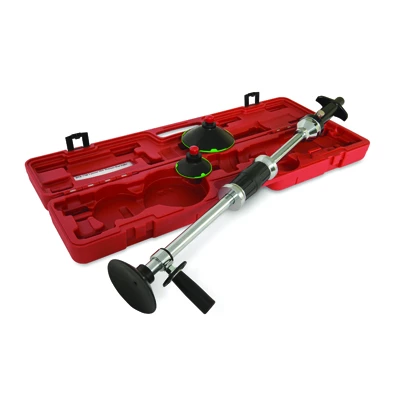
- Stud welder + bridge/hand puller (two-handled with rubber feet): Offers more controlled, even lift than a slide hammer. Good for broad shallow lows and minimizing high spots. Rubber feet spread the reaction load to avoid new dents.
- Stud welder + floor pull (chain/come-along/winch): For larger structural pulls or stubborn creases where you can anchor to a floor pot or structural anchor. Delivers sustained, adjustable tension; often paired with hammer-on dolly work to relax crowns while the panel is under load.
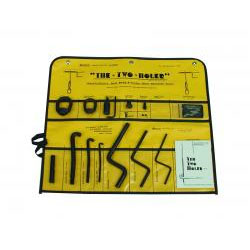
- Wiggle wire or pull rings/washer tabs: Used with a stud gun to bridge across a crease. Apply tension uniformly across the damage line instead of point pulling. Helpful on long, shallow creases.
- Glue pull (tabs + lifter/bridge): Non-invasive option for e-coated or aluminum panels when welding is not appropriate. Best for light to moderate hail-type dents or when preserving coatings is critical. Less effective on sharp creases.
Do not weld studs to aluminum panels, high-strength structural reinforcements, or plastic bumper covers. Follow OEM repair procedures for material-specific limitations.
2) Tools and Setup: What You Need and Why
At minimum, have:
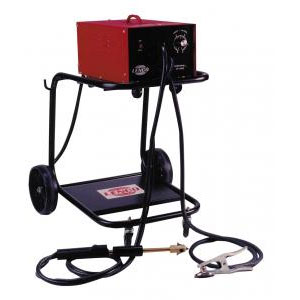
- Stud welder (spot gun): Capable of consistent pin attachment. Select tips for pins, wiggle wire, and washers. For frequent use, a unit with adjustable power and duty-cycle protection is preferred.
- Consumables: Steel draw pins (aka keys or nails), wiggle wire, washer tabs. Match diameter to your puller.
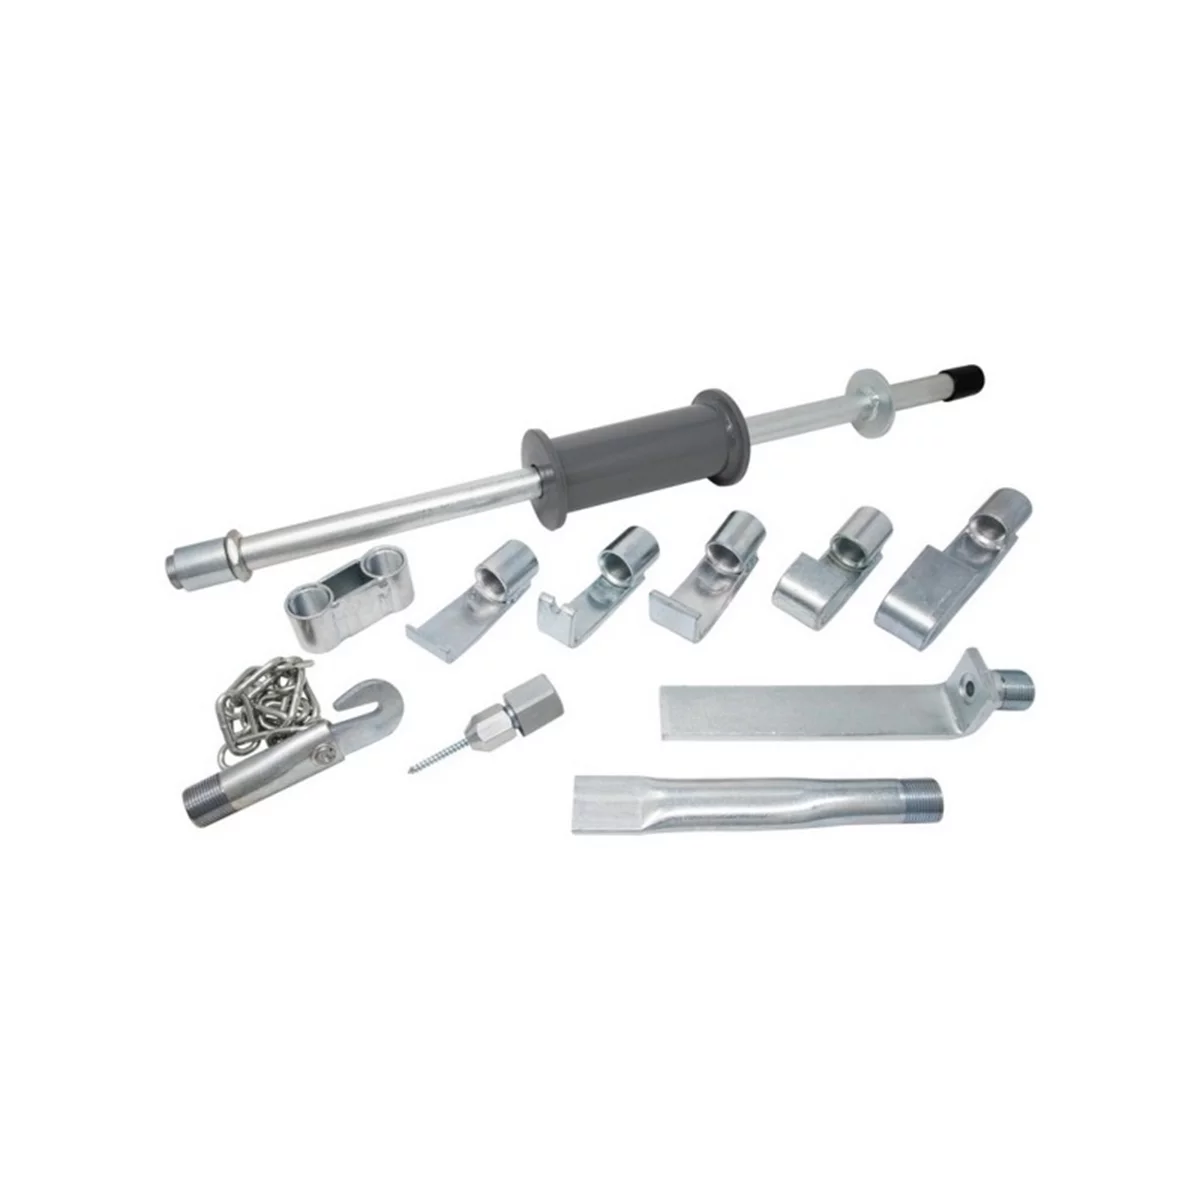
- Pulling devices: Slide hammer with appropriate collet; bridge/hand puller with wide rubber feet; portable winch or come-along for floor pulls; chains and rated hooks/shackles.
- Anchoring: Floor pots/anchors or a portable anchor stand/bench for floor pulls. Never anchor to unrated objects.
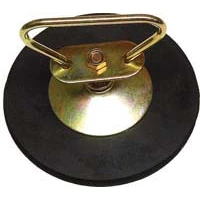
- Grounding: A high-quality clamp or magnetic ground with clean, bare metal contact. A poor ground causes weak studs and blown pins.
- Surface prep: 24–80 grit abrasives, strip disc, or fiber wheel to take the panel to clean bare metal only where needed for welding or pulling feet. Consider weld-through corrosion inhibitor on backside after repair.
- Metal work tools: Body hammers, dollies, slappers, shrinking disc (as appropriate), panel file.
- Finish materials: Epoxy or etch primer underbody; 2K filler skim; glaze; sanding blocks; corrosion protection.
- PPE & protection: Eye/ear protection, welding gloves, FR clothing, respirator, welding blanket, battery protection (memory saver if required), fender covers, fire extinguisher.
Vehicle prep and electrical safety:
- Disconnect the negative battery cable on conventional vehicles before welding. For hybrids/EVs, follow OEM de-energization and safety procedures; if you do not have the training/equipment, do not weld on the vehicle.
- Remove or shield flammables and trim near the repair. Keep a Class ABC extinguisher within reach.
- Verify panel material and strength class. Avoid stud welding on UHSS (>700 MPa) and boron-reinforced parts. Consult the OEM body repair manual.
3) Step-by-Step: Stud Weld Pull with Slide Hammer or Bridge Puller
- Assess the damage: Identify crowns (highs) and lows. If the panel was pushed inward, plan to release highs first while supporting or lightly tensioning the low area. Note body lines and edges; avoid direct pulling on sharp feature lines initially.
- Prepare the surface: Strip paint and coatings down to bright bare steel in small islands where studs will be placed. Keep prep tight to minimize refinishing area. Clean with a solvent that leaves no residue.
- Establish a reliable ground: Clean a separate bare metal patch for the ground clamp or use a magnetic ground on clean steel. Ensure full contact—no e-coat, no seam sealer.
- Dial in the welder: Start with a moderate power/time setting. Practice on scrap of similar thickness to verify pins weld solidly without burning through. Good pins twist off; bad pins pop off during the pull.
- Place studs (pins/keys): Start at the outer perimeter of the low, progressing toward the center. Space 15–30 mm apart for control. For a crease, use wiggle wire or washer tabs along the crease line to distribute force.
- Attach the puller: For a slide hammer, latch onto one pin at a time and make controlled pulls, not violent yanks. For a bridge puller, hook to one or more pins, adjust the feet for stable footing on solid areas, and apply tension evenly.
- Work the metal: With slight tension applied, tap down crowns around the pull area with a body hammer while backing with a dolly as needed. Alternate tension and tapping. The goal is to relieve stress and let the metal return, not to stretch it.
- Progress gradually: Move around the repair area, alternating pulls to prevent over-stretching or creating highs. Reposition pins as needed; don’t over-rely on a single attachment point.
- Check your surface: Use a straightedge, reflection, or guide coat to monitor progress. Stop pulling as soon as the panel is within a skim coat tolerance (typically within 1–2 mm of flat).
- Remove studs: Twist them off cleanly with side cutters or pliers. Only dress the weld nubs lightly with a 36–80 grit disc. Avoid thinning the panel.
- Metal finish: Planish minor highs/lows with hammer and dolly. Apply epoxy primer to bare steel, then a thin skim of quality filler. Block sand and refine. Seal and topcoat per refinishing system.
Tip: If a pin tears out immediately, improve grounding and surface prep, reduce pull force, or increase welder dwell slightly. If metal is oil-canned or springy, you may need shrinking techniques; proceed cautiously.
4) Step-by-Step: Floor Pull with Chain/Come-Along (“Floor Pull”)
Use a floor pull when the damage requires sustained, directional force that a handheld puller can’t maintain. This is common on heavier creases, rocker/quarter areas, and near structural edges.
- Anchor safely: Inspect and use rated floor pots or anchor stands. Use grade-rated chains, hooks, and shackles. Verify the pull path aligns with the vector needed to reverse the damage.
- Protect the panel: Place a protective pad or a sacrificial plate behind chains if near finished edges. Do not hook directly to a thin flange; use welded studs and a pull plate/ring that spreads the load.
- Stud placement: Weld a series of pins along the low or crease, or attach a pull plate to multiple welded washers/keys. Clean bare metal and ensure strong welds.
- Rig the pull: Connect the chain or winch line to the pull plate/ring. Take up slack and lightly tension. Confirm the vehicle is secured (wheel chocks, stands) and that the pull won’t shift the vehicle dangerously.
- Apply controlled tension: Increase tension gradually with the come-along or winch, watching panel movement. While under light tension, tap down adjacent crowns with a hammer and dolly. This relieves stress and assists the pull.
- Adjust vector and height: Reposition chains or add intermediate snatch blocks to modify direction as the metal moves. Avoid steep pull angles that cause tearing or high spots.
- Progressive re-attachment: As the panel comes up, remove and re-weld pins closer to remaining lows. Don’t chase the same studs past their useful range—fresh attachment points maintain control.
- Finish and release: Once within tolerance, back off tension, remove studs by twisting, dress nubs minimally, and metal finish as in the previous section.
Note on portable winch/“little winch” systems: Portable panel pulling winches are useful when anchored correctly. Ensure the anchoring system is rated and stable. Never anchor to lift arms, jack stands, or non-structural shop fixtures.
5) Best Practices for Materials, Grounding, and Safety
- Grounding is everything: Clean, bare metal and a high-quality clamp or magnetic ground dramatically improve stud weld quality. A poor ground causes cold welds, overheating, and inconsistent pulls.
- Panel metallurgy matters: Avoid stud welding on UHSS reinforcements, intrusion beams, or boron steel. On HS or DP steels, minimize heat input and adhere to OEM guidelines. For aluminum exterior panels, use glue-pulling systems or aluminum-specific repair equipment—do not weld steel studs.
- Heat control: Short, controlled welds. Allow cooling between welds to prevent panel warping. Keep a wet rag nearby for rapid cooling when appropriate.
- Don’t pull on plastic bumpers with welded studs: Plastic bumper covers require glue tabs and plastic repair methods. For older steel bumpers, studs can be used, but reinforce and pull cautiously to avoid distortion.
- Protect vehicle electronics: Disconnect the battery (conventional vehicles) and protect modules. For hybrids/EVs, follow OEM service information; if in doubt, avoid welding and refer to qualified facilities.
- Anchoring discipline: Use only rated anchors and hardware. Inspect for wear. Replace stretched chains and damaged hooks. Keep spare clamp bolts and avoid impacting them to failure.
- Minimal finishing: The aim is to restore shape with metal work. Use the thinnest possible skim coat. Heavy filler hides poor metalwork and often fails prematurely.
6) Troubleshooting and Quality Checks
- Pins popping off while pulling: Improve ground contact; clean metal better; increase welder dwell slightly; reduce initial pull force; ensure pin is square and fully seated before welding.
- Overpull/high spots: Use a broader pull (bridge or wiggle wire) to spread force. Tap highs while under light tension. Avoid aggressive slide hammering on thin skins.
- Panel oil-canning: Metal is stretched. Reduce tension and planish. Consider controlled heat-shrinking with a shrinking disc or spot heat (within OEM guidance). If severe, replacement may be more efficient.
- Uneven movement along a crease: Switch to wiggle wire or washer tabs across the crease. Alternate pull points; don’t focus on the deepest spot first.
- Stud removal marks too deep: Don’t grind aggressively. Twist studs off with pliers. If grinding is necessary, feather carefully with 80 grit and finish with finer grit before epoxy.
- Bridge foot dents: Ensure rubber feet are on solid areas; add protective pads; reduce tension; reposition feet to avoid unsupported sections.
- Winch/floor pull drift: Correct vector with snatch blocks or move the anchor. Lock vehicle position with chocks and tie-downs.
Quick Checklist Before You Pull
- Identify metal type and consult OEM repair info (avoid welding on UHSS/aluminum).
- Disconnect battery; follow HV safety on hybrids/EVs.
- Clean to bare metal at weld and ground locations.
- Test-weld a pin on scrap; verify strong twist-off removal.
- Select the pull method (slide, bridge, or floor) based on damage size.
- Stage fire protection and PPE; secure vehicle and anchors.
FAQs
Can I do this at home, on the driveway? What’s a realistic cost?
Yes, on mild damage with proper safety and power availability. A basic stud welder kit runs roughly $200–$700; slide hammers $30–$150; bridge pullers $80–$250; glue pull kits $60–$300. Portable winches are $50–$250, but you still need a safe anchor. Floor-pull work without rated anchors is not recommended at home. Add PPE, abrasives, primers, and fillers to the budget.
How do I remove the welded pins (“keys”)?
Grip with side cutters or pliers and twist; a properly welded pin will shear at the weld nugget. If a nub remains, dress it lightly with 80 grit. Avoid grinding through the parent metal. Do not lever the pin sideways; you’ll stretch or tear the panel.
Do I need wiggle wire, or are straight pins enough?
Use wiggle wire or washer tabs when pulling along a crease or when point pulls create highs. Wiggle wire spreads force across multiple welds, allowing a smoother, more uniform pull and less chance of overpulling a single spot.
My inexpensive stud welder seems weak. Any tips?
Ground on bright bare steel with a solid or magnetic ground; keep the gun tip clean; verify correct pin type and size; increase weld time one step at a time; allow cool-down to respect duty cycle; and shorten extension cords to reduce voltage drop. Many “budget” units work acceptably when grounding and surface prep are optimized.
Can I use stud welding on aluminum panels or ultra-high-strength steel?
No for aluminum with steel pins; use glue pulling or aluminum-specific repair systems. For UHSS and boron steel (often in reinforcements and intrusion beams), avoid heat-based dent pulling. Follow OEM procedures; replacement is often specified for damaged UHSS parts.
Is drilling holes and using a screw-type slide hammer acceptable?
Drilling and screwing into panels is an outdated practice that invites corrosion and weakens the panel. Stud welding or glue pulling preserves integrity and is the professional approach. Only consider drilling where OEM procedures explicitly allow it, and ensure proper corrosion protection.
Shop Paint & Finishing Tools
After metal work, finish cleanly with Automotive Paint & Finishing Tools for prep, priming, and refinishing.
- Surface prep: sanding blocks, abrasives, masking and mixing tools.
- Application: spray guns, cups/filters, stands and accessories.
- Finishing: polishers, pads, and inspection lights.
The Toolsource Technical Team blends decades of real-world automotive service experience with up-to-date technical research. Our writers collaborate with professional mechanics, shop owners, and diagnostic specialists to deliver practical, workshop-ready guidance you can trust.

Follow us on social media