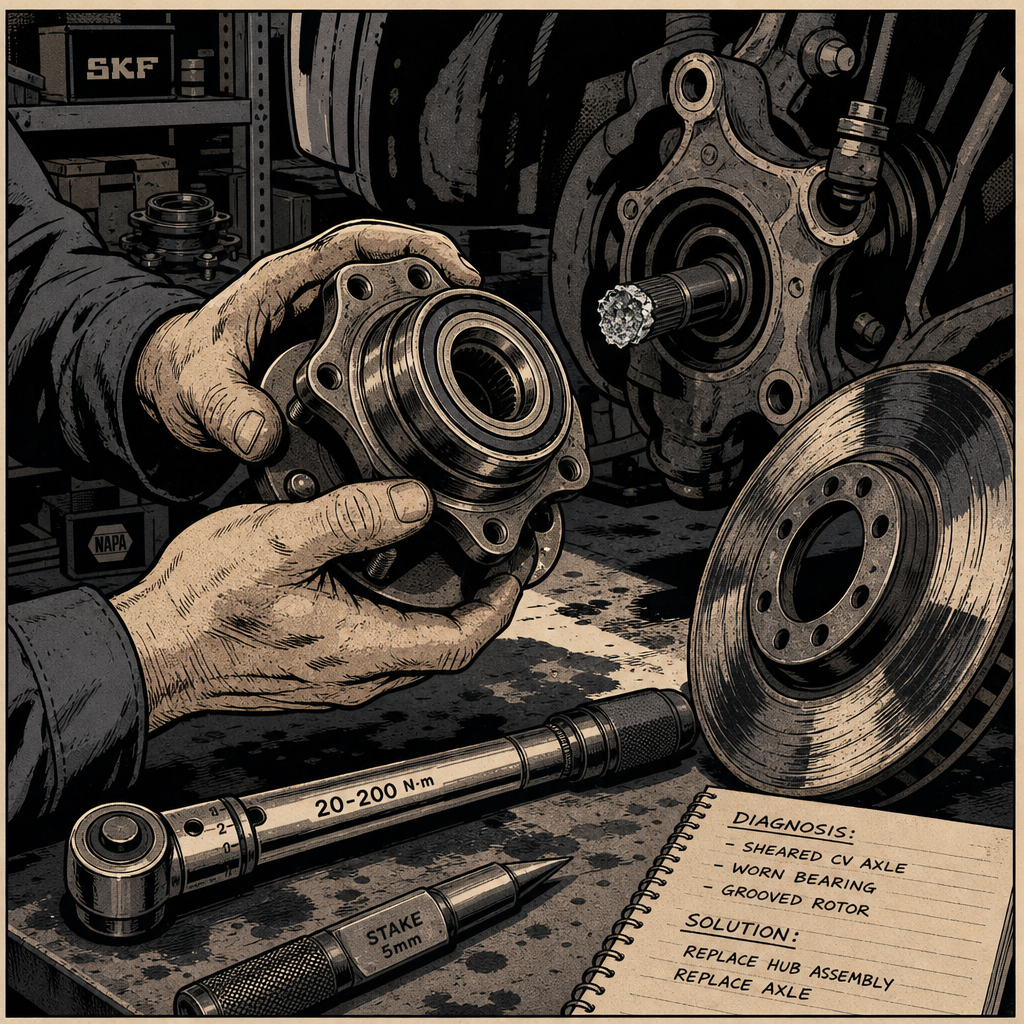
When a customer brings in a vehicle with a cleanly sheared CV axle nut, it’s tempting to treat it as a one-part fix: swap the axle, torque the new nut, send it down the road. But a nut and axle shaft don’t fail like that in isolation. In nearly every case seen in the field, a sheared axle stub is accompanied by a wheel bearing that’s already loose, a rotor with abnormal wear, or both. This piece walks through how to read the failure evidence correctly, what to inspect while the corner is apart, and how to avoid comebacks from treating a symptom instead of the root cause.
Reading the Fracture: Overtorque, Impact, or Fatigue?
Before ordering parts, look closely at the break itself — it tells you what kind of stress caused it. A clean, even fracture across the full cross-section, with no visible necking (stretching/thinning near the edges), usually points to a brittle failure rather than simple overtightening. If the metal was overtorqued into pure tensile overload, you’d typically expect some elongation or “necking” near the break where the material passed from its elastic zone into its plastic zone before separating. An even, crystalline-looking break straight across is more consistent with a stress riser — commonly right at the shoulder-to-thread transition of the axle stub, which is an inherent weak point by design — combined with axial or tangential loading rather than pure radial torque.
In practice, this usually means one of two things happened, often together: (1) the nut was torqued well beyond spec at some point (during a wheel bearing job, rotor swap, or axle service), weakening the shaft at the thread relief, or (2) a wheel bearing had already failed or loosened, allowing the hub and axle to move outside their normal plane and impose stress the shaft was never designed to handle. Don’t assume overtorque alone explains it — check the bearing before you write up the estimate.
Check the Wheel Bearing First
The axle nut isn’t just holding the axle in the hub — on most modern FWD and AWD vehicles with a fixed hub bearing, the clamping force from that nut is also what preloads and holds the wheel bearing assembly together. If the nut backs off, loosens, or shears, the bearing loses its clamping force immediately and can degrade rapidly from that point forward, even if it was fine before.
With the wheel off, check for:
- Play in the hub when you grab the tire at 12 and 6 o’clock and rock it — any perceptible movement means the bearing is compromised.
- Rough or notchy rotation when spinning the hub by hand with the axle nut removed.
- Visible scoring, heat discoloration, or galling on the hub flange where the rotor mounts.
If the bearing shows any play or roughness, replace it along with the axle — don’t reuse a bearing that’s been running without proper clamping force, even briefly. A wheel bearing that failed first is also a very plausible root cause of the axle shearing in the first place, since a wobbling hub imposes exactly the kind of off-axis load that snaps an axle stub cleanly rather than gradually.
{{PRODUCT_SEARCH_1}}
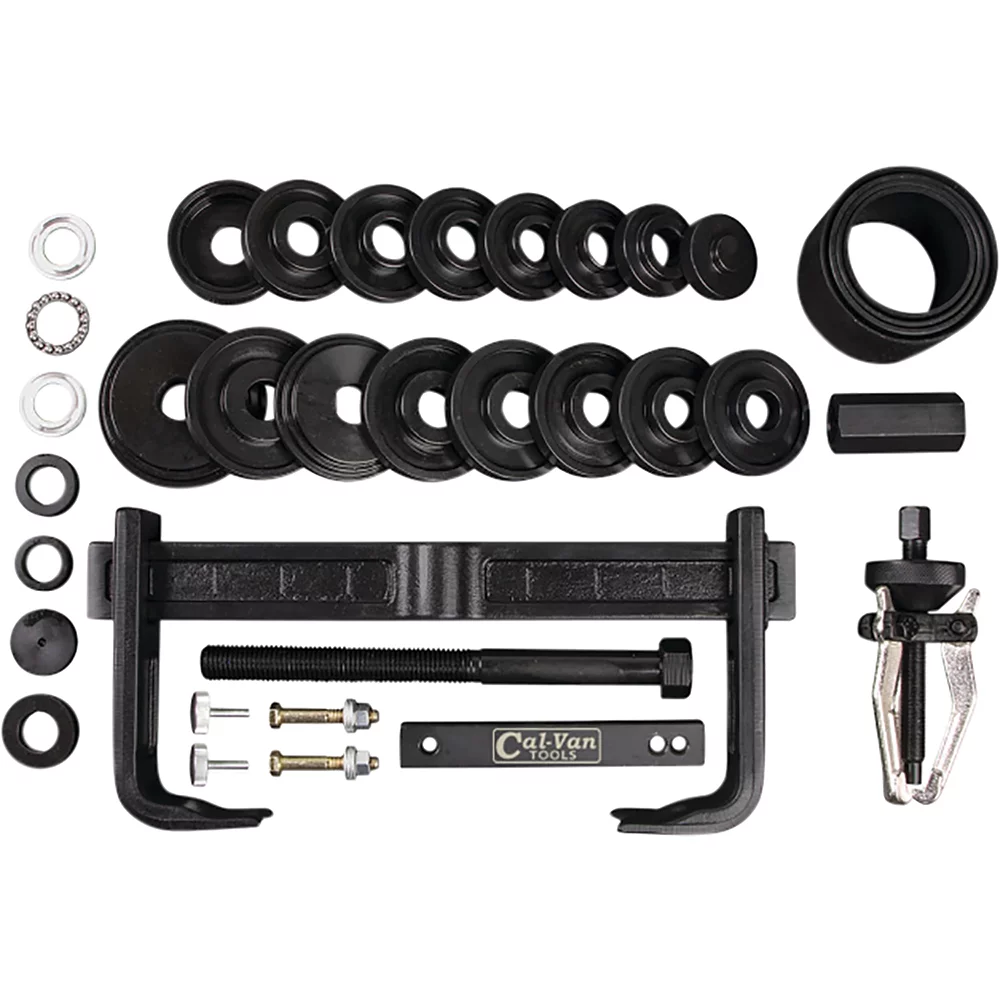
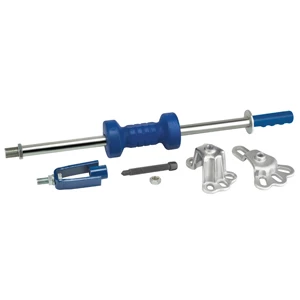
10 lb. Slide Hammer & Puller for Front Wheel Hubs & Rear Axles
Mfg: S & G Tool Aid
Part #: 66370
Inspect the Rotor and Brake Pads While It’s Apart
A sheared axle nut is frequently found alongside unusual rotor wear — a groove, gouge, or “racing stripe” pattern in the friction surface that doesn’t match normal pad wear. There are two common explanations, and you need to rule out both:
- Debris embedded in the pad — a rock or piece of hardware lodged in the pad material will cut a consistent groove into the rotor as the wheel turns. Pull both pads and check the friction material for embedded debris.
- Bearing-induced rotor deflection — if the wheel bearing was already loose, the rotor can develop horizontal runout (wobble) large enough to intermittently contact the caliper or a hardware component, producing uneven wear or metal-on-metal contact if pads had already worn through.
While the corner is disassembled, this is also the cheapest time to address pads and rotors if they’re anywhere near end of life. Comebacks for “you had it apart and didn’t catch this” are avoidable with a five-minute inspection.
Replacing the Axle: Full Assembly vs. Outer CV Joint Only
Once you’ve confirmed the bearing and brakes, address the axle itself. You have two paths:
- Replace the outer CV joint only — possible on some designs if the joint boot and inner joint are undamaged, but it requires pressing the old joint off and the new one on, typically needing a table vise or hydraulic press and a way to properly seat and stake the joint.
- Replace the complete axle assembly — on most vehicles this is the more practical choice. Rebuilt or new complete axles are widely available and often cost about the same as having just the outer joint rebuilt, without the labor risk of a botched press job.
For most shop environments, a complete axle assembly is the faster, more reliable call. Reserve the outer-joint-only approach for situations where the customer specifically wants to save the inner joint or the complete assembly isn’t readily available.
Torque and Stake the New Nut Correctly
Whatever caused the original failure, don’t repeat it. Axle nuts have a specified torque value for a reason — it sets bearing preload and clamping force within a narrow window. Too loose and the bearing and hub can work loose over time; too tight and you risk exactly the kind of stress-riser failure discussed above, especially over repeated heat cycles.
- Always torque to the manufacturer’s spec with a calibrated torque wrench — don’t rely on an impact gun “feel.”
- If the nut design calls for staking (deforming the nut into a groove on the axle shaft to prevent it from backing off), stake it properly. A missing or improper stake is a common contributor to nuts working loose or being over-torqued to compensate.
- Never reuse a nut that requires a new one per manufacturer service instructions — many axle nuts are single-use, torque-to-yield fasteners.
Check Alignment Before Returning the Vehicle
Any time a CV axle, wheel bearing, or hub assembly is replaced, camber and toe can shift slightly due to hub runout changes or disturbed hardware. It’s worth a quick alignment check, particularly if the vehicle showed any pulling, vibration, or uneven tire wear before the repair. This is a low-cost step that prevents a comeback for “new noise” or premature tire wear a few weeks later.
{{PRODUCT_SEARCH_2}}
Quick Reference Checklist
- Inspect the fracture surface — even/crystalline break suggests overtorque and/or bearing-induced stress, not simple wear.
- Check wheel bearing play and rotation before reassembly; replace if any looseness or roughness is present.
- Pull both brake pads and inspect for embedded debris and abnormal rotor wear.
- Decide between full axle assembly replacement vs. outer CV joint rebuild based on cost and shop capability.
- Torque the new nut to spec with a calibrated wrench and stake it if the design requires it.
- Do not drive or release the vehicle with a sheared axle nut under any circumstances.
- Recheck alignment after any hub, bearing, or axle replacement.
FAQs
Can I drive with a sheared axle nut and cracked axle stub?
No. The wheel can separate from the hub or the axle can disengage entirely, causing sudden loss of drive and control. Tow or trailer the vehicle instead.
Does a sheared axle nut always mean the wheel bearing is bad?
Not always, but it’s common enough that the bearing should be inspected every time. The nut’s clamping force is what holds many hub bearing assemblies together, so a shear event compromises the bearing going forward even if it wasn’t the original cause.
Is it cheaper to rebuild the CV joint or replace the whole axle?
A complete new or remanufactured axle assembly is often close in price to having just the outer joint rebuilt, and it avoids the labor and risk of pressing joints on and off. Most shops default to full assembly replacement unless there’s a specific reason not to.
What causes an axle nut to be overtorqued in the first place?
Usually an impact gun used without a follow-up torque check, or a tech using “feel” instead of the spec value. It can also happen when someone stakes a nut down onto an axle groove and cranks it further to align the stake rather than adjusting position.
Why does the rotor have a groove or gouge pattern in the middle of the pad contact area?
Most often debris — a small rock or metal fragment — was lodged in the pad and cut into the rotor as it rotated. It can also result from rotor wobble caused by a failing wheel bearing making intermittent contact with hardware.
Do I need an alignment after replacing a CV axle and wheel bearing?
It’s recommended. While axle and bearing replacement doesn’t directly set toe or camber, disturbed hardware and hub runout changes can shift alignment slightly, and it’s a low-cost check compared to a tire-wear comeback.
CV Joint Tools for This Repair
Properly diagnosing and replacing a CV axle requires the right tools to press joints, inspect bearings, and torque fasteners to spec. Browse our CV Joint Tools selection to find what you need.
- Joint removal, installation, and pressing equipment
- Bearing and hub inspection tools
- Torque wrenches and staking tools

The Toolsource Technical Team blends decades of real-world automotive service experience with up-to-date technical research. Our writers collaborate with professional mechanics, shop owners, and diagnostic specialists to deliver practical, workshop-ready guidance you can trust.


Follow us on social media