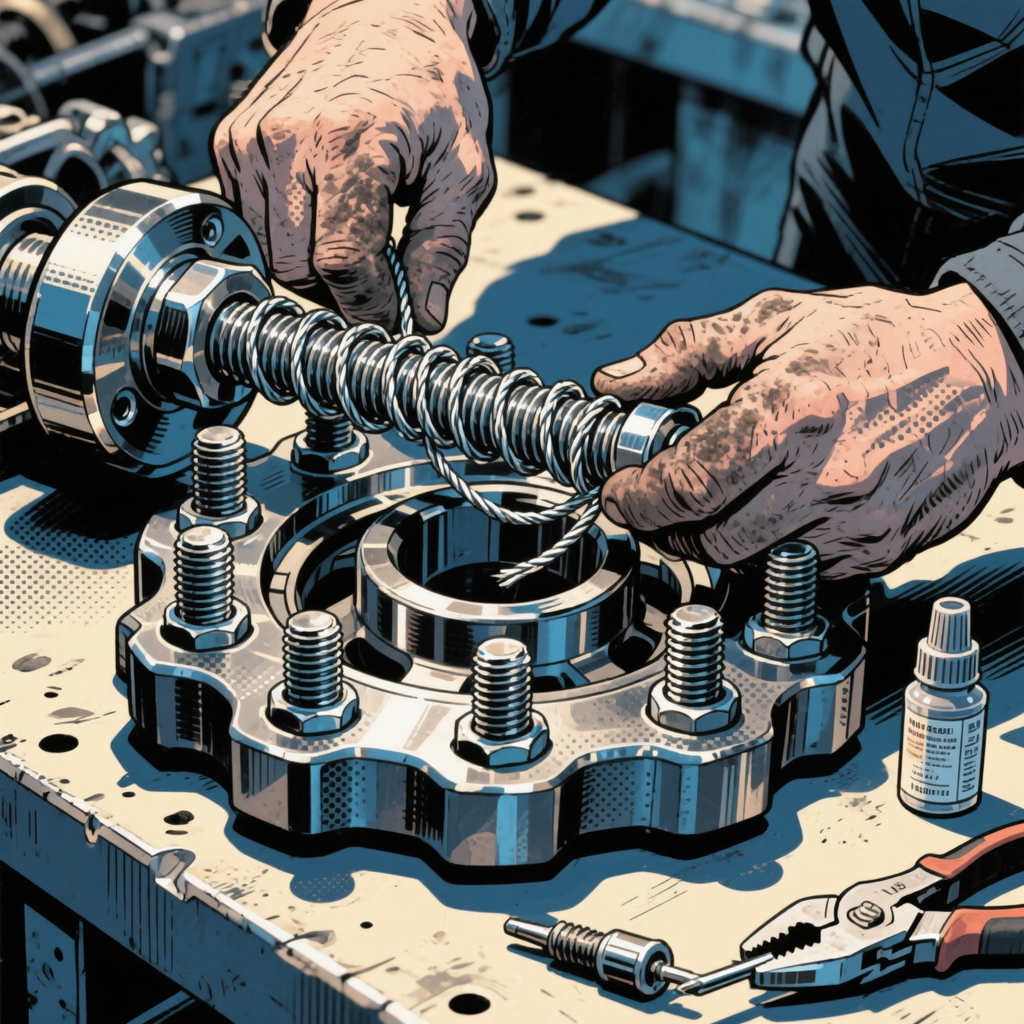
Safety wire—also called lockwire—serves as a mechanical failsafe that prevents fasteners from backing out due to vibration, thermal cycling, and rotational forces. While commonly associated with aircraft maintenance, safety wire has proven critical in high-performance automotive applications, particularly for ring gear bolts in limited-slip differentials that experience extreme loads and RPM ranges. When installed correctly, safety wire provides positive retention that supplements thread-locking compounds, ensuring fasteners remain torqued to specification throughout demanding track sessions or competition use. This guide breaks down proper safety wire technique based on both aviation standards and real-world automotive application, focusing on the specific challenges of ring gear bolt retention in performance differentials.
Understanding Safety Wire Function and Material Selection
Safety wire works by creating a positive mechanical connection between multiple fasteners, arranged so that any rotational force tending to loosen one bolt will tighten its neighbor. The wire must be installed in the “direction of tightening”—meaning if a bolt loosens and rotates counterclockwise, the wire pulls it back clockwise toward the tightened position. This principle requires careful attention to wire routing and twist direction during installation.
Material selection directly impacts performance and longevity. Most automotive applications use 0.032-inch or 0.041-inch diameter stainless steel safety wire (MS20995). The 0.041-inch wire provides greater tensile strength for high-horsepower applications where differential ring gear bolts experience significant loading. Stainless steel resists corrosion from gear oil and maintains tension through thermal cycles. Some technicians attempt to use 0.032-inch wire on ring gear applications, but several field failures have been documented when bolt torque values exceed 70 ft-lbs or when differential output exceeds 600 horsepower. The heavier 0.041-inch wire provides the necessary margin for these demanding conditions.
Breaking strength matters more than cosmetic appearance. While tightly-twisted wire may look professional, over-twisting reduces wire ductility and can cause premature failure at stress points. The wire must retain enough flexibility to absorb slight bolt movement during thermal expansion without snapping.
Twist-Per-Inch Specifications: The Critical Standard
The most common technical error in automotive safety wire installation involves excessive twisting. Aviation standard AC43.13-1B specifies 6-8 twists per inch for general applications, with 10-12 twists per inch as an acceptable maximum. Many automotive technicians, particularly those new to lockwire technique, produce 15-20 twists per inch—creating wire that appears tight and professional but actually becomes brittle and prone to failure.
Excessive twisting work-hardens the stainless steel wire, reducing its ability to flex under load. When a differential heats up during operation, ring gear bolts undergo slight thermal expansion. Properly-twisted safety wire accommodates this movement; over-twisted wire snaps at the first stress point, typically where it wraps around a bolt head. Once broken, the wire provides zero retention and may become foreign object debris (FOD) that damages gear teeth or bearing surfaces.
Achieving proper twist density requires either disciplined hand-twisting technique or correct use of safety wire pliers. When twisting by hand, hold wire ends perpendicular to each other and maintain consistent tension while rotating. Count twists against a ruler or marked reference to develop muscle memory for the 6-8 TPI target. Safety wire pliers speed the process but tend to over-twist if used carelessly. Apply steady pulling tension while operating the pliers, and stop every inch to verify twist count. New technicians should master hand-twisting before relying on pliers—this builds the tactile sense for proper tension that prevents both under-twisting (loose wire that provides inadequate retention) and over-twisting (brittle wire that fails prematurely).
The pigtail termination at each end of a safety wire run can be twisted tighter than the main span—12-15 twists in the final half-inch provides secure anchorage without compromising the main wire’s flexibility. This “blend” technique transitions from the 6-8 TPI specification along the main run to tighter wraps immediately at the bolt head, ensuring the wire seats firmly in the drilled hole or shoulder without backing out.


Step-by-Step Ring Gear Bolt Safety Wire Installation
Proper installation begins before the wire is ever cut. Ring gear bolts must be torqued to manufacturer specification using a calibrated torque wrench, following the prescribed tightening sequence. ARP ring gear bolts typically require 75-85 ft-lbs with their proprietary ultra-torque fastener assembly lubricant. Allow torqued fasteners to settle for 10-15 minutes, then verify torque values before beginning safety wire installation. Some technicians apply thread-locking compound (Loctite 271 or equivalent) in addition to safety wire; while this provides additional insurance, the presence of thread-locker does not eliminate the need for proper lockwire technique.
Cut a length of safety wire approximately 1.5 times the span between bolt pairs you intend to connect. For a typical ring gear with 10-12 bolts arranged in a circular pattern, plan to connect bolt pairs or create a continuous chain around the entire circumference. Thread one end of the wire through the drilled hole in the first bolt head, leaving approximately 2 inches of tail. If bolts feature a shoulder below the head (common on ARP hardware), route the wire under this shoulder for positive retention.
Begin twisting using either hand technique or safety wire pliers. Maintain tension so the wire pulls slightly toward the direction of tightening. Route the wire to the second bolt, threading it through the drilled hole, then create the twisted span between bolts. The wire must exit each bolt head on the side that opposes loosening rotation—for standard right-hand threads, this means the wire pulls from each bolt head in a clockwise direction when viewed from above.
Continue the pattern around the ring gear, connecting all bolts in series. At the final bolt, create a pigtail termination by twisting the remaining wire tail back on itself for 12-15 twists, then trim the pigtail to 0.25-0.375 inches and bend it flat against the bolt head. Use diagonal cutters to create a clean cut without leaving sharp edges that could snag or cut fingers during future service. Some technicians bend the pigtail toward the bolt head; others bend it parallel to the wire run. Either method works provided the pigtail cannot catch on rotating components or work loose during operation.
Quality Control and Inspection Criteria
After installation, inspect each safety wire connection using a fingernail test: attempt to lift the twisted wire span over the bolt head. Properly installed wire should be tight enough that you cannot slip it over the bolt head without tools. If wire lifts easily, tension is insufficient—the wire will provide minimal retention and must be reinstalled. The wire should not be so tight that it deforms the bolt head or shows signs of yielding (necking down at stress points).
Check twist-per-inch count across multiple spans. Consistency matters—a single section with 15+ TPI creates a stress concentration that may fail even if surrounding sections meet specification. Verify that wire routing follows the direction of tightening for every bolt. A single reversed connection compromises the entire safety wire system by creating a path for the bolt to loosen.
Examine pigtail terminations for proper length and bending. Pigtails longer than 0.375 inches risk catching on differential components or becoming FOD if they break loose. Sharp wire ends must be bent flat or trimmed smooth. Run your fingers along the entire wire path to identify any sharp points that could cause injury during future maintenance.
Document your work with photos showing overall installation pattern and close-ups of individual connections. This provides a reference for future rebuilds and helps identify any changes or failures during post-run inspection. Date and initial the differential housing with a paint pen to track when safety wire was installed—this helps maintenance scheduling, as safety wire should be inspected after every major event or every 20 hours of operation, whichever comes first.
Common Mistakes and How to Avoid Them
The most frequent error remains excessive twist-per-inch count, typically resulting from over-enthusiastic use of safety wire pliers or attempting to make the installation “look professional” rather than following specification. Remember that function outweighs appearance—slightly loose-looking wire that meets 6-8 TPI will outperform cosmetically perfect wire twisted to 18 TPI. If you catch yourself thinking “just a few more twists to tighten it up,” stop and measure your TPI count.
Wire routing errors create installations that look correct but fail functionally. Each wire span must pull in the direction that opposes loosening. On circular ring gear bolt patterns, this typically creates a “clockwise” or “counterclockwise” flow around the entire ring. If even one connection reverses this flow, that bolt can loosen despite being safety wired. Before twisting each span, pause and verify which direction the bolt would rotate if loosening, then route wire to oppose that motion.
Inadequate wire diameter for the application causes failures that superficially appear to be installation errors. If you’re experiencing broken safety wire on ring gear bolts despite proper TPI and routing, the wire gauge may be insufficient for your torque and horsepower levels. Moving from 0.032-inch to 0.041-inch wire significantly increases tensile strength and fatigue resistance with minimal increase in installation difficulty.
Failing to verify bolt torque before safety wire installation is common when technicians are rushed or when adding safety wire to an existing assembly. Loose bolts will back out regardless of wire installation quality. Always verify torque immediately before installing safety wire, and mark bolts with a paint pen after torquing to provide visual confirmation of correct installation.
Reusing safety wire introduces fatigue failures. Once wire has been twisted, cut, and bent, the material has been work-hardened and stress points have been established. Installing new wire takes 10-15 minutes and costs less than two dollars—reusing old wire to save a few minutes risks differential failure that causes thousands in damage and potential safety hazards on track.
Safety Wire Installation Checklist
- Verify all ring gear bolts torqued to specification using calibrated wrench
- Select appropriate wire diameter (0.041-inch for high-performance applications)
- Cut wire to 1.5x the span length needed
- Route wire in direction opposing bolt loosening rotation
- Maintain 6-8 twists per inch on main wire spans
- Use 12-15 twists per inch only on pigtail terminations
- Trim pigtails to 0.25-0.375 inches and bend flat
- Perform fingernail test—wire should not lift over bolt heads
- Inspect for sharp edges and smooth all wire cuts
- Photograph installation for future reference
- Date and initial differential housing with paint pen
- Schedule inspection after 20 hours operation or major event

Differential Side Bearing Installer T57L-4221-A2
Mfg: OTC Tools and Equipment
Part #: 205-010
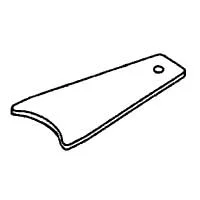
Differential Shim Installer Ford T85L-4067-AH
Mfg: OTC Tools and Equipment
Part #: 205-220

Frequently Asked Questions
Can I use safety wire instead of thread-locking compound?
Safety wire and thread-locker serve complementary functions. Thread-locker prevents initial loosening by increasing breakaway torque; safety wire provides mechanical retention if a bolt does begin to rotate. Best practice for critical fasteners like ring gear bolts uses both methods—apply thread-locker during assembly, torque to specification, then install safety wire as a secondary failsafe. Neither method alone provides the reliability of combined installation.
How do I know if my safety wire has failed during operation?
Post-run inspection should include close examination of all safety wire installations. Look for broken wire strands, loose pigtails, wire that has slipped over bolt heads, or any discoloration indicating excessive heat. If wire appears stretched or shows necking at stress points, it has experienced load and should be replaced even if not completely broken. Any bolt that has backed out will show gaps in the ring gear mating surface or torque stripe paint marks that no longer align.
What’s the difference between safety wire technique for automotive vs. aircraft applications?
Aviation standards (AC43.13-1B) provide the foundation for all safety wire technique, including automotive applications. The core principles—6-8 TPI, directional routing, proper tension—remain identical. Automotive applications may tolerate slightly higher TPI (up to 10-12) for aesthetic reasons, and pigtail requirements may be less stringent when there’s no risk of the assembly passing pre-flight inspection. However, any deviation from aviation standards should be carefully considered, as these specifications represent decades of field experience with safety-critical fasteners.
Should I safety wire every bolt on the differential?
Ring gear bolts are critical fasteners that absolutely require safety wire in racing or high-performance applications. Differential cover bolts typically do not require safety wire if proper gasket sealant and torque specifications are followed. Pinion nut installations vary—some use castle nuts with cotter pins, others use prevailing torque nuts that don’t accommodate safety wire. Focus safety wire efforts on fasteners where loosening would cause immediate catastrophic failure, particularly those experiencing rotational forces in line with the loosening direction.
Can I install safety wire on bolts that weren’t drilled for it?
Drilling existing bolts to accommodate safety wire requires careful technique to avoid weakening the fastener. Use a drill press (never a hand drill), proper cutting fluid, and a bit size that creates adequate wire clearance without removing excessive material—typically 0.041-inch hole for 0.032-inch wire. Drill through the head parallel to the bolt axis, positioning the hole to allow proper wire routing. Many technicians prefer to replace solid-head bolts with pre-drilled hardware (such as ARP ring gear bolt kits) rather than risk damaging existing fasteners with improper drilling technique.
How often should safety wire be replaced?
Inspect safety wire after every significant event or every 20 hours of operation. Replace wire immediately if inspection reveals any breaks, excessive stretching, or looseness. Even if wire appears intact, replace it during major service intervals—differential rebuilds, ring gear replacement, or any time bolts are removed for inspection. Safety wire is inexpensive insurance; replacing wire preemptively costs far less than repairing damage from a failed fastener. Track-only vehicles should replace safety wire at the beginning of each season regardless of condition to eliminate any fatigue accumulated during the previous year.
Recommended Tools for Safety Wire Installation
Proper lockwire technique requires the right equipment to achieve consistent twist-per-inch specifications and secure terminations. Our Automotive Specialty Tools selection includes safety wire, precision pliers, and measurement aids designed for professional-grade fastener retention on differential assemblies and other critical applications.
- Safety wire in 0.032-inch and 0.041-inch stainless steel diameters
- Safety wire pliers and hand-twisting tools for accurate TPI control
- Diagonal cutters and finishing tools for clean pigtail terminations

The Toolsource Technical Team blends decades of real-world automotive service experience with up-to-date technical research. Our writers collaborate with professional mechanics, shop owners, and diagnostic specialists to deliver practical, workshop-ready guidance you can trust.


Follow us on social media