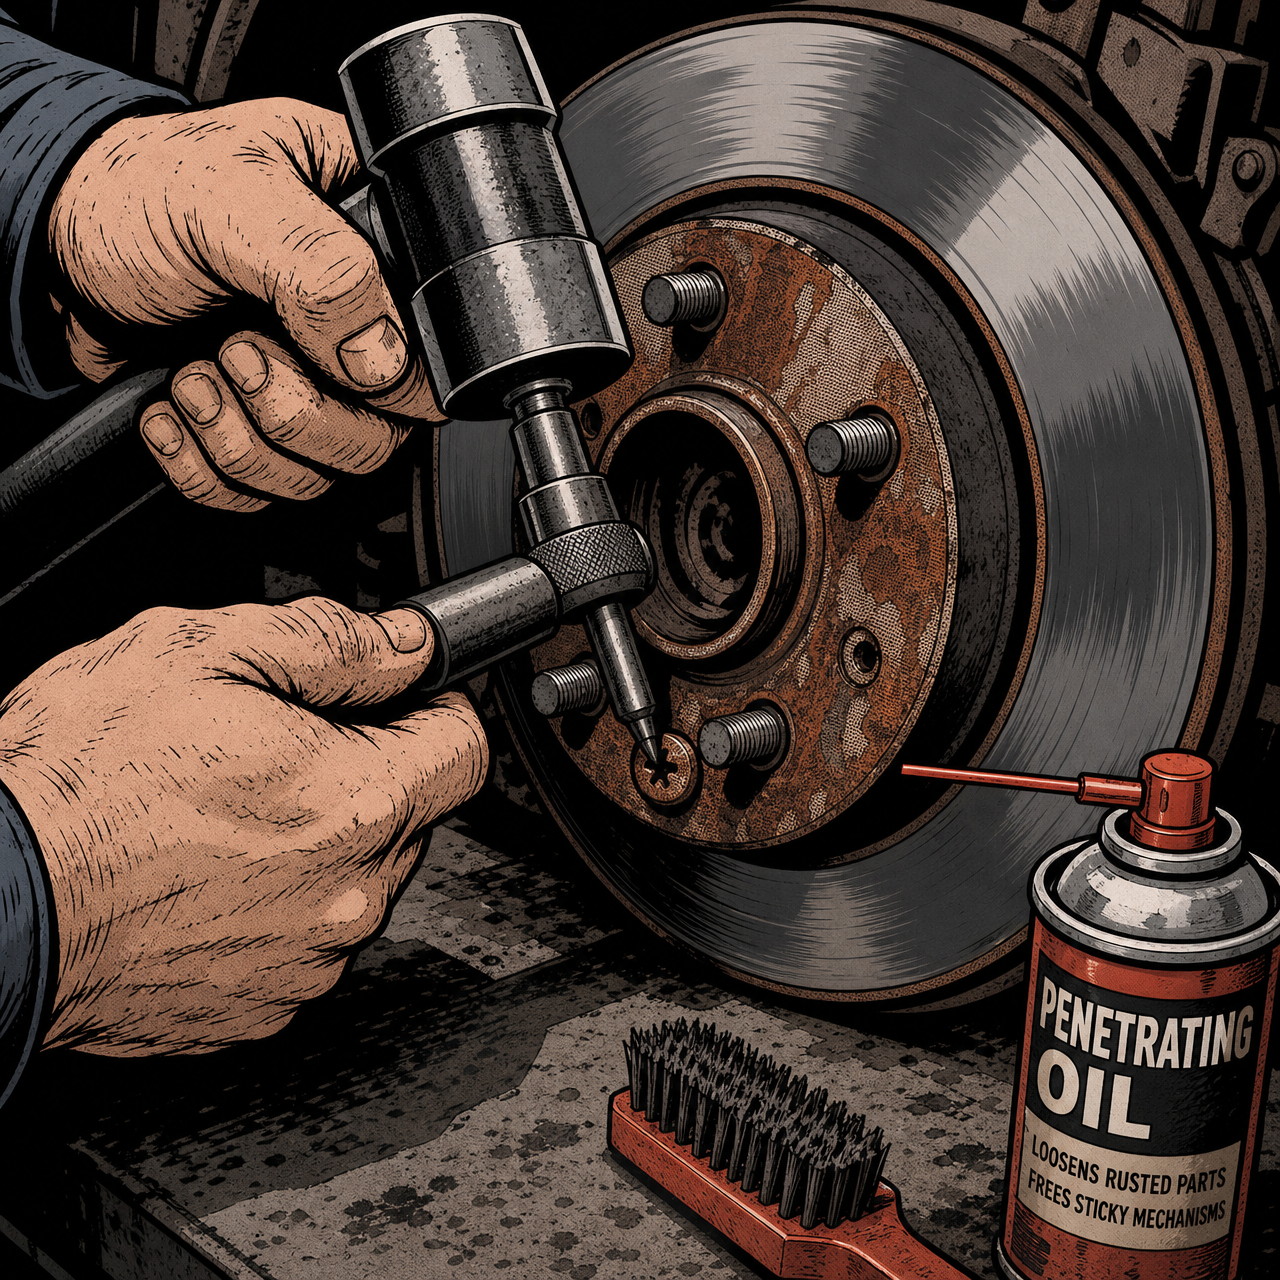
Every tech has a story about the two tiny Phillips (or JIS) screws holding a brake rotor to the hub. They’re small, they’re cheap, and on a vehicle that’s spent a few winters in road salt, they can turn a 15-minute brake job into a 45-minute fight involving drill bits, cuss words, and a trip to the parts counter for a replacement rotor. This guide covers what those screws are actually for, the tool that makes removal a non-issue, how to handle the ones that are already seized, and what to do with them once the rotor is off.
What Rotor Retaining Screws Are Actually For
These screws are an assembly-line aid, not a functional safety component. On the production line, rotors are slid onto the hub and held in place with one or two small screws so the rotor doesn’t rattle, shift, or fall off while the vehicle moves down the line and gets its wheels, calipers, and suspension components installed. Once the wheel is torqued onto the hub, the wheel itself clamps the rotor against the hub flange with far more force than those screws ever could.
In other words, after the car leaves the factory, the screws have no remaining structural job. They don’t affect rotor runout, they don’t prevent warping, and they don’t contribute to braking performance. Their only post-production function is convenience — keeping the rotor from sliding off the hub studs while you’re lining up the caliper and bracket during a brake job. That’s a real convenience, which is why plenty of techs still use them; it’s just not a safety requirement.
The One Tool That Makes These Screws a Non-Issue
If you’ve ever stripped one of these screws with a cordless impact driver or a hand screwdriver, the problem usually isn’t the screw — it’s the tool. A rotary impact driver can cam out of a corroded Phillips or JIS head before it generates enough torque to break the rust loose. The fix that comes up over and over among techs who deal with this constantly is the manual (hammer) impact driver: a handle with a square-drive bit holder that converts a hammer strike into rotational torque. You seat the correct bit in the screw head, hold it square, and strike the end with a hammer. The downward force keeps the bit from camming out while the rotational snap breaks the corrosion bond.
A few practical notes on using one:
- Match the bit to the head exactly — many of these screws use a JIS #3 head, which looks like a Phillips #2 or #3 but has a different tip profile. A mismatched bit is the fastest way to strip the head.
- Keep the driver square to the screw before you strike. Angled strikes round out the head just as fast as a worn-out power tool.
- One firm hammer strike is usually enough to break a rusted screw loose. If it doesn’t move after two or three solid hits, stop and move to the rust-removal steps below rather than continuing to hammer on a head that’s starting to round.
This is a cheap tool — most hardware and tool stores carry one for well under $20 — and it pays for itself the first time it saves you from drilling out a screw or ruining a rotor’s center bore.
{{PRODUCT_SEARCH_1}}


Vessel 8 Pc Megadora Impacta Assorted Screwdriver Set
Mfg: Vessel Tools USA
Part #: 980MIXEVA
Step-by-Step Removal Procedure
For a screw that isn’t badly corroded, the process is straightforward:
- Clean the screw head with a wire brush to clear surface rust and debris so the bit seats fully.
- Select the correct bit size and type (Phillips vs. JIS) and seat it firmly in the driver.
- Apply steady inward pressure, keep the driver perpendicular to the screw, and strike the driver’s end cap once with a hammer while applying slight counterclockwise pressure.
- Back the screw out by hand or with light driver rotation once it’s broken loose — don’t force it if it binds partway out.
- Repeat on the second screw, then lift the rotor off the hub.
If a screw spins freely but won’t back out, or the head starts to round before it breaks loose, stop and move to the next section rather than continuing to work a failing head.
Dealing With Rust-Seized Screws
On rust-belt vehicles or anything that’s sat outside for years, these screws can seize into the hub hard enough that even a manual impact driver won’t move them on the first try. A few escalation steps, in order of least to most destructive:
- Penetrating oil and time. Soak the screw heads and let it work for 10-15 minutes before attempting removal again. This alone resolves a lot of moderately rusted screws.
- Heat. A small torch applied briefly to the screw head (not the rotor’s friction surface) can break the rust bond through thermal expansion. Use this carefully and only when the rotor is being replaced anyway, since heat near a rotor you intend to reuse isn’t ideal.
- Re-strike with the manual impact driver. After oil or heat, a second attempt often succeeds where the first didn’t.
- Drill out as a last resort. If the head is already rounded or the screw won’t budge after the above, center-drill the head with a bit sized to just clear the screw shank, then remove the remaining shank with pliers or an extractor. This is a last resort because it risks damaging the hub’s screw hole threads and takes meaningfully longer than any of the earlier steps.
Drilling out a seized screw is far more common on vehicles where the screws were installed dry with no corrosion protection and left for years. It’s avoidable on the next service interval — see the prevention section below.
Reinstall or Toss: What to Actually Do
There’s no mechanical requirement either way, so this comes down to shop practice and what the vehicle is likely to need next time:
- Reinstalling keeps the rotor seated neatly for the next technician and preserves the “as the manufacturer built it” appearance customers sometimes expect, especially on vehicles being sold or inspected closely.
- Leaving them out is completely fine functionally. The wheel clamps the rotor regardless, and skipping two screws saves time with zero effect on braking or safety.
- If a screw was destroyed getting it out (stripped head, drilled out), don’t force a damaged screw back in or leave a shard in the hole — clear the hole and either install a fresh screw of the correct size or leave it empty. A stripped screw left half-threaded can interfere with rotor seating.
Whichever way you go, note it on the repair order if the customer asks, since this is one of those details that occasionally comes up in a comeback conversation.
Preventing the Problem Next Time
If you’re reinstalling the screws, a thin coat of anti-seize or dielectric grease on the threads prevents the next person (possibly you, in a few years) from fighting the same battle. Avoid thread-locking compound on these — it defeats the point of preventing seizure and adds unnecessary difficulty for the next removal with no functional benefit, since the screws aren’t a torque-critical fastener. If you’re the shop doing new-rotor installs, anti-seize on these threads before reinstallation is a 30-second step that saves real labor time down the road.
Quick Checklist
- Confirm bit type — Phillips vs. JIS #3 — before attempting removal
- Use a manual impact driver, not a cordless impact, on corroded screws
- Soak with penetrating oil if the screw doesn’t break loose on the first strike
- Apply heat only if the rotor is being scrapped anyway
- Drill out only as a last resort, sized to clear the shank without damaging hub threads
- Anti-seize the threads before reinstalling, skip thread locker
- Clear any stripped remnants from the hole before closing up the job
{{PRODUCT_SEARCH_2}}

FAQs
Are rotor retaining screws necessary for safe braking?
No. Once the wheel is torqued to spec, it clamps the rotor against the hub with far more force than these screws provide. They have no function related to braking performance or safety after the wheel is installed.
What size and type of bit do these screws typically use?
Many Japanese-brand vehicles use a JIS #3 head, which resembles a Phillips #2 or #3 but has a steeper tip angle. Using a standard Phillips bit on a JIS head is a common cause of stripped screws. Check the head profile closely before choosing a bit.
Can I just use my cordless impact driver instead of a manual one?
You can try, but a rotary impact driver is more likely to cam out of a corroded head before generating enough torque to break it loose, which strips the screw. A manual hammer-type impact driver applies axial force and rotational torque simultaneously, which holds the bit in the head and breaks corrosion more reliably.
What if I strip the screw head and can’t get a bit to grip at all?
Try a slightly oversized bit or a bit extractor designed for stripped fasteners first. If the head is too damaged to grip anything, center-drill it and remove the remaining shank with pliers or an extractor as a last step.
Should I reinstall the screws after a rotor replacement?
It’s optional. Reinstalling keeps things tidy for future service and matches factory appearance; leaving them out has no downside for braking function. If you reinstall, use a light coat of anti-seize on the threads first.
Will leaving these screws out cause the rotor to rattle or shift?
No, as long as the wheel is properly torqued. The wheel’s clamping force against the hub and rotor is what keeps everything seated; the retaining screws were only needed before the wheel was installed.
Recommended Tools
Rotor retaining screws call for the right approach and the right tools. Explore General Brake Service Tools to find what you need for efficient, damage-free brake work.
- Manual impact drivers and bit sets designed for corroded fasteners
- Screw extractors and removal specialists for stripped or seized heads
- Penetrating oils and anti-seize compounds for corrosion management

The Toolsource Technical Team blends decades of real-world automotive service experience with up-to-date technical research. Our writers collaborate with professional mechanics, shop owners, and diagnostic specialists to deliver practical, workshop-ready guidance you can trust.


Follow us on social media