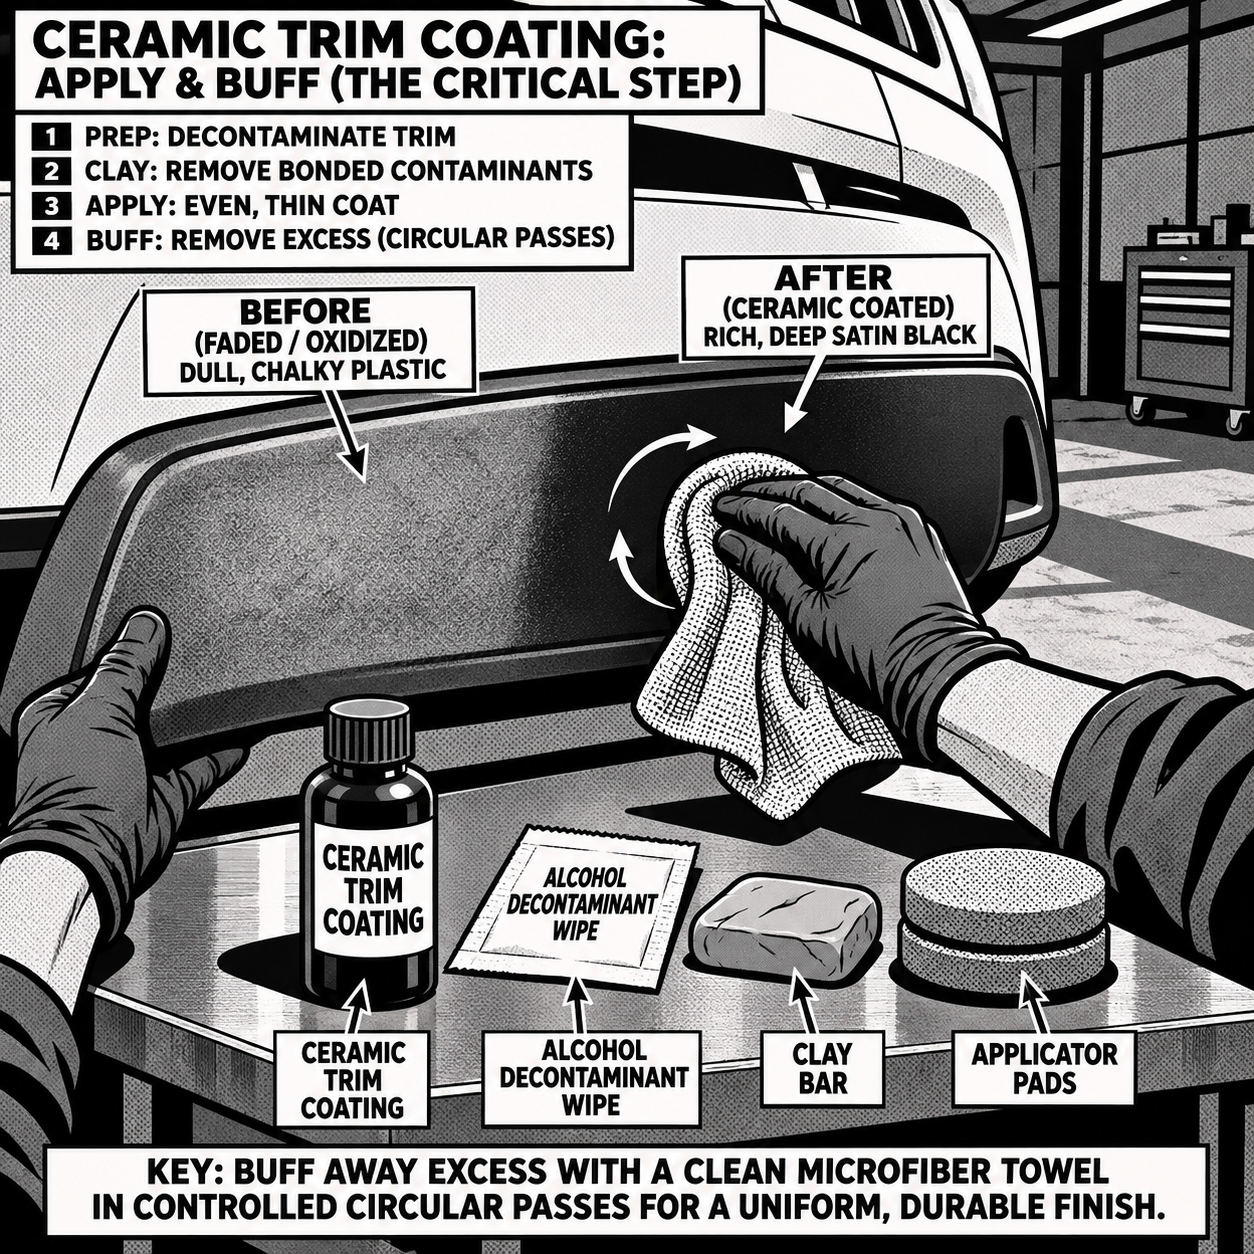
Faded, chalky plastic trim is one of the most common cosmetic complaints that rolls into a shop — cowls, fender flares, rocker panels, and bumper inserts all take direct UV exposure and oxidize over time. Ceramic trim coatings have largely replaced old-school trim dressings because they last years instead of weeks, but they’re also easy to apply wrong. Get the technique off and the part looks shiny and cheap instead of a rich OEM-style satin black. Here’s a practical breakdown of prep, product choice, and application that holds up in daily-driver conditions.
Why Plastic Trim Fades in the First Place
Unpainted exterior plastic (ABS, TPO, or polypropylene blends) doesn’t have a clear coat protecting it, so UV radiation attacks the plasticizers and carbon black pigment directly. The surface oxidizes, pigment migrates, and the result is that grayish, chalky look customers describe as “sun-faded.” Heat cycling accelerates it — parts near the windshield cowl, A-pillars, and anything facing the sun most of the day fade faster than trim on shaded panels. This matters for the fix: oxidized plastic has a porous, degraded surface layer, so whatever coating goes on needs to either penetrate and restore that layer or bond cleanly to what’s left of it. Skipping decontamination means you’re coating over dirt and oxidation byproducts, which is the single biggest reason restorations fail early.
Prep Work: The Step Everyone Underestimates
Surface prep determines whether a trim coating lasts two years or two months. The process technicians report having the most success with:
- Wash the panel with a dedicated plastic-safe cleaner or an APC diluted for trim — avoid anything with heavy wax or silicone content left over from a prior detail.
- Clay or use a dedicated trim-prep wipe to pull embedded contamination out of the pores.
- Degrease with isopropyl alcohol (iso-rich panel wipe, not a wax-and-grease remover that leaves residue) and let it fully evaporate.
- Confirm the panel is at ambient temperature — never apply a trim coating to hot plastic. Heat flashes the solvents too fast and causes uneven bonding and streaking, which is one of the most frequently repeated warnings from techs who’ve had coatings fail.
- If the trim is heavily oxidized, a light compound or dedicated plastic restorer pass before the coating goes down helps the product lay evenly instead of pooling in degraded texture.
Work in the shade or in a climate-controlled bay. Direct sun during application causes the same flash-curing problem as hot plastic and is the top cause of blotchy, inconsistent results.
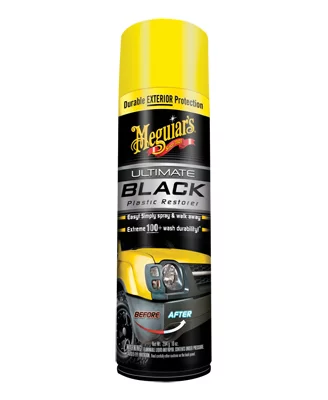


Medium Gray Bumper Coater Spray - SEM 39183 Aerosol 12oz
Mfg: Sem Products
Part #: 39183
Choosing the Right Product for the Job
Not every trim coating is formulated for the same scenario, and using the wrong one causes avoidable comebacks. Two categories matter most:
Restoration coatings are built for trim that’s already faded or oxidized. These are typically higher-solids formulas (sometimes grouped under “ceramic coating” branding for trim) designed to fill in degraded texture and lock in a deep black finish long-term. They’re more forgiving of surface imperfections but less forgiving of sloppy application — excess product left unbuffed is what causes the glossy, cheap-looking finish that gives this category a bad reputation among people who’ve only seen it done poorly.
New-plastic protectants are a different formula entirely, meant for trim straight from the factory or from a part supplier that hasn’t oxidized yet. These are lower-build, breathable coatings that let new plastic continue off-gassing normally while still blocking UV. Putting a heavy restoration coating on brand-new trim can trap off-gassing and lead to clouding or an uneven cure. If you’re doing a full front-end refresh with new OEM or aftermarket trim pieces alongside existing faded trim, you may need both products — restorer on the old parts, protectant on the new ones.
[PRODUCT_SEARCH: query=”ceramic trim restorer for faded plastic bumper” context=”mid-article”]
Application Technique: Where Most Jobs Go Wrong
The application itself is simple in concept — apply, let it flash, buff off excess — but the margin for error is tighter than most dressings. Key points from experienced applicators:
- Use thin, even coats. Trim coatings are not meant to be applied like a wax with a thick, visible layer — more product does not mean more durability, it means more excess to buff.
- Work small sections at a time, especially on textured or recessed trim (fender flares, rocker cladding) where pooling is easy to miss until it’s already flashed.
- Immediately buff off heavy spots with a clean, dry, throwaway microfiber — don’t wait until the whole panel is coated. High spots that are allowed to cure before buffing are what create the patchy, glossy look that reads as cheap rather than factory-satin.
- Check panel edges, seams, and fastener recesses specifically — these trap excess product more than flat surfaces and are the first place uneven gloss shows up.
- Let the coating cure per the product’s instructions (usually 12–24 hours) before the vehicle sees rain or a wash.
Done correctly, the finish should look satiny and slightly matte — close to a factory-fresh black — not wet or glossy. If a panel comes out shiny, that’s almost always excess product that wasn’t buffed off in time, not a flaw in the product itself.
Maintenance and Touch-Ups
One advantage of ceramic-style trim coatings over older dressings is how easy touch-ups are. A quick wipe-on reapplication to a localized faded or scuffed spot blends in without redoing the whole panel, and most coatings hold up well under normal washing once cured. For vehicles that see heavy sun exposure or frequent off-road use (fenders and rocker panels catching debris), expect to spot-touch high-wear areas annually even if the main coating is rated for multiple years. Keep a dedicated microfiber for trim-only use — the same towel used on paint can transfer wax or sealant residue that interferes with trim coating adhesion on the next application.
Quick Reference Checklist
- Wash and clay the trim; remove all wax/sealant residue
- Degrease with an iso-based panel wipe and let it fully evaporate
- Confirm the panel is cool to the touch and out of direct sun
- Match the product to the trim condition — restorer for oxidized, protectant for new
- Apply thin, even coats in small sections
- Buff off high spots immediately, before the product flashes
- Check seams and recessed areas for pooling before moving on
- Allow full cure time before washing or rain exposure
[PRODUCT_SEARCH: query=”plastic and trim restoration kit” context=”end-article”]

FAQs
How long does a ceramic trim coating actually last?
Properly prepped and applied, most trim-specific ceramic coatings hold up one to two years or more on a daily-driven vehicle, with some users reporting multi-year results on panels that aren’t in constant direct sun.
Can I apply a trim coating over an existing dressing or protectant?
No — strip prior dressings first. Silicone-based protectants in particular prevent proper bonding and are a common cause of early coating failure or uneven finish.
Why did my trim come out glossy and cheap-looking instead of satin black?
This is almost always leftover excess product that wasn’t buffed off before it cured. Apply thinner coats and buff high spots immediately rather than waiting until the whole panel is done.
Is there a difference between products for new plastic versus faded plastic?
Yes. New-plastic protectants are lower-build and allow continued off-gassing; restoration coatings are higher-build and designed to fill and seal already-oxidized surfaces. Using the wrong one can trap moisture or cause uneven curing on new parts.
Does temperature matter during application?
Significantly. Hot plastic or direct sunlight causes the coating to flash too quickly, leading to streaking and uneven bonding. Work in shade with the panel at ambient temperature.
Do these coatings work on interior plastic too?
Many trim coatings are rated for both interior and exterior plastic and perform well on interior trim, though UV exposure and buffing access differ, so always confirm the specific product’s labeled use cases.
Shop Paint & Body Supplies
The techniques in this guide rely on proper prep products and quality trim coatings. Browse our Paint & Body selection for everything you need from cleaners and clay to ceramic coatings and application tools.
- Trim-specific cleaners and decontamination products
- Ceramic and protective coatings for plastic and trim
- Application accessories including microfiber towels and buffing pads

The Toolsource Technical Team blends decades of real-world automotive service experience with up-to-date technical research. Our writers collaborate with professional mechanics, shop owners, and diagnostic specialists to deliver practical, workshop-ready guidance you can trust.


Follow us on social media