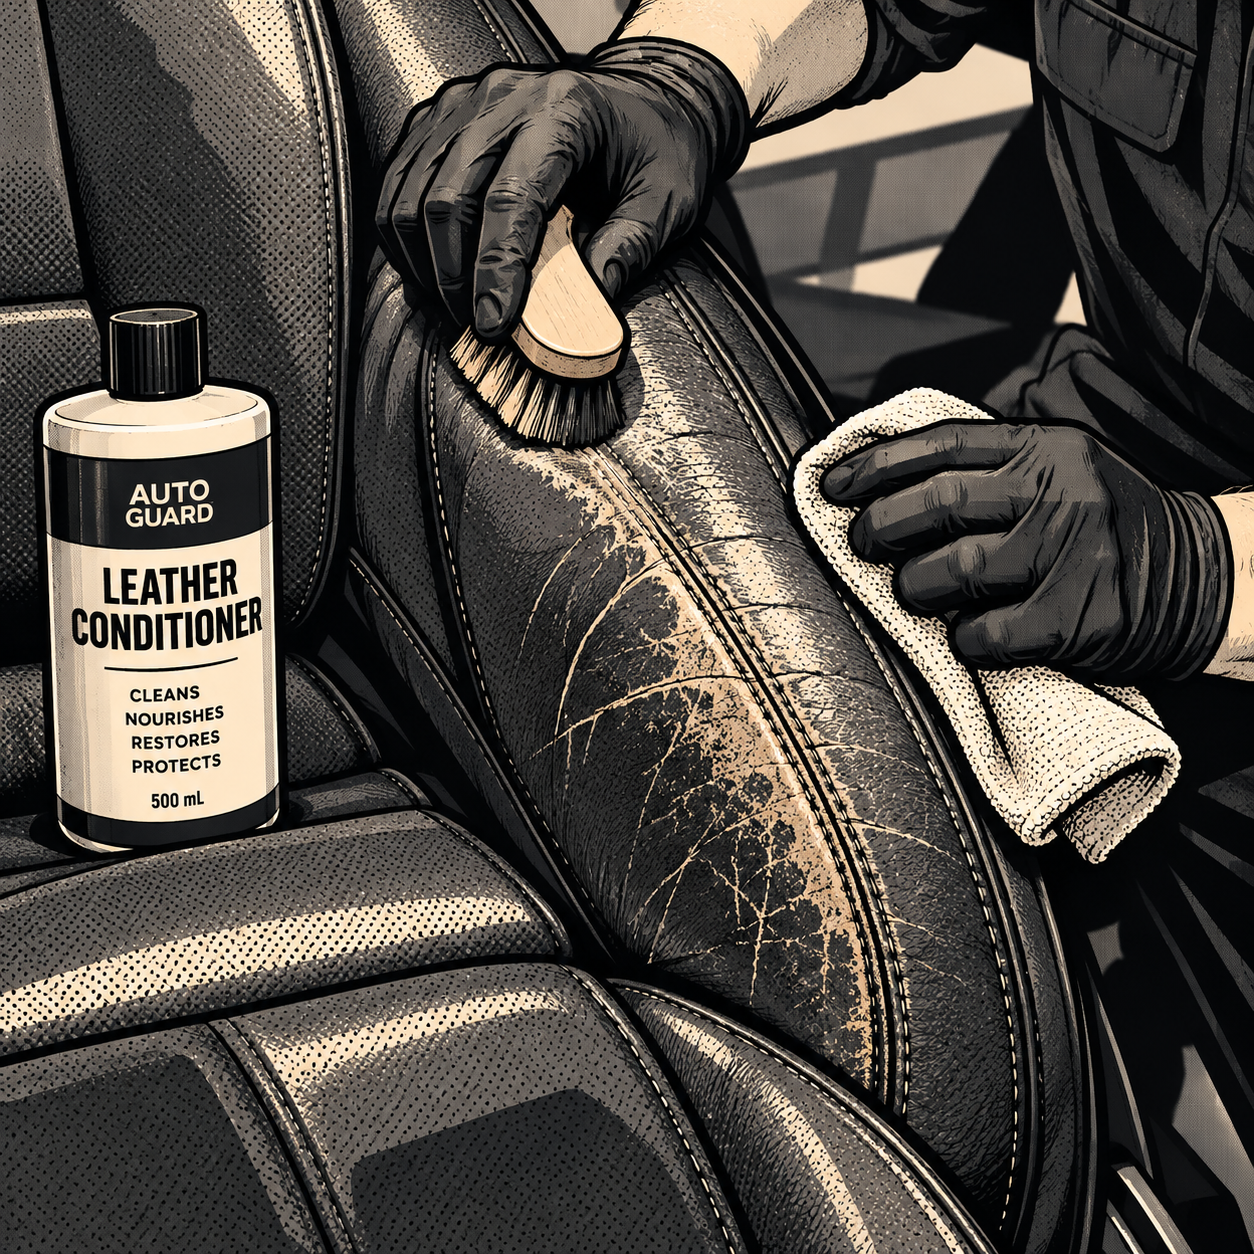
A car that looks like it was never abused sells faster and closer to asking price than one that just looks “clean.” Buyers scroll past dozens of listings a day, and the ones that stop them are the ones where the seats look unmarked, the carpets look untouched, and the photos make the car look like it rolled off a showroom floor. None of that happens by accident — it’s the result of a methodical detail pass that hits the spots most sellers skip. Below is a practical sequence for prepping a used car for sale, based on what actually moves buyers from “interested” to “I’ll take it.”
Start With a Full Interior Deep Clean
Before touching leather conditioner or polish, strip the interior down. Pull the floor mats out and clean them separately, vacuum every seat track and crevice with a crevice tool, and run a brush attachment along the dash vents, cupholders, and door pockets where debris collects. Shampoo or extract the carpets and any cloth trim — a car that smells clean photographs clean, and buyers notice odor within seconds of opening a door. If the car has been driven for years, don’t skip the areas underneath the seats; folded receipts, old coins, and years of dropped crumbs collect there and it’s one of the first places a serious buyer will check during an in-person inspection. A quick pass with a flashlight under each seat before you call the interior “done” will save you from an awkward moment at the test drive.
Treat and Protect Leather Seats and Trim
Leather seats make or break the interior impression, especially on the driver’s side where years of entry and exit wear the bolster. Use a dedicated leather cleaner first to lift oils and grime without stripping the finish, then follow with a conditioner formulated for automotive leather — not a generic furniture product, which can leave a greasy residue or change the sheen. Two-step systems (cleaner plus conditioner, like the kind detailers commonly recommend in pairs) tend to outperform all-in-one wipes on seats with real wear, because the cleaning step actually removes the embedded dirt the conditioner would otherwise just seal in. Pay extra attention to the driver’s bolster and seams — these are the spots where stitching breaks down first, and catching early wear with conditioner can prevent a split seam from turning into a listing-killing tear.
[PRODUCT_SEARCH: leather cleaner and conditioner kit for car seats]


Hit the Spots Sellers Routinely Skip
Door sills and door jambs are the single most overlooked area in a DIY detail. They take direct contact every time someone gets in or out, and road grime builds up on the painted sill and the rubber seals long after the rest of the car looks spotless. Wipe them down with an all-purpose cleaner and a microfiber towel, then dress the rubber seals so they don’t look dry and cracked. While you’re in there, clean the trunk, including the spare tire well and the underside of the cargo cover — buyers who are serious enough to check maintenance records are also the type to open the trunk. Glovebox, console bins, and seatback pockets should be emptied and wiped, not just cleared of visible trash.
Exterior Wash, Paint Correction, and Photo Staging
Wash the exterior with a two-bucket method to avoid swirl marks, clay bar it if there’s bonded contamination you can feel but not see, and apply a sealant or wax for gloss and water beading in photos. Clean the wheels and wheel wells separately — brake dust is one of the first things a buyer’s eye catches in a listing photo. Headlights that have hazed over respond well to a polishing compound and make a bigger visual difference than most sellers expect for the time invested.
Once the car is clean, remove every accessory before you shoot photos — phone mounts, seat covers, dash cams, air fresheners, parking permits, and personal items all need to come off. These items make a listing look cluttered and can make buyers wonder what you’re trying to hide or distract from. Shoot in open shade or overcast light rather than direct sun, which blows out reflections and hides panel gaps or paint imperfections a buyer will find anyway at the viewing. Get full exterior angles, wheel close-ups, the engine bay, the trunk, and wide interior shots from both front doors — buyers specifically look for exterior photos when a listing only shows interior shots, and the absence reads as a red flag.
Document the Maintenance History
A detailed car earns trust at first glance; a documented maintenance history earns it at the negotiating table. Gather receipts for oil changes, brake service, and any major work, and organize them by date and mileage. This matters more on vehicles with a reputation for expensive upkeep — European makes in particular get buyer pushback on service costs, and being able to show “$550 a year for fluids on a DIY-friendly schedule” versus a vague “I think I changed the oil” answer changes the conversation entirely. If you’ve done any maintenance yourself, note what was done and when; buyers generally respond well to a seller who clearly understands and has stayed ahead of the car’s needs, and it undercuts the assumption that a particular brand or model is automatically a money pit.
Final Walkthrough Before You List
Do one last pass with fresh eyes — or better, have someone else walk the car with you, since you’ll miss things you’ve stared at for years. Check under the seats again, open every door and the trunk, run a hand along the dash for dust, and confirm the exterior is free of water spots after the wash dries. Make sure tire pressures and fluid levels are correct before a test drive, since a low tire or a dash warning light during a buyer’s first impression can undo an otherwise spotless detail job.
[PRODUCT_SEARCH: complete car detailing kit for interior and exterior]
Quick Pre-Listing Checklist
- Vacuum and shampoo carpets, mats, and under-seat areas
- Clean and condition leather, focusing on the driver’s bolster and seams
- Wipe down door sills, jambs, and rubber seals
- Empty and clean glovebox, console, trunk, and spare tire well
- Wash, clay, and seal or wax the exterior; clean wheels and wells
- Remove all accessories and personal items before photographing
- Gather and organize maintenance receipts by date and mileage
- Do a final walkthrough with a second set of eyes before listing

Automotive Cleaning Brush w/ Dense Solvent Resistant Hog Hair Br
Mfg: AES Industries
Part #: 544

Frequently Asked Questions
What leather conditioner should I use on worn seats?
Look for a two-step automotive leather system: a dedicated cleaner to lift embedded dirt, followed by a conditioner designed for vehicle upholstery. Avoid household furniture products, which can leave the wrong finish or feel on automotive leather.
How often should leather seats be conditioned?
Every 3-6 months under normal use, or more often in hot or sun-exposed climates where leather dries out faster. Regular conditioning before cracking starts is far cheaper than repairing or replacing a seat later.
Can a driver’s seat with worn stitching be repaired instead of replaced?
Often, yes. A leather repair shop can rebuild bolster stitching and re-dye worn areas for a fraction of reupholstery cost, and doing this before listing can meaningfully improve a buyer’s first impression of the interior.
Why do buyers care about exterior photos if the interior looks great?
Missing exterior shots read as an attempt to hide bodywork issues, even when that’s not the seller’s intent. Always include full exterior angles alongside interior photos.
Is a luxury car actually expensive to maintain?
It depends on the service, not just the badge. Routine fluid and filter work can be comparable to mainstream brands; the cost gap widens mainly on major repairs like transmission or engine work, so documented routine maintenance history matters even more for these vehicles.
Should I fix small cosmetic issues before listing or disclose and discount instead?
For cheap, high-visibility fixes — headlight haze, a torn floor mat, a stained seat panel — fixing it before listing usually returns more in sale price than it costs. For bigger issues, honest disclosure with photos tends to produce fewer dead-end negotiations than letting a buyer discover it at the viewing.
Exterior Finishing Products
The polish and wax stage makes the biggest visual difference in a pre-sale detail, especially in listing photographs. Our Car Care – Polishes and Waxes selection includes the compounds, clays, and protective coatings you need to bring out gloss and durability.
- Polishing compounds for paint correction and swirl mark removal
- Automotive waxes and sealants for lasting protection and water beading
- Clay bar systems for removing bonded contamination before wax application

The Toolsource Technical Team blends decades of real-world automotive service experience with up-to-date technical research. Our writers collaborate with professional mechanics, shop owners, and diagnostic specialists to deliver practical, workshop-ready guidance you can trust.


Follow us on social media