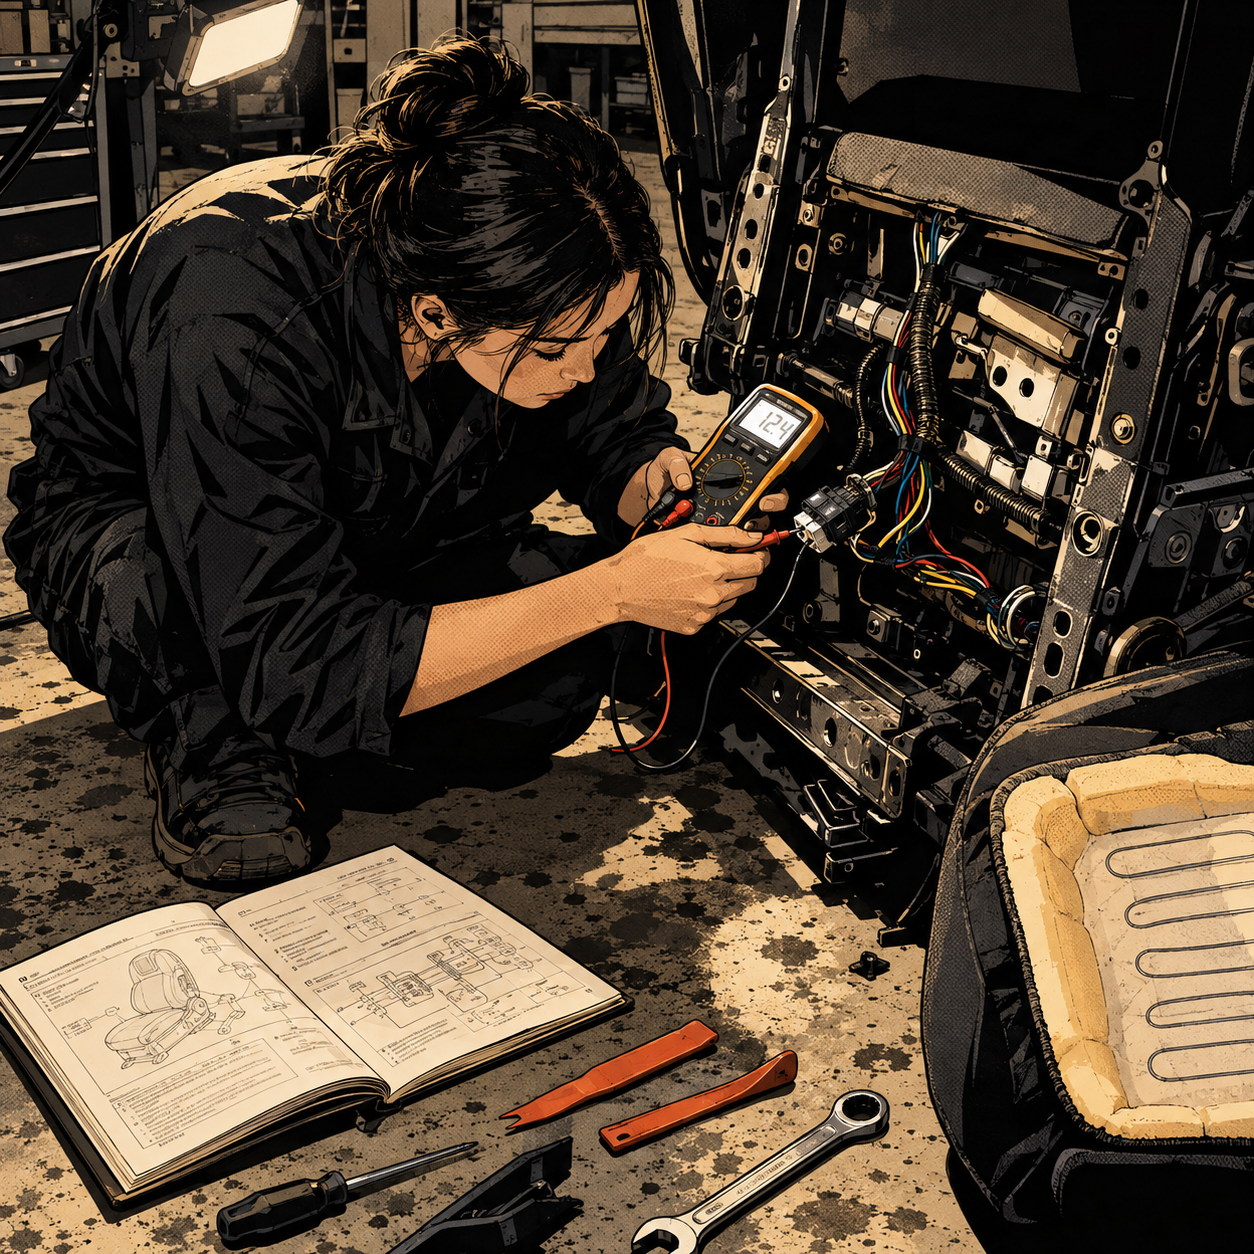
Automakers build wiring harnesses to a shared platform, not to each trim level’s option sheet. That means a huge number of vehicles roll off the line with connectors, relay slots, or even complete hardware for features the buyer never checked off — heated seats, heated mirrors, auxiliary switches, even full audio wiring behind a “no radio” dash. For technicians fielding the inevitable “can I just add this myself” question, the challenge isn’t finding the plug — it’s figuring out how far the factory actually went before stopping, and verifying that before a customer starts cutting into trim panels. This guide walks through a repeatable diagnostic sequence for confirming, testing, and safely enabling these dormant options.
Why Partial Factory Installs Happen
Running one universal harness across every trim level is cheaper than stocking multiple harness variants. It’s standard practice across nearly every OEM: Land Rover Discoverys (1999–2004) with leather seats got heating elements installed on every unit regardless of whether the buyer paid for the switch; early BMW MINIs did the same with just a missing switch bank; some Subarus shipped with speaker wiring and tweeter mounts but no tweeters; and some early-2010s Hyundai/Kia economy trims used a single seat-foam mold with heating elements baked in for every seat, heated or not, because running two seat SKUs cost more than the wire and foam element itself.
The inverse also happens — full hardware with no switch, like the Nissan Rogues that shipped with seat heating elements and relays installed but no dash button. That’s a liability, not a convenience, and it’s covered below.
The practical implication for a shop: “pre-wired” doesn’t mean “plug and play.” It can mean anywhere from (a) everything is there except a $15 switch, to (b) only the connector exists and every other component — element, relay, fuse position, software flag — is missing. You have to test for which scenario you’re in before quoting a job.
Step 1: Confirm the Hardware Is Actually Present
Before ordering parts, physically verify what exists:
- Pull the seat bottom cushion (usually four bolts or hook clips) and look for a heating pad or visible element mat in the foam, plus a connector dangling from the harness.
- Check the dash, console, or door panel for a blanked-off switch bay — a plastic blank with no backside wiring means the factory didn’t bother running wire that far; a blank with a taped-off connector behind it means they did.
- For mirrors, pull the mirror glass (most pop out with a flat trim tool or built-in release tab) and look for a heating grid bonded to the back of the glass, plus wiring already run to the mirror housing.
- For audio, pull the head unit bezel and rear deck speaker covers — wiring and mounting holes with no actual speakers or harness is the tell for a stripped base trim rather than a true delete.
If the element, grid, or component itself isn’t there, you’re looking at a full retrofit, not a simple activation — different labor quote, different parts list.


Step 2: Check the Fuse Box and Relay Positions
With hardware confirmed, move to the fuse box and relay panel under the hood and/or under the dash. Compare it against the factory wiring diagram for a fully optioned version of the same model and year:
- Look for an empty fuse slot or empty relay socket labeled for the function (seat heat, mirror heat, etc.) in the fuse box legend. An unpopulated slot that’s labeled in the cover diagram is a strong signal the circuit is otherwise complete.
- A relay socket with no relay installed typically means the OEM left the final activation step as a dealer-installed option — common on the GM “customer-requested” trunk release and similar glovebox-covered switch provisions from the 1980s–90s, which dealers would complete in minutes by plugging in a taped-off connector and popping a switch into a pre-molded hole.
- If the fuse/relay position isn’t present at all (no slot, no legend entry), the circuit was never wired past the bulkhead connector, and you’re back into retrofit territory.
[PRODUCT_SEARCH: automotive fuse and relay test kit]
Step 3: Trace and Test with a Diagram, Not a Guess
Pull the factory wiring diagram for the fully-optioned trim and physically trace the circuit in the car. Don’t rely on forum photos of someone else’s connector — pinouts and colors vary by model year and even by production run within a year.
- With the key on (or in the correct test mode per the diagram), check for the expected voltage at the connector using a multimeter — don’t just probe with a test light on circuits that run through a BCM or module, since a test light can draw enough current to false-trigger a logic circuit or blow a sensitive input.
- If you’ve got 12V at the harness side matching what the diagram calls for, hardware activation is likely just a switch, fuse, and possibly a relay away.
- If voltage is absent where the diagram says it should be, check upstream: is the circuit fed from a module output (BCM, SJB, gateway) rather than straight from the fuse box? If so, the module firmware may be the gatekeeper, not the wiring — see Step 4.
- For anything that routes through an airbag, seat-position, or climate control module, treat it with the same caution as factory safety circuits — verify grounds and shields, and don’t leave anything spliced without proper connectors and heat-shrink.
Step 4: Module/Software Enablement
On newer vehicles, wiring and hardware being physically complete doesn’t guarantee the feature works — the function may need to be flagged “enabled” in the BCM or a related module via dealer-level or aftermarket diagnostic software (ODIS, VCDS/OBDeleven on VW/Audi platforms, Techstream on Toyota, FORScan on Ford, etc., depending on make).
- This is common on vehicles where a feature like adjustable exhaust-sound suppression (AVAS) on/off switches is region-locked — Canadian-spec cars may carry the wiring and connector for a disable button that US-spec software simply won’t act on, even with the switch physically installed.
- Similarly, some OEMs gate options like upgraded A/C, auto-locking, or daytime running light behavior behind a software coding bit rather than a physical relay — this is a common documented fix path (a tech enabling a coding bit after a dealer install) on several platforms.
- Check manufacturer-specific and model-specific forums before assuming a module flag even exists for your target feature — some functions genuinely have no software gate and are purely mechanical/electrical.
Safety Note: When “Pre-Wired” Becomes a Hazard
Partially installed circuits aren’t just inert — they can fail dangerously. Seat heater circuits with elements and relays installed but no switch have been documented to fail with the relay stuck closed, applying continuous, unregulated heat with no thermostat cutoff because the control logic (switch + sensor) was never completed. If you find elements and a powered relay with no corresponding switch or temperature sensor in the circuit, don’t assume it’s simply “off” — verify there’s no path to constant power, and disconnect or fuse-isolate it until the full control circuit (including thermal protection) is properly installed.
Quick Diagnostic Checklist
- Physically confirm the component (element, grid, speaker mount) is present, not just the connector
- Check fuse box legend and relay panel for labeled-but-empty positions
- Pull the correct factory wiring diagram for the fully-optioned trim — don’t guess from a similar model
- Test for voltage at the harness with a multimeter before assuming the circuit is live or dead
- Determine if a BCM/module software flag gates the function before ordering switches
- Isolate any circuit with elements + relay but no switch/thermal protection until properly completed
[PRODUCT_SEARCH: OBD2 diagnostic scanner module programming]

Tech 2 Authentic GM Software Update Kit
Mfg: OTC Tools and Equipment
Part #: 3625-14


FAQ
How do I know if my seats have heating elements if they weren’t optioned?
Pull the seat cushion cover and check the foam for a wired heating mat, and check under the seat for a dangling connector and relay. This is common on certain Land Rover, MINI, and various Hyundai/Kia models from specific production years — check model-specific forums for known cases.
Can I just buy a switch and plug it in?
Only if the element, relay, and fuse position are already present and tested live. A switch alone won’t do anything if any upstream component is missing, and on module-gated circuits it may do nothing even with everything else physically wired.
Is it safe to leave a relay-and-element circuit alone if I don’t plan to activate it?
Not necessarily. If the relay has a path to constant power and no switch, confirm it isn’t energized at all; a relay stuck closed with no thermal cutoff can overheat. Isolate the circuit at the fuse or connector if you’re not completing the full install.
What tools do I need to trace this myself?
A factory wiring diagram for the fully optioned trim, a digital multimeter, basic trim removal tools, and — for anything that may be module-gated — access to the appropriate diagnostic/coding software for your make.
Why would a manufacturer wire a car for a feature and then not enable it?
It’s almost always cost. Running one harness/foam mold across all trims is cheaper than manufacturing multiple variants, even if it means some “unused” wiring or elements ship in base models.
Does this apply to regional/export versions of the same model?
Yes — regionally gated features (like exhaust sound suppression disable switches) often have the wiring present across regions, with only the switch or the software flag differing by market.
Recommended Diagnostic Tools
The diagnostic procedures in this guide require precise testing equipment. Our Automotive Diagnostic Tools selection includes multimeters, OBD2 scanners, and module programming devices essential for safely verifying circuits and enabling pre-wired features.
- Digital multimeters for accurate circuit voltage testing
- OBD2 diagnostic scanners with module access and coding capability
- Specialized equipment for wiring tracing and circuit verification

The Toolsource Technical Team blends decades of real-world automotive service experience with up-to-date technical research. Our writers collaborate with professional mechanics, shop owners, and diagnostic specialists to deliver practical, workshop-ready guidance you can trust.


Follow us on social media