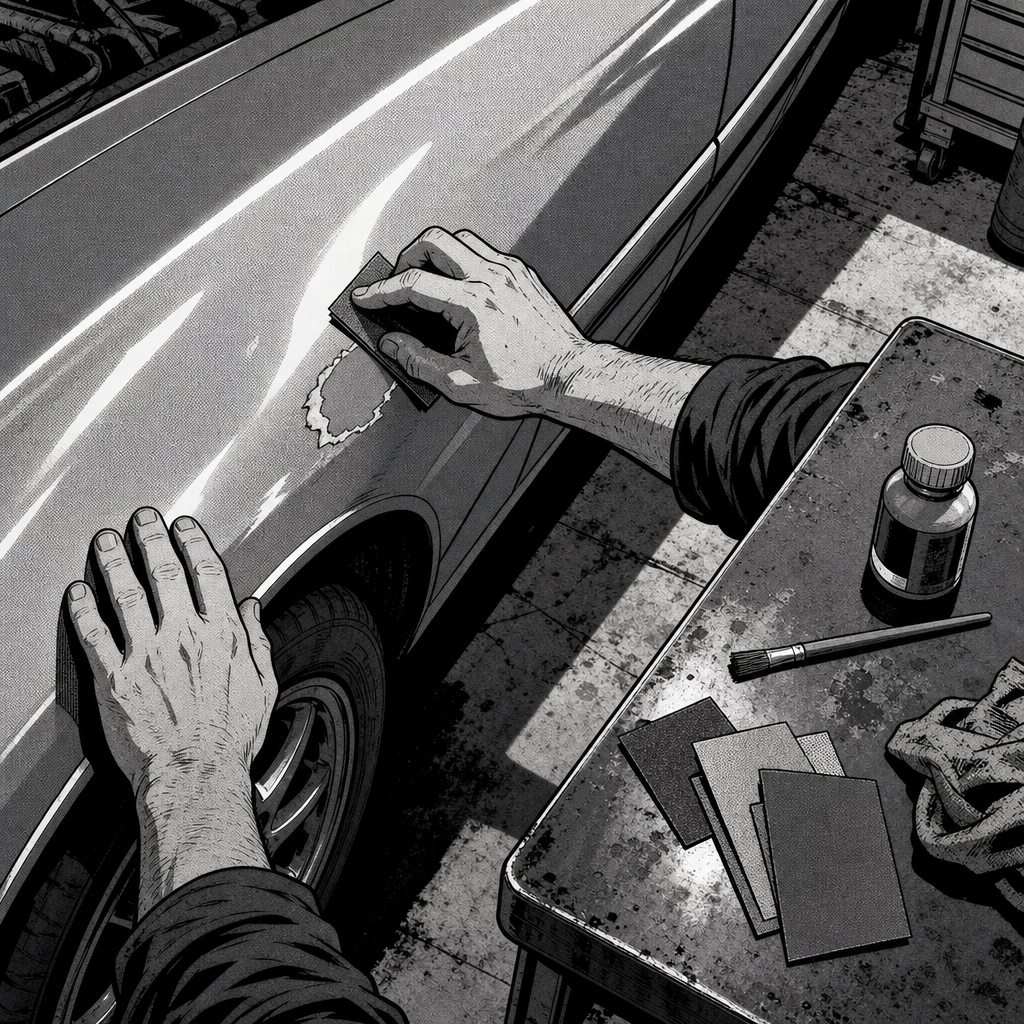
A low-flying rock or a misjudged parking spot can leave a chip or scratch that parking sensors never flagged and insurance isn’t worth claiming. The good news: most shallow chips and scratches can be made nearly invisible from normal viewing distance with a touch-up kit, the right sandpaper grits, and some patience. This isn’t a guide to a factory-perfect respray — it’s a guide to doing a repair that holds up under daily use and doesn’t scream “DIY” from across the parking lot.
Assess the Damage Before You Touch a Brush
Not every mark needs the same approach, and misjudging depth is the most common reason DIY touch-ups fail. Run a fingernail across the damage: if it catches, you’re through the clear coat and likely into the base color or primer. If it’s smooth but discolored, you’re probably dealing with clear coat scuffing only, which may just need polish and sealant, not paint.
Check the damage from a few angles and distances, not just straight-on under shop lights. A shallow-angle look under direct light will show surface irregularities that a head-on glance misses — this is also how you’ll judge your finished repair later. For deep gouges that cut into plastic trim (fog light housings, bumper corners), understand up front that sanding and filling won’t fully restore the texture; clear coat alone can reduce the stark white “fresh plastic” look significantly even without a perfect color match.
Also check the surrounding area for pre-existing damage. On an older or non-garaged daily driver, you’ll often find a dozen other small scratches nearby. Decide now whether you’re fixing one spot or doing a broader touch-up pass, since blending one repair next to visibly different older damage can actually draw more attention to it.
Prep the Surface: Sanding Grits and Technique
Surface prep determines whether the repair looks like a repair. Start by clearing loose paint, dirt, and plastic debris from the damaged area — a sharp blade edge, used carefully, often removes loose chip edges more cleanly than sandpaper at this stage, since sandpaper can drag debris across intact paint. Follow with a finer grit, roughly 400, to clean up the edges of the chip and feather the boundary between damaged and intact paint. Feathering matters more than people expect: a hard edge is what makes a touch-up visible, not the color mismatch.
Once you begin layering touch-up paint into the chip, switch to a much finer grit — around 1000 — to knock down high spots between coats. Go gently here. Touch-up paint remains soft for several days after application, so aggressive sanding too soon will smear or lift it rather than leveling it. If you’re working on a tri-coat or pearl finish, be extra conservative with sanding between layers, since these finishes are more sensitive to grit marks and uneven buildup than solid colors.
===PRODUCT_SEARCH_1===


Apply Touch-Up Paint in Thin Layers
The single biggest technique upgrade over “dab and hope” is building the repair in thin layers rather than one thick fill. A single heavy application shrinks unevenly as it cures and almost always sits higher than the surrounding paint, which catches light and announces itself. Apply a thin coat, let it begin to set, and check it under angled light before deciding whether another layer is needed.
Primer is optional depending on what you’re repairing. If the touch-up kit didn’t include one and the chip hasn’t exposed bare metal, you can skip it — many successful amateur repairs on clear coat-through chips go straight to base color without issue. If you do see bare metal or a rust-prone edge, primer isn’t optional; skipping it invites corrosion under the repair later, which is a worse problem than a visible scratch.
Work in good light and resist the urge to rush between coats. Let each thin layer firm up before adding the next, and don’t judge the color match until the paint has had time to cure — touch-up paint often looks slightly off wet and settles closer to the panel color as it dries.
Blend and Apply Clear Coat
Clear coat is what unifies the texture and gives the repair its final look, and it’s worth applying generously enough to cover slightly past the repaired area so there’s no hard clear-coat edge to sand down later. After it’s cured enough to handle (check your kit’s recommended cure time), level any high spots with the 1000-grit paper, working wet if your paper and process support it, then polish to restore gloss.
For scratches and chips in plastic trim — fog light bezels, bumper corners — that are too deep to fully fill or sand level, clear coat alone applied directly into the cut can meaningfully reduce the stark white or hazy look of the exposed plastic, even without a perfect texture match. This is a useful fallback when you’ve determined a gouge is too deep to disguise through filling and sanding alone.
Judge the final result the way anyone else will see it: from a normal standing distance, in regular light, not crouched six inches from the panel with a flashlight. A repair that still shows texture or color variation up close is completely normal and doesn’t mean the job failed — it means you’re inspecting it like a technician instead of like a passerby.
Know When to Stop DIYing and Call a Body Shop
Touch-up paint and careful sanding solve chips and shallow scratches that haven’t penetrated deep into the panel or structure. They don’t solve dents, creases, cracked plastic, or damage that’s gone through multiple layers into bare substrate over a large area. If a scratch is long, deep, and continuous rather than a localized chip, or if you’re dealing with a panel that’s structurally dented as well as scratched, a DIY touch-up will fix the color but not the underlying shape — and an uneven surface under good paint still looks bad.
Set the right expectation before you start: this process makes damage much less noticeable, not invisible under scrutiny. If the vehicle is a daily driver with other cosmetic wear already present, “significantly better and no longer eye-catching” is a realistic and worthwhile outcome. If you need the panel to pass a detailed inspection or match a show-quality finish, that’s a job for a paint shop with spray equipment and a controlled environment.
Quick Reference Checklist
- Check damage depth with a fingernail test and inspect at multiple angles before starting
- Clear debris and loose paint edges with a blade, then feather edges with ~400 grit
- Use primer if bare metal is exposed; skip it for clear-coat-only chips if your kit lacks one
- Apply touch-up paint in thin layers, letting each set before adding the next
- Level between coats with ~1000 grit, sanding gently since fresh paint stays soft for days
- Apply clear coat slightly beyond the repair area, then level and polish once cured
- For deep plastic gouges that can’t be filled, clear coat alone can reduce the whitened look
- Judge the finished repair from normal viewing distance, not under a flashlight up close
===PRODUCT_SEARCH_2===


FAQs
Do I need primer for every touch-up repair?
No. Primer matters when bare metal is exposed or there’s rust risk. For chips that only went through clear coat and base color without reaching metal, going straight to touch-up paint is generally fine.
What sandpaper grit should I use for touch-up paint repair?
Coarser paper (around 400 grit) works for initial cleanup of chip edges and loose material. Finer paper (around 1000 grit) is for leveling touch-up paint between coats and should be used lightly to avoid disturbing uncured paint.
How long does touch-up paint need to cure before sanding or buffing?
It varies by product, but touch-up paint commonly stays soft for several days after application. Sand and polish gently and give it more time than you think it needs — rushing this step is the most common cause of a smeared or dull repair.
Can I fix a deep scratch on plastic trim the same way as paint on metal panels?
Partially. Sanding and paint layering work the same way, but very deep cuts in plastic often can’t be fully leveled. Applying clear coat directly into the cut, even without a perfect fill, reduces the whitened or hazy appearance significantly.
Will the repair be invisible up close?
Usually not, and that’s a reasonable outcome. A good DIY touch-up should be unnoticeable from normal viewing distance (a meter or more) even if texture or slight color variation is visible under close inspection with direct light.
When should I skip DIY and get a professional respray instead?
If the damage includes dents or creases, spans a large continuous area, or goes through multiple paint layers into bare substrate over a wide section, a shop respray will outperform touch-up paint, since filling and sanding alone can’t correct the underlying panel shape.
Recommended Tools
Having the right materials on hand makes the difference in whether a repair holds long-term. Check our Paint & Body category for the supplies you’ll need.
- Touch-up paint and primer kits for chips and scratches
- Sandpaper in various grits (400 and 1000) for prep and finishing
- Clear coats and polishing compounds for a durable final coat

The Toolsource Technical Team blends decades of real-world automotive service experience with up-to-date technical research. Our writers collaborate with professional mechanics, shop owners, and diagnostic specialists to deliver practical, workshop-ready guidance you can trust.


Follow us on social media