A $13,000 body shop estimate is enough to push plenty of vehicle owners toward doing the repair themselves, especially when their policy only carries liability coverage. Bolt-on front-end work – headlamp panels, hoods, bumpers, fenders – is genuinely within reach for someone with patience and the right tools. The problem isn’t the bolt-on parts. It’s everything underneath them that doesn’t get checked before the new panels go on and the car gets sold or driven like nothing happened. This post walks through what a shop-trained tech actually verifies on a DIY collision repair, where owners most often cut corners, and what you’re on the hook for later if you skip the measurement step.
Know What Your Insurance Actually Covers Before You Start
Before any wrench turns, figure out why the repair is coming out of pocket in the first place – it changes how much risk you can absorb. “Liability” insurance pays for the other party’s damage when you’re at fault; it does not pay to fix your own vehicle. “Collision” coverage is the piece that pays for your car when it hits another vehicle or object, and “comprehensive” covers non-collision events like theft, fire, or weather. Owners frequently downgrade from full coverage to liability-only to save money, not realizing that a solo accident – hitting a pole, a garage door, a curb – is no longer covered on their own vehicle at all.
If you’re repairing out of pocket because you carry liability-only coverage, that’s expected and legal in every state. Driving with zero insurance, including no liability, is illegal in nearly all US states and carries its own penalties separate from the repair question. Confirm which bucket you’re in before you decide how much time and money to put into the fix – it affects whether a quick bolt-on repair is reasonable or whether you’re better off selling the car as-is.
Measure for Structural Damage Before You Order Parts
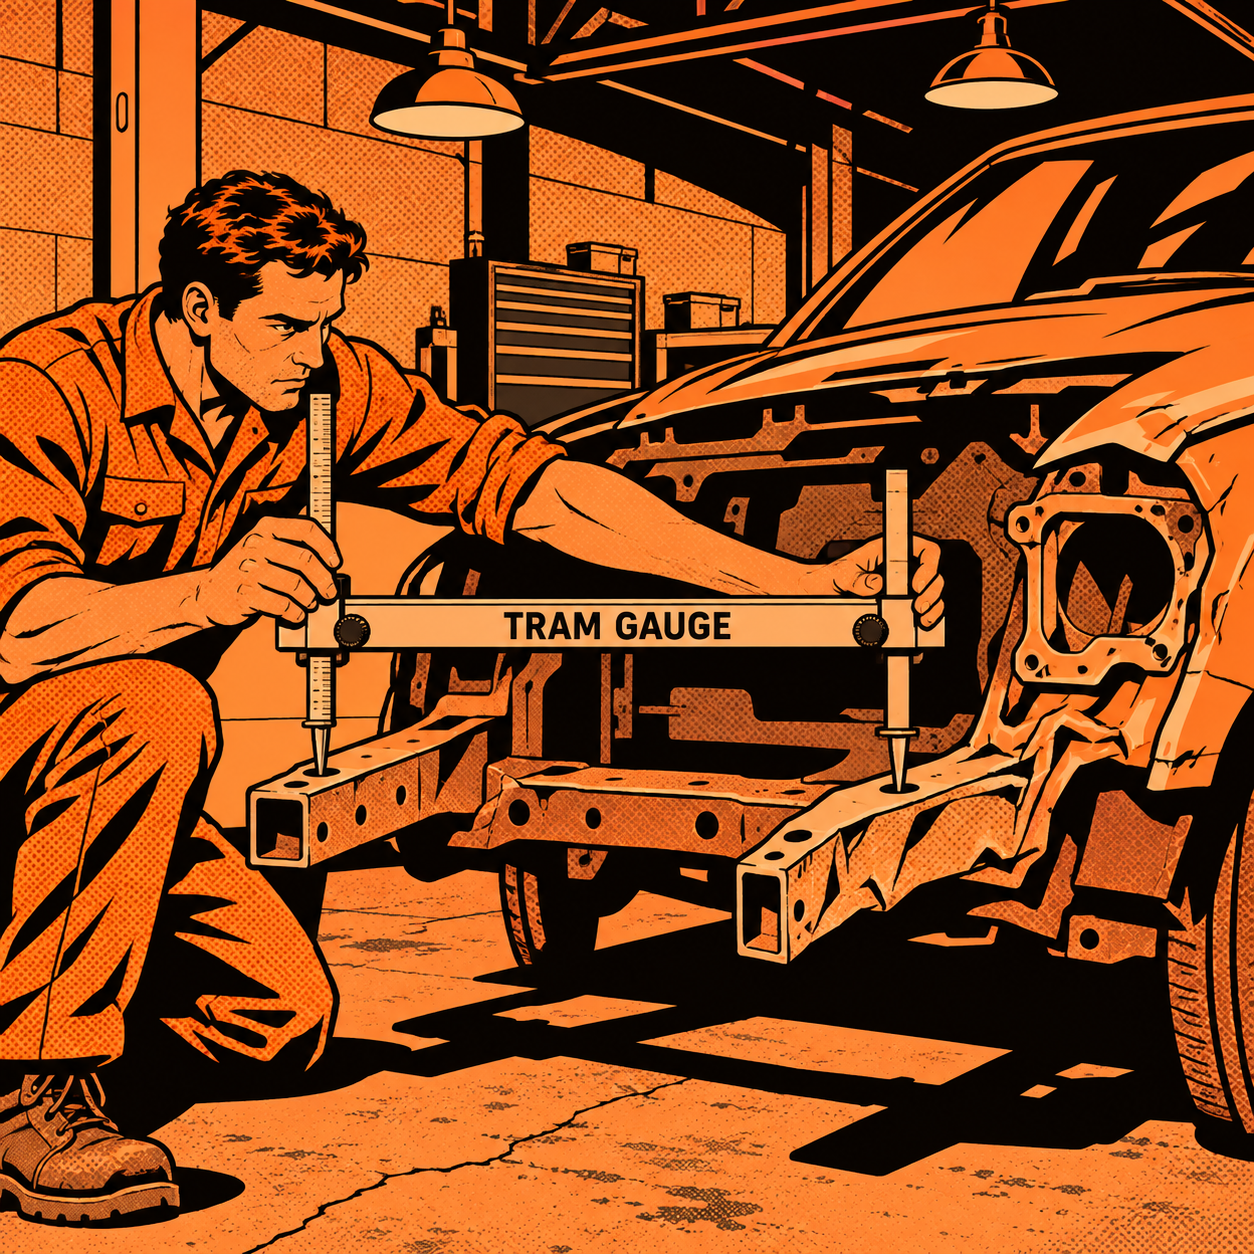
This is the step most DIY repairs skip, and it’s the one that matters most for safety. Bolt-on parts (headlamp panels, bumper covers, fenders, hoods) can be swapped without special tools, but they sit on a structure – rails, core support, and headlamp mounting panels – that can be bent even when the bolt-on parts look fine stacked on top of it. A car that “drives straight with no bumper or hood misalignment” can still have a bent rail or distorted headlamp pocket; panel fit is not proof the structure underneath is square.
A tram gauge (also called a tram tracking gauge) is the standard tool for this check. It measures point-to-point distances across the underbody and front structure and compares them against the manufacturer’s body dimension specs, which catch asymmetry that’s invisible to the eye. Many public libraries carry subscriptions to professional repair databases (Mitchell, ALLDATA, Identifix) that include these body dimension charts for your specific year and model – use them before you assume “no structural issues” based on a visual check alone. If one side measures even a few millimeters off from the other, don’t bolt the cosmetic panels on yet; address the frame or rail first.


Align Bolt-On Front-End Components the Right Way
Once the structure checks out square, bolt-on reassembly is straightforward but sequence-dependent. On most unibody front ends, everything forward of the firewall – headlamp panels, fenders, hood, bumper cover – attaches with bolts, with only a handful of structural welds at the ends of the headlamp panels themselves. Work from the inside out: headlamp panels and their mounting rails first, then fenders, then hood last, since hood fit is the easiest visual indicator of whether everything underneath is seated correctly.
A common fit issue is a hood that sits high at the rear corners. That’s usually the panel where the hinges bolt in being slightly distorted, not the hinge itself – tap down at the rear hinge bolt hole to correct it rather than just re-torquing the hinge and calling it “good enough.” Loose-fitting panels bolted together without this correction will show up as uneven hood-to-fender gaps even if every individual part is undamaged.
Verify the Repair Before You Call It Finished
Don’t rely on a single angle or a dark photo to judge fit – check it the way a shop would, in daylight, from multiple points:
- Panel gaps side-to-side: hood-to-fender and fender-to-bumper gaps should be even on both sides of the vehicle.
- Window and door openings: a door or window column that reads visibly out-of-square against the body line usually means something behind it is still shifted.
- Headlamp pocket alignment: a headlamp that sits proud or recessed compared to the opposite side often points to a bent rail, not a loose bolt.
- Tram gauge cross-check: re-measure after reassembly, not just before, since torquing panels down can reveal play that wasn’t visible with parts loose.
If anything reads out-of-square at this stage, stop and run down the cause before painting or driving it daily. A structural issue that’s merely cosmetic today – a bent headlamp pocket or rail – becomes a crash safety issue in a second collision, since that structure is what’s supposed to manage impact energy and keep the steering column and cabin intact.
Refinishing a Repaired Bumper Without Repainting the Whole Panel
Plastic bumper covers are a frequent follow-up repair after a trailer strike or low-speed hit, and owners often want to avoid repainting the entire bumper. If the damage crosses a body line, you can’t mask it off cleanly, which limits how small a blend panel you can get away with. A few practical points from shop experience:
- Plastic-weld the back side for strength first, then use a flexible filler rated for bumpers on the front – rigid body filler will crack on a part that’s designed to flex.
- Feather the filler and primer out well beyond the repair area so the blend isn’t visible as a hard edge, especially where you can’t tape off at a body line.
- Rattle-can touch-up with a 2K clear can work for small spot repairs, but color match and clear gloss will be the weak points – test on a hidden spot first.
- Blend into adjacent panels rather than trying to feather-edge within a single flat area; a hard stop in the middle of a bumper face is much more visible than a blended transition at a natural break line.
What You’re Obligated to Disclose When You Sell
If you repair the car and later sell it, disclosure rules vary significantly by state. Several states operate under “buyer beware” standards for private party sales, which shifts more inspection burden onto the buyer, but that doesn’t eliminate liability if you knowingly conceal prior structural damage. Independent of what your state legally requires, disclosing a prior accident – especially one involving structural or safety-related repairs – is the standard practice that protects you from a liability claim down the road if the buyer later discovers the repair history through a vehicle history report or their own inspection.
Quick Pre-Reassembly Checklist
- Confirm your coverage type (liability vs. collision/comprehensive) before budgeting the repair.
- Pull manufacturer body dimension specs for your exact year/model.
- Tram-gauge the structure before ordering or installing bolt-on panels.
- Reassemble inside-out: headlamp panels and rails, then fenders, then hood.
- Re-check panel gaps, window squareness, and headlamp alignment after final torque.
- Document the repair and disclose it at resale, regardless of state minimums.

FAQ
Does liability insurance pay to fix my own car after an at-fault accident?
No. Liability coverage pays for the other party’s vehicle and injuries when you’re at fault; repairing your own car requires collision coverage, or it comes out of pocket.
Can a car look fine but still have structural damage?
Yes. Straight panel fit and no visible misalignment don’t rule out a bent rail or headlamp mounting panel – only a tram gauge measurement against factory specs confirms the structure is square.
What’s the real difference between “collision” and “comprehensive” coverage?
Collision covers damage from hitting another vehicle or object (a pole, a garage door, a curb). Comprehensive covers non-collision events like theft, fire, vandalism, or weather. Liability-only covers neither for your own vehicle.
Do I have to tell a buyer my car was in an accident?
Legal disclosure requirements vary by state, and some are “buyer beware” for private sales. Even where it’s not strictly required, disclosing prior structural repairs is the standard that limits your liability exposure after the sale.
Can I repair a damaged plastic bumper without repainting the whole panel?
Often yes, if the damage doesn’t cross a body line you can mask against. Plastic-weld for strength, use flexible filler, and blend primer/paint out past the repair area to avoid a visible hard edge.
Where can I find factory body dimension specs for free?
Many public libraries provide free access to professional databases like Mitchell or ALLDATA that include body dimension charts and tram gauge reference points by year and model.
Paint & Body Supplies for DIY Collision Repair
Once your structural work is complete and panels are aligned, finishing materials make the difference between a quick fix and a durable repair. Browse our Paint & Body selection for everything you need to complete the job correctly.
- Flexible fillers and primers rated for plastic and metal surfaces
- Paint refinishing supplies for blending and touch-up coverage
- Surface preparation materials for lasting results

The Toolsource Technical Team blends decades of real-world automotive service experience with up-to-date technical research. Our writers collaborate with professional mechanics, shop owners, and diagnostic specialists to deliver practical, workshop-ready guidance you can trust.


Follow us on social media