When a coolant reservoir starts boiling over, it signals a failure somewhere in the pressurized cooling system—but the root cause isn’t always obvious. Modern cooling systems rely on pressure to raise the boiling point of coolant well above 212°F; when that pressure disappears, coolant boils at lower temperatures and the engine overheats. The challenge for technicians is determining whether you’re dealing with a simple pressure leak (cracked tank, bad cap, failed hose) or a more serious internal engine problem like a blown head gasket forcing combustion gases into the cooling system. This guide provides a systematic diagnostic approach to identify the failure point before you start replacing parts.
Understanding Pressure System Fundamentals
The cooling system operates as a sealed, pressurized circuit. Most systems run at 13-16 PSI, which raises the coolant boiling point to approximately 265°F depending on the coolant mixture. The reservoir on most modern vehicles isn’t just an overflow tank—it’s an integral part of the pressurized system. When pressure is lost through any leak, the boiling point drops dramatically. Even a properly mixed 50/50 antifreeze solution will boil around 220°F at atmospheric pressure, and pure water boils at 212°F.
Air pockets anywhere in the system create hot spots that boil before the coolant does. A small leak at a hose connection, O-ring, or reservoir seam can prevent the system from building proper pressure. This is why cooling system diagnosis must start with pressure integrity testing before jumping to expensive repairs like head gaskets. The physics are straightforward: lower pressure equals lower boiling point, and any breach in the sealed system will cause problems.
Visual Inspection and Initial Testing
Start with the vehicle cold. Inspect the coolant reservoir carefully for cracks, particularly along seams and at mounting points. On certain platforms—GM’s Epsilon cars including Pontiac G6 and Chevy Malibu, for example—plastic reservoir tank failures are common. Look for hairline cracks near the seam or stress fractures where mounting brackets attach. Check whether the reservoir comes with an integrated cap or uses a separate radiator cap; either way, the cap is a pressure relief valve and a common failure point.
Examine the coolant color in the reservoir. Properly maintained coolant should be bright and clean—orange, green, or pink depending on type. Brown, rusty, or milky coolant indicates contamination. Milky or foamy coolant suggests oil intrusion, which points toward head gasket or intake manifold gasket failure. Check the oil dipstick and oil fill cap for the reverse condition: coolant in the oil creates a chocolate milk appearance or mayonnaise-like foam under the cap.
With the engine cold, remove the reservoir cap or radiator cap and verify the coolant level. Squeeze the upper radiator hose—it should feel soft and pliable when cold. If it’s rock-hard with the engine cold, the system is holding residual pressure from combustion gases leaking into the cooling system, a strong indicator of head gasket failure.
Pressure Testing the Cooling System
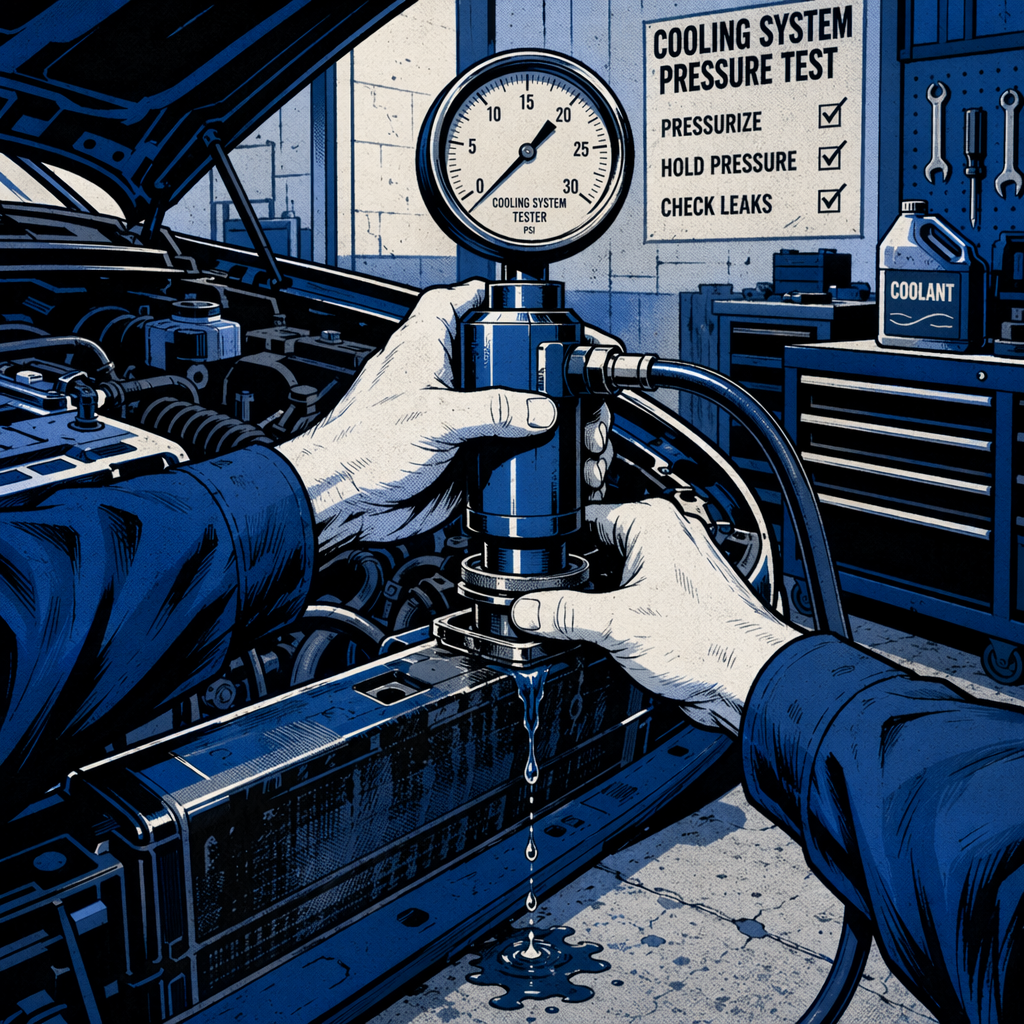
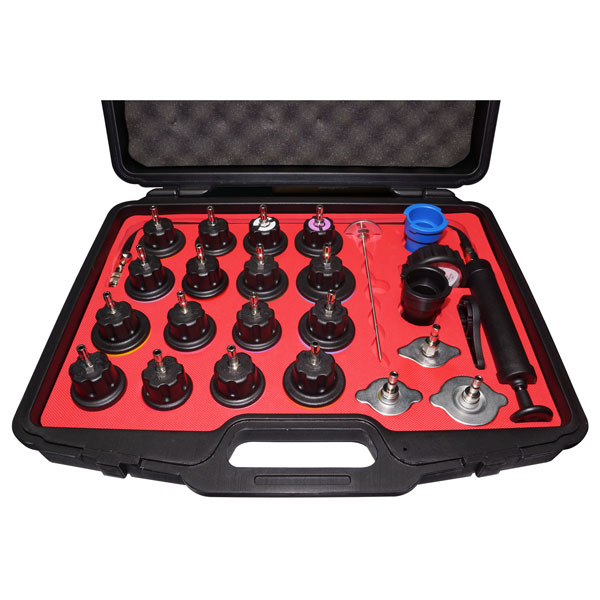
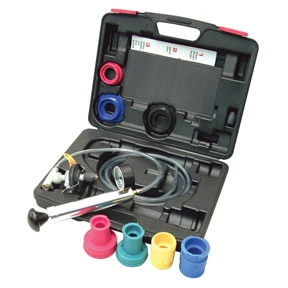
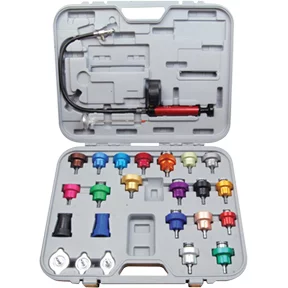
A cooling system pressure tester is essential for proper diagnosis. Most auto parts stores loan or rent these tools. With the engine cold, attach the pressure tester to the radiator or reservoir neck and pump it to the rating stamped on the cap (typically 13-16 PSI). The system should hold pressure for at least 10 minutes. Watch the gauge: a slow drop indicates a leak somewhere in the system.
While the system is pressurized, perform a systematic leak check. Inspect all hose connections, the water pump weep hole, heater core hoses, thermostat housing, and the reservoir itself. On vehicles with the coolant reservoir as the pressure point, pressurizing the system will often reveal leaks at the tank seam or cracks that aren’t visible at atmospheric pressure. Have a helper squeeze the upper radiator hose firmly while you watch for coolant spraying from the water pump, radiator, or tank—pressure surges will force coolant through small leaks.
If the system won’t hold pressure and you can’t find an external leak, the pressure is escaping internally. This points to a head gasket, cracked cylinder head, or intake manifold gasket allowing coolant to enter the combustion chamber or oil passages. Before tearing down the engine, confirm this with a combustion leak test.
Combustion Leak Testing (Block Test)
A combustion leak tester—often called a block tester—detects exhaust gases in the coolant, which confirms a breach between the combustion chamber and cooling system. The tool uses a chemical fluid that changes color in the presence of combustion gases. Auto parts stores typically loan these tools; buy the test fluid as it’s consumed during testing.
With the engine cold, remove the radiator or reservoir cap and insert the tester’s cone into the opening without touching the coolant. Start the engine and let it idle. Draw air from above the coolant through the tester fluid. If combustion gases are present, the blue fluid turns yellow within 30 seconds to two minutes. This is a definitive test for head gasket failure, cracked head, or cracked block—all conditions that require major repair.
Perform this test before replacing any parts. If the block test is positive, a new reservoir, cap, or thermostat won’t solve the problem. You’re looking at head gasket replacement at minimum, and you’ll want to pressure-test the cylinder head for cracks and have the mating surface machined flat before reassembly. If the block test is negative, you can proceed with cooling system component diagnosis and replacement.
Thermostat and Flow Diagnosis
A stuck-closed thermostat prevents coolant from circulating through the radiator, causing rapid overheating and boil-over. A stuck-open thermostat allows constant circulation, preventing the engine from reaching operating temperature—but won’t typically cause boiling unless combined with another failure.
Start the engine and monitor the temperature gauge. As the engine warms, feel the upper and lower radiator hoses. With a functioning thermostat, the upper hose should warm first as the engine heats up, and the lower hose should remain cool until the thermostat opens (typically around 195°F). When the thermostat opens, you’ll feel the lower hose warm rapidly as hot coolant flows through the radiator. If both hoses heat equally from the start, the thermostat is stuck open. If the upper hose gets extremely hot but the lower stays cool, the thermostat is stuck closed or the radiator is blocked.
Check for radiator flow restrictions. A clogged radiator won’t cool the coolant even if it’s circulating. With the engine at operating temperature and the thermostat open, the upper hose should be hot and the lower hose should be noticeably cooler—this temperature difference confirms the radiator is transferring heat. If both hoses are equally hot, the radiator isn’t flowing or cooling properly. External debris blocking airflow or internal corrosion blocking coolant passages both cause this condition.
If the engine shows overheating symptoms but the temperature gauge reads normal or low, suspect a faulty temperature sensor giving false readings to the gauge while the engine actually overheats. Use an infrared thermometer to verify actual coolant and engine block temperatures.
Diagnosing Reservoir and Cap Failures
The pressure cap is a wear item that fails over time. The cap contains a spring-loaded valve that opens at the rated pressure to vent excess pressure to the overflow, and a vacuum valve that opens during cool-down to draw coolant back from the overflow. If either valve fails, the system won’t maintain proper pressure. Caps are inexpensive—replace the cap as a first step if it’s more than two years old or shows any corrosion or damage to the sealing surface.
Test the cap seal with the cooling system cold and depressurized. Shut down the engine and wait two minutes for residual pressure to equalize. Locate the hose leading from the radiator to the reservoir—this is typically a small overflow hose on the side of the radiator. Squeeze the upper radiator hose hard and hold. If you hear hissing from the reservoir, either the cap isn’t sealing or there’s a crack in the tank preventing pressure buildup. A properly sealed system should show no air escape when you squeeze the hose.
Inspect the reservoir for the drain point. Most pressurized reservoirs have a small drain or weep hole at the bottom center; if coolant is streaming from this location, it indicates the cap’s pressure relief valve is venting—which is normal under extreme overpressure conditions, but shouldn’t happen during normal operation. Continuous venting suggests system overpressurization from combustion gas intrusion or a failed cap that’s venting at too low a pressure.
When replacing a cracked reservoir, verify whether the new tank includes a cap. Many replacement tanks don’t include the cap, and installing a new tank with an old deteriorated cap will result in continued pressure and boiling issues. Replace both components together.
Quick Diagnostic Checklist
- Check oil and coolant for cross-contamination (milky oil, rusty coolant)
- Perform cooling system pressure test and identify external leaks
- Run combustion leak test (block test) to rule out head gasket failure
- Test thermostat operation by monitoring radiator hose temperatures
- Verify radiator cooling efficiency (temperature difference between upper and lower hoses)
- Inspect reservoir tank for cracks along seams and mounting points
- Replace pressure cap if older than two years or showing wear
- Check for proper system bleeding after any repair to eliminate air pockets
System Bleeding and Air Pocket Elimination
Air trapped anywhere in the cooling system will cause localized boiling and overheating. After replacing any cooling system component—reservoir, hoses, thermostat, water pump—the system must be properly bled to remove air pockets. Air is compressible; coolant is not. Air pockets prevent proper coolant circulation and create hot spots that boil even when the bulk of the coolant is at safe temperatures.
Bleeding procedures vary by vehicle. Many systems have bleeder valves at high points in the cooling system—typically near the thermostat housing or on the engine block. With the engine cold, open the bleeder valves and fill the system slowly through the radiator or reservoir. Coolant will push air out through the bleeders; close each valve when steady coolant flow appears with no bubbles. If your system doesn’t have bleeder valves, you’ll need to burp the system by running the engine with the cap off, allowing air to escape as the thermostat opens and coolant circulates.
Run the engine at fast idle (1500-2000 RPM) with the heater on maximum heat and fan on high. This opens the heater core circuit and helps purge air from that section of the system. Watch the coolant level and add coolant as air escapes. Continue until the thermostat opens, the upper radiator hose gets hot, and you see steady circulation in the radiator or reservoir with no bubbles. Maintain the coolant level throughout this process—if the level drops and draws air into the pump, you’re back to square one.
Other Potential Causes
Less common failures can also cause overheating and coolant boiling. A failing water pump with eroded impeller blades won’t circulate coolant effectively even though the pump pulley spins. You can’t see the impeller without removing the pump, but symptoms include overheating at highway speeds (when the engine needs maximum coolant flow) while operating normally at idle.
Blocked or melted catalytic converters create extreme exhaust backpressure that can contribute to engine overheating, though this rarely causes coolant boiling by itself. If you’ve confirmed the cooling system is functioning but the engine still overheats, check for exhaust restrictions. A rusted freeze plug (core plug) on the back of the engine block can leak coolant externally; these leaks are hard to see because they’re hidden behind the engine near the firewall, but they’ll prevent the system from holding pressure.
On engines with plastic intake manifolds, the intake manifold gasket can fail and allow coolant into the intake plenum or oil passages. This creates symptoms similar to a head gasket failure—coolant loss, oil contamination, and sometimes white exhaust smoke. The combustion leak test won’t always detect an intake gasket leak because the coolant isn’t entering the combustion chamber, so consider this failure mode if you have coolant loss and contamination but a negative block test.
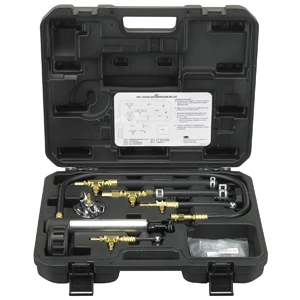

Cooling System Adapter Gasket FZ128-1 1/16 Inch
Mfg: Assenmacher Specialty Tools
Part #: FZ128138-1
Frequently Asked Questions
Can a cracked coolant reservoir cause the coolant to boil?
Yes. A crack prevents the cooling system from building pressure, which lowers the coolant boiling point. Even a small crack that leaks slowly can prevent proper pressurization, causing coolant to boil at temperatures well below the engine’s normal operating range.
How do I know if it’s a head gasket or just a pressure leak?
Perform a combustion leak test (block test) with the engine running. This chemical test detects exhaust gases in the coolant and definitively identifies head gasket or internal engine failures. If the test is negative, you’re dealing with an external pressure leak.
Will the engine overheat immediately if the thermostat is stuck closed?
Yes, usually within a few minutes of starting. Hot coolant is trapped in the engine block with no circulation to the radiator. The upper radiator hose will be extremely hot while the lower hose stays cool, and the temperature gauge will climb rapidly into the red zone.
Why does squeezing the radiator hose help diagnose leaks?
Squeezing the hose creates a pressure surge that forces coolant through small leaks that might not be visible under static pressure. It also tests cap seal integrity—a properly sealed system won’t hiss or release air when you squeeze a hose with the system cold.
Can I drive the vehicle if coolant is boiling in the reservoir?
No. Continued operation with a boiling, depressurized cooling system will cause severe engine damage within minutes. The engine will overheat rapidly, potentially warping the cylinder head, blowing the head gasket if it isn’t already blown, or seizing internal components. Diagnose and repair the cooling system before operating the vehicle.
Do I need to replace the cap when I replace the coolant reservoir?
Yes, if the cap is part of the reservoir assembly or if it’s more than two years old. Many replacement reservoirs don’t include caps, so verify this before installation. A deteriorated cap won’t seal properly even on a new tank, and you’ll continue to have pressure and boiling issues.
Cooling System Tools for Diagnosis and Repair
Proper diagnosis of coolant boil-over requires the right tools and systematic testing. Pressure testers, combustion leak detectors, and basic hand tools are essential for identifying whether you’re dealing with a simple pressure leak or an internal engine failure. Our Automotive Cooling System category carries the diagnostic and repair equipment you need:
- Cooling system pressure testers and adapters for accurate leak detection
- Combustion leak test kits (block testers) to confirm head gasket failure
- Hose clamps, thermostats, caps, and radiator tools for system service

The Toolsource Technical Team blends decades of real-world automotive service experience with up-to-date technical research. Our writers collaborate with professional mechanics, shop owners, and diagnostic specialists to deliver practical, workshop-ready guidance you can trust.


Follow us on social media