Oil leaks in Chrysler 3.6L engines, particularly in vehicles like the Dodge Charger, Challenger, and Jeep Grand Cherokee, are common issues that technicians encounter often. These leaks can lead to significant engine damage if not addressed promptly. This article will provide a systematic approach for diagnosing these leaks, practical repair steps, and essential tools needed.
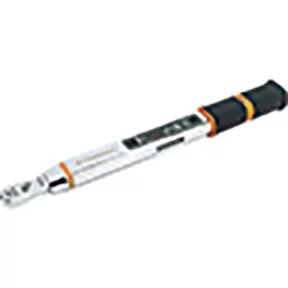
1/4 Dr. 5-25Nm Fixed Head E-Spec Electronic Torque Wrench Kit
Mfg: GearWrench
Part #: 85235

1/2 Inch Drive Torque Wrench - Dial Type - 250 ft-lbs
Mfg: CDI Torque Products
Part #: 2503LDFNSS
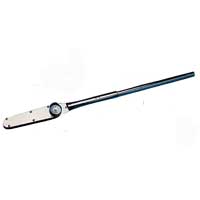
1 Inch Drive Dual Scale Dial Torque Wrench - 0-1000 ft-lbs
Mfg: CDI Torque Products
Part #: 10005LDFN

1" Drive Dial Torque Wrench, Single Scale (0-1000 ft-lb)
Mfg: CDI Torque Products
Part #: 10005LDFESS
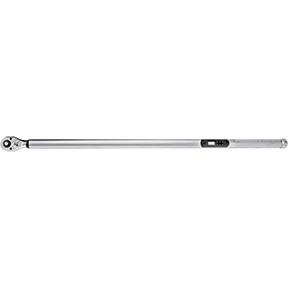

1/4 Inch Drive Electronic Torque Wrench 12-120 in-lbs TPMS
Mfg: GearWrench
Part #: 85072
Understanding Common Sources of Oil Leaks
Before diving into repairs, it’s vital to identify potential sources of oil leaks in the 3.6L engine. The most common causes include:
- Oil Filter Housing: The oil filter housing is known for leaks due to its design and material. If it is cracked or improperly sealed, oil can leak out, especially after an oil change.
- Oil Drain Plug: A loose or damaged drain plug can cause an oil leak. Ensure that the threaded area is clean and that the washer is in good condition.
- Oil Cooler: Many 3.6L engines have an oil cooler integrated with the oil filter housing. Cracks in this component can lead to excessive oil loss.
- Gasket Failures: Over time, gaskets can degrade, leading to leaks at various points. Check the oil pan gasket and any other seals that may have been compromised.
Step-by-Step Diagnosis
Determining the source of an oil leak requires a methodical approach. Follow these steps:
- Visual Inspection: Start with a visual examination of the engine and surrounding areas. Look for oil pooling on surfaces, as well as dried oil spots that indicate previous leaks.
- Check Fluid Color: Use a clean white paper towel to absorb a small amount of fluid. This will help you confirm that it’s oil (brown color). If it’s green or orange, the leak may be coolant.
- Inspect the Oil Filter: With the engine off, check the oil filter for any signs of oil weeping. If it’s not snug, reseat it properly.
- Examine the Drain Plug: Ensure the drain plug is tight. If you feel oil around it, it may need a new washer or have stripped threads.
- Analyze the Engine Valley: For the V6 configuration, a common leak source is the valley between the cylinder heads. Remove the engine cover and look for oil accumulation.
Performing the Repairs
Once the source of the leak is diagnosed, proceed with repairs:
- Replacing the Oil Filter Housing: If the oil filter housing is cracked, remove the old unit and install a new aluminum housing. Ensure all seals are in place to prevent future leaks.
- Tightening or Replacing the Oil Drain Plug: Use a torque wrench to tighten the drain plug to manufacturer specifications. If it’s damaged, replace it with a new one.
- Repairing Gaskets: If the oil pan gasket is leaking, it can be a more extensive job requiring you to lift the engine or transmission. Remove the old gasket and apply the new one according to specifications.
Post-Repair Inspection and Maintenance
After repairs, check your work:
- Run the Engine: Observe for any new leaks while the engine runs for at least five minutes. Look for oil droplets from the previously diagnosed areas.
- Check Oil Levels: Always check oil levels after repairs. This ensures that you’re not running the engine low on oil.
- Schedule Regular Maintenance: Regular oil changes and inspections can prevent issues down the line. Make a habit of inspecting oil filters and drain plugs during these services.
Safety Precautions to Consider
Safety is paramount when working on vehicles:
- Use Proper Equipment: Always use jack stands or ramps when working under the vehicle. A floor jack alone is not sufficient for safety.
- Wear Protective Gear: Gloves and safety glasses are essential to prevent injury from oil and debris.
- Environmental Considerations: Dispose of used oil and components according to local regulations to protect the environment.
Checklist for Quick Reference
Use this checklist to ensure you don’t miss any vital steps:
- Conduct a thorough visual inspection
- Use a paper towel to check fluid color
- Inspect the oil filter and drain plug
- Examine the engine valley
- Replace any faulty components
- Run the vehicle to check for leaks post-repair
FAQs
1. How do I know if I have an oil leak?
Signs include oil spots on the ground under your vehicle, low oil levels in the engine, and the smell of burning oil.
2. Is it safe to drive with an oil leak?
No, driving with an oil leak can lead to severe engine damage. It’s best to have it towed to a shop.
3. How can I fix an oil leak?
Identify the leak source, tighten loose connections, replace faulty gaskets or components, and monitor the area for further oil accumulation.
4. What common tools do I need for oil leak repairs?
A floor jack, jack stands, torque wrench, socket set, oil catch pan, and replacement parts/gaskets.
5. How often should I check my oil levels?
Check your oil levels regularly, especially before long trips or after significant maintenance.
6. What should I do if I suspect my car has been overfilled with oil?
If you suspect overfilling, do not drive the vehicle and have it inspected by a professional to prevent engine damage.
Recommended Tools
To effectively handle oil leak repairs in Chrysler 3.6L engines, consider our Engine Repair Tools. These tools will help you ensure a thorough and safe repair process.
- Professional-grade torque wrenches for accurate tightening.
- Complete socket sets designed for engine components.
- Oil catch pans to manage fluid during repairs.

The Toolsource Technical Team blends decades of real-world automotive service experience with up-to-date technical research. Our writers collaborate with professional mechanics, shop owners, and diagnostic specialists to deliver practical, workshop-ready guidance you can trust.


Follow us on social media