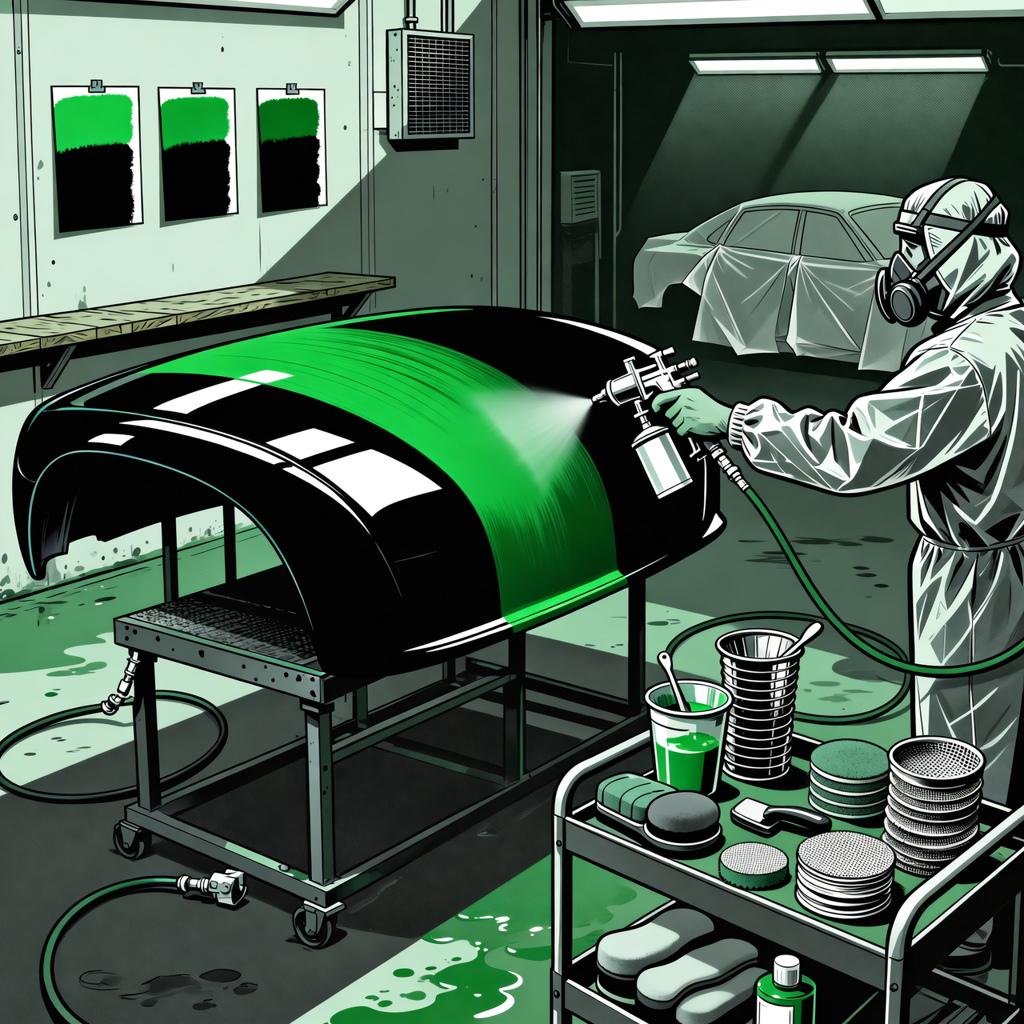
Want a deep green finish that reads like a candy without the difficulty curve of a true dye-based candy? A candy-style (tinted/pearlescent) green over a black groundcoat is a proven route. Below is a technician-oriented workflow: picking the groundcoat, dialing in your gun, laying down the candy-style base evenly, applying three coats of USC01 clear, and addressing minor dirt nibs without a full color-sand and polish. Follow the system technical data sheets (TDS) you’re using; the targets and tips here help you get consistent, repeatable results.

213391 70030002 Gemtex Abrasives GMA-70030002 3" B/PAD FOR TYPE N SREW ON
Mfg: Gemtex Abrasives
Part #: 70030002
165616 30002 CGW Abrasives CGW30002 2" Roloc T27 Zirconia 40gt
Mfg: CGW Abrasives
Part #: 30002

1) Plan the System: Groundcoat, Midcoat, and Clear
Before mixing paint, define the stack: substrate prep, sealer, black groundcoat, candy-style green base (or midcoat), then USC01 clear. Candy-style bases use tinted binders and/or pearl rather than pure dyes, so they’re more forgiving than true candy but still sensitive to application variation.
- Groundcoat color: Black intensifies depth and contrast under candy-style greens, delivering a darker, richer result. A lighter or metallic ground (e.g., silver, gold) will brighten and increase flop but can reduce perceived depth.
- Spray-out cards: Always create spray-outs over your chosen groundcoat. Use at least three sample passes: 1, 2, and 3 medium-wet coats of the candy-style base so you can see saturation and mottling risk. Note your reducer speed and flash times.
- Sealer choice: A dark gray/black sealer beneath the black base helps even absorption and reduces coverage time, especially over varied substrates or bodywork. Match sealer to system requirements for topcoat compatibility.
- System compatibility: Keep primer/sealer, base, and clear within the same paint system where possible. If you must mix brands, confirm chemical compatibility and observe flash/recoat windows from each TDS.
- Film build management: Plan clear film build for appearance and future refinish options. Three coats of clear increase cut-and-buff safety margin. Observe the clear’s TDS maximum dry film build to avoid solvent entrapment or cracking risk.
2) Prep and Masking to Minimize Dirt Nibs
Dirt nibs come from dust, fibers, or contaminants in the booth airflow or on the substrate. Start clean so you need less correction after clear.
- Substrate leveling: Block to final shape and finish-sand with 600–800 grit for solventborne base (1000–1200 for waterborne; follow system TDS). Hard edges and body lines benefit from a finer grit to prevent cut-through.
- Clean cycles: Use a waterborne degreaser first, then a solvent panel wipe. Change wipes often. Final-clean twice, then tack lightly with a quality tack cloth just before spraying. Do not over-tack.
- Static control: Plastic bumpers and fresh primer can hold static. Use an antistatic wipe or ionizing air gun. Ground the panel where possible.
- Masking and airflow: Use high-tack automotive tape and clean paper or film. Seal door gaps and jambs to reduce blowout. Verify booth filtration is fresh and the floor is damp-mopped (not wet) before entry.
- Personal contamination: Wear a lint-free suit and clean gloves. Keep mixing room separate from booth. Strain all coatings through 125–190 micron strainers, and keep lids on cups until you enter the booth.
- Temperature and reducer choice: Target 70–78°F (21–26°C) and 40–60% RH. Pick reducer speed by panel size and temp to limit overspray dusting and dry spray.
3) Gun Setup, Mixing, and Test Panels
Consistency in setup yields even color and texture. Use test panels to lock in parameters before touching the vehicle.
- Spray gun and tip: For base/midcoat, start with a 1.3–1.4 mm tip on HVLP or compliant. Clear is typically 1.3–1.4 mm. Follow your gun maker’s chart.
- Pressure: As a baseline, HVLP often runs 18–22 psi at the gun for base (to achieve roughly 10 psi at the cap) and 24–28 psi for clear. Compliant guns may need 26–30 psi. Verify with a gun regulator/manometer and adjust for atomization without excessive bounce-back.
- Fan and fluid: Set a full, even fan that slightly exceeds panel height where practical. Start mid-range on fluid, then increase until a medium-wet coat forms without sags. Keep the gun 6–7 inches (150–180 mm) off the panel.
- Mixing and pot life: Mix base and clear per TDS, including hardener and reducer ratios. Strain all mixes. Respect pot life on activated products. Some clears benefit from a short induction (1–5 minutes); consult TDS.
- Test panels: Verify coverage, orientation, and metallic control on a spray-out. Check the midcoat for uniformity and the clear’s flow and texture with your reducer/hardener choice.
4) Laying Down the Candy-Style Green Over Black
Candy-style green demands even application to avoid tiger striping, blotches, or dark/light bands. Over black, small variations in film thickness noticeably shift shade.
- Groundcoat coverage: Apply the black basecoat over sealer until fully uniform. Use 50–75% overlap and consistent gun speed. Let flashes reach matte (or as directed for waterborne). Avoid sanding the black base; if you must correct, re-spray to full hiding before the midcoat.
- Orientation coat: Apply the first candy-style pass as a light-to-medium orientation coat to establish even metallic/pearl distribution without chasing full color. Walk the panel, keep your distance and speed consistent, and maintain 70–75% overlap.
- Building color: Apply subsequent medium-wet coats to build depth. Plan for 2–3 coats depending on the product and desired richness. Allow proper flash to hand-slick/matte between coats to prevent mottle from solvent disturbance.
- Cross-coating strategy: For large hoods or roofs, use cross-coats (one pass horizontal, one vertical) to minimize banding. Keep a wet edge and spray off-panel at the start/stop of each pass.
- Avoiding tiger striping: Do not arc your wrist; keep the gun perpendicular to the surface throughout each pass. Overlap consistently and avoid speeding up or slowing down across the center of the panel. If striping appears, a final light drop-coat at a slightly increased distance can even the orientation—test on a panel first.
- Blending: Blending candy-style layers is sensitive. Extend the blend of the black groundcoat first if needed, then feather the candy-style base into adjacent panels with a controlled drop-coat pattern. Plan to clear a natural break or the entire side to conceal transitions.
5) Applying USC01 Clear: Three-Coat Strategy for Depth and Protection
USC01 is commonly used where high gloss, durability, and a safe cut/buff window are desired. Three coats provide film build for future correction while delivering off-the-gun gloss when dialed in.
- Booth conditions: Verify 70–78°F (21–26°C). Choose activator/reducer speed for your temperature and job size. Cooler temps or large vehicles favor slower speed to maintain flow without solvent pop.
- Coat 1 – medium-wet: Aim for even coverage with slight texture. This anchor coat reduces solvent shock. Overlap 70–75% with uniform gun speed.
- Flash: Allow the first coat to go hand-slick per TDS. If the clear remains stringy when touched in a masked area, extend the flash or increase airflow (not heat) to evacuate solvents.
- Coat 2 – full-wet: Increase fluid slightly for a wet coat with uniform gloss. Watch body lines and verticals for early sags. Adjust your pace to maintain a wet edge.
- Flash: Follow TDS. If texture or orange peel rises, verify gun distance and atomization. A small pressure increase (1–2 psi) may tighten the pattern; do not chase a run.
- Coat 3 – controlled wet/flow: The third coat adds film build and depth. Apply slightly wetter than coat 2 only if your booth and reducer speed allow safe flow without runs. Some techs prefer mirroring coat 2 for safety. Respect the clear’s maximum film build.
- Edges and jambs: Pre-wet edges with a pass of clear before bombing the center of large panels. This reduces dry edges. Use careful gun control in jambs to avoid heavy build.
- Cure: Allow the clear to dry per TDS. Off-the-gun gloss can be excellent. If your schedule allows, a 24–48 hour ambient cure or a panel-baked cycle reduces the risk of dieback before any denibbing or polishing.
6) Dirt Nib Correction and Finishing Options
Minor nibs can be corrected without a full color sand, provided the clear has cured sufficiently. If you’re satisfied with texture and gloss, only remove the defects.
- Initial cure: Wait until the clear is firm enough to sand cleanly (often 24–48 hours ambient or per bake schedule). Test a small masked area.
- Locate nibs: Use raking light to spot raised dust points. Mark them with a grease pencil.
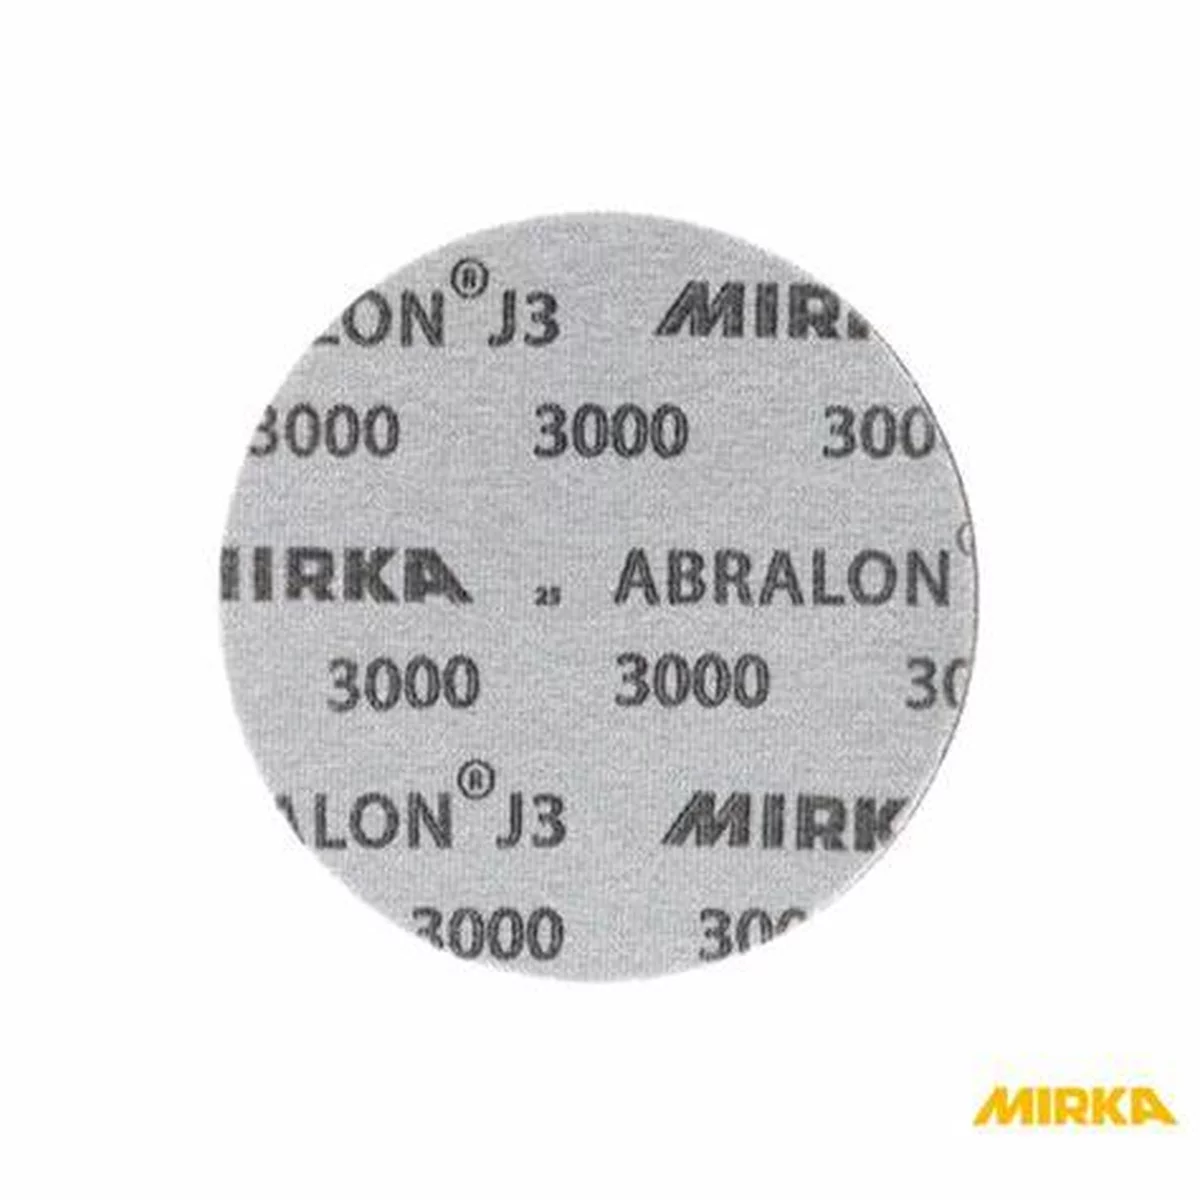
- Targeted removal: Level the nib with a denibbing tool or a tight 2000–2500 grit dot using a small interface pad on a DA at low speed. Keep the area small.
- Refinement: Step to 3000–5000 grit foam discs to refine the scratch. Keep it cool and use minimal water if wet-sanding. Avoid thinning at edges or body lines.
- Compounding: Use a diminishing-abrasive compound on a microfiber or foam cutting pad at low-to-medium speed. Clean the pad frequently to avoid haze.
- Polish and inspect: Follow with a fine polish on a soft foam pad. Wipe with an inspection spray and check under multiple light sources.
- When to full cut/buff: If texture varies panel-to-panel or if you require a show surface, flatten uniformly with 1500–2000 grit and step through 3000–5000 before compounding. Ensure you left enough clear film to safely cut.
Quick Checklist: Candy-Style Green Over Black
- Spray-out over black groundcoat to confirm color depth and uniformity.
- Clean and de-static thoroughly; strain all coatings.
- HVLP 1.3–1.4 mm; baseline 18–22 psi base, 24–28 psi clear (adjust per gun/TDS).
- Apply black base to full hiding; do not sand the base prior to midcoat.
- Build candy-style midcoat in 2–3 even coats with consistent overlap; use cross-coats where needed.
- Apply 3 coats of USC01 clear with proper flash; control film build.
- After cure, denib locally with 2000–3000 grit and polish as required.
FAQs
Is a candy-style base the same as a true candy?
No. A candy-style base uses tinted bases and/or pearl in a conventional basecoat binder. It sprays more like standard basecoat and is less transparent than a true dye-in-binder candy. It’s more forgiving, with fewer tiger striping issues, especially over black.
Why choose a black groundcoat for green?
Black maximizes depth and darkens the final shade, emphasizing the candy effect. It also simplifies coverage compared to metallic grounds. If you want a brighter, more sparkling green, a lighter or metallic ground (silver/gold) can be used, but it changes the look dramatically—confirm with spray-outs.
How many coats of clear are ideal?
Two coats often meet OEM-like appearance. Three coats are common when you want extra film for future cut/buff or to enhance perceived depth. Always respect the clear’s TDS for maximum film build and recoat windows.
Can I skip color sanding and buffing?
If the clear lays down cleanly with acceptable texture and you only have minor dirt nibs, you can denib locally and leave it off the gun. Full color sanding and buffing are optional and depend on your gloss/texture target.
What if I see tiger striping or blotchiness in the candy-style layer?
Pause and correct before clearing. Increase overlap consistency, maintain a uniform gun distance, and consider a light drop-coat to even orientation. Cross-coat on large horizontals. If the mottling is already locked in the midcoat, resand the midcoat per system guidance and respray evenly before clear.
What gun tip and pressure should I start with?
Start at 1.3–1.4 mm for both base and clear. Base: 18–22 psi at the gun on HVLP; clear: 24–28 psi. Adjust by test panel to achieve fine atomization and an even wet film without overspray dryness or runs. Always follow your gun and paint system TDS.
When should I denib the clear?
After the clear has reached a firm cure—commonly 24–48 hours ambient or after a bake and cool-down. If sanding produces gummy residue, wait longer. Denib locally first, then refine and polish.
Tools and Materials Reference
- Sealer compatible with your system (dark gray/black recommended)
- Black basecoat and reducers (temperature-appropriate)
- Candy-style green base or midcoat; follow the system’s mixing ratios
- USC01 clear with appropriate activator and reducer
- HVLP/compliant spray gun with 1.3–1.4 mm tip and gun regulator
- Mixing cups, stir sticks, and 125–190 micron paint strainers (PPS or similar)
- Masking paper/film, automotive tape, and panel stands
- Degreasers (waterborne and solvent), tack cloths, antistatic wipes
- Abrasives: 600–800 (prep), 1500–2000 (cut), 3000–5000 (refine)
- Denibbing tool, interface pads, DA sander, raking light
- Compound, polish, microfiber and foam pads
- PPE: fresh-air or cartridge respirator rated for isocyanates (per local regulations), gloves, suit, and eye protection
Final note: Always consult and follow the specific TDS for your primer/sealer, basecoat, and USC01 clear. Environmental conditions, reducer/activator selection, and equipment settings can materially change flash times, recoat windows, and finish quality.
Shop Automotive Paint & Finishing Tools
Ready to put this workflow into practice? Find the essentials in our Sanding Discs and Sheets.
- HVLP/compliant spray guns, regulators, and disposable cup systems.
- Mixing supplies, strainers, reducers/activators, and PPE for booth work.
- Abrasives, denibbing tools, compounds, and polishing pads for final finish.
The Toolsource Technical Team blends decades of real-world automotive service experience with up-to-date technical research. Our writers collaborate with professional mechanics, shop owners, and diagnostic specialists to deliver practical, workshop-ready guidance you can trust.

Follow us on social media