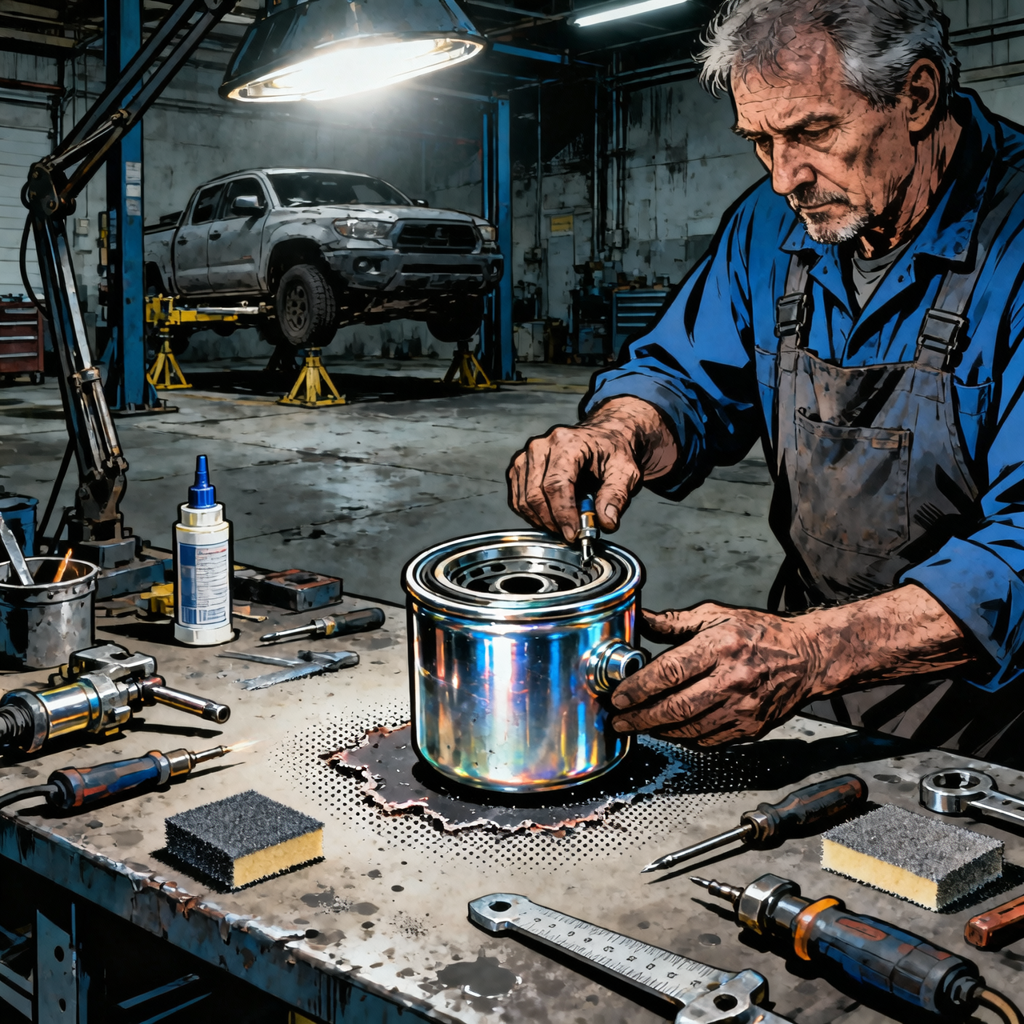
Gouging the oil filter sealing land while removing a stuck spin-on filter can turn a routine service into a leak you cannot ignore. The good news: if the damage is confined to the machined sealing ring around the oil filter boss, you typically have multiple viable repair paths. This guide breaks down how to assess the severity, choose the right approach, and execute a clean, durable repair with technician-level detail.
Assess the Damage and Choose a Repair Path
Start with a clean, well-lit inspection. Wipe away oil, use a bright inspection light, and run a fingernail around the sealing land to identify raised burrs, gouges, and low spots. Understand how the filter seals: the rubber gasket contacts the flat machined ring outside the threaded spud. As long as you can restore a reasonably flat, continuous surface, you can often recover the location without replacing the engine block.
- Identify the component: Is the oil filter mount a bolt-on housing or cast into the block? Many engines use a replaceable housing or cooler plate; others are integral.
- Map damage: Is the gouge confined to a local sector of the ring, or is the land chewed across most of the circumference? Note raised lips and sharp edges that can cut a gasket.
- Check access: Can you remove the center threaded spud (adapter) to gain tool room? Many spuds accept a hex/Allen or Torx internally.
- Leak path awareness: The sealing land must be flat and free of deep grooves. The gasket will tolerate small irregularities, but not sharp edges or channels.
Decision guide:
- Minor nicks/raised lips only: Dress with a fine file or machinist stone; no fill required.
- Localized gouge(s) but mostly intact land: Rebuild with a metal-filled epoxy/putty, then lap flat.
- Large missing section or fractured land, sufficient access: TIG weld build-up, then machine/stone flat.
- Bolt-on housing present: Replace the housing (often fastest and most reliable).
- No access, extensive damage, or uncertain sealing after repair: Remove and machine on a bench, or consult a machine/welding shop.
Tools and Materials You’ll Likely Need
- Surface prep and finishing: fine and smooth-cut hand files, machinist stone, 220–600 grit aluminum-compatible wet/dry paper, lapping plate (thick glass or granite block), small square/straightedge, feeler gauges.
- Abrasive options (use judiciously): 3M Roloc-style surface conditioning discs (red), small die grinder or low-speed drill with Roloc backing pad. Control debris; avoid aggressive removal on aluminum.
- Cleaning: solvent-safe brushes, brake cleaner, acetone or lacquer thinner, lint-free wipes, masking tape, shop vacuum, compressed air with clean/dry supply.
- Heat for de-oiling and cure: adjustable heat gun or infrared lamp; non-contact thermometer.
- Protection: nitrile gloves, eye protection, hearing protection, fender covers, absorbent pads, plugs or tape to temporarily seal oil passages.
- Fill materials (choose one approach):
- Metal-filled epoxies/putties: general examples include steel- or aluminum-filled repair compounds designed for flange restoration.
- High-quality RTV (for supplement only, not primary build): oil-resistant, sensor-safe types if needed for minor assist after a proper rebuild.
- Filter tools for reassembly/prevention: nylon strap wrench, cap-style filter socket, torque wrench (for drain plugs where applicable), fresh oil filter and engine oil.
Step-by-Step: Epoxy/Metal Putty Rebuild of the Sealing Land
This is the most accessible and commonly successful field repair when a chunk of the sealing land is missing. Success depends on surgical cleanliness, good surface profile, and full cure at the proper temperature.
- Stabilize and prepare: Park safely, engine cool. Disconnect battery negative if you’ll be grinding. Drain oil to minimize drips and contamination.
- Remove the filter and spud: If not already off, remove the damaged filter. Remove the threaded center spud/adapter if the design allows (internal hex/Torx). This greatly improves access and finishing.
- Mask and protect: Plug the center oil feed and return annulus with lint-free foam plugs or tape. Mask threads. Surround the work area with absorbent pads to catch debris.
- Initial degrease: Flood the area with brake cleaner. Scrub with solvent-safe brushes. Wipe until no oil appears on a fresh lint-free wipe.
- De-oil by heat cycling: Warm the aluminum casting to approximately 120–160°F (50–70°C) with a heat gun. As oil sweats out, wipe and spray again with brake cleaner or acetone. Repeat until a warmed wipe comes away clean and dry. This step is critical; aluminum pores trap oil.
- Mechanically key the damaged zone: Lightly roughen only the repair area with 80–120 grit or a fine burr. Avoid spreading aluminum dust into galleries. Vacuum while you work. Break sharp edges and remove raised lips with a fine file. Do not thin the entire sealing land.
- Final clean: After abrading, repeat solvent wash and hot de-oiling once more. Allow the surface to cool to the product’s recommended application temperature.
- Choose your forming strategy:
- Freehand fill, finish later: Pack the putty flush or slightly proud, then stone/lap it flat after cure.
- Mold to shape using a release surface: Cover a clean, sacrificial filter’s gasket land with smooth release tape (shiny packaging tape or PTFE plumber’s tape), or foil plus release agent. Lightly oil the filter’s rubber gasket. The release layer prevents bonding to the filter and helps mold a flat plane.
- Mix and apply compound: Follow the manufacturer’s mix ratio and working time. Press the compound firmly into the gouge and across the immediate area. Avoid voids. If using the molded method, thread the prepared filter on by hand until the gasket first contacts, then an additional small fraction of a turn to seat the plane. Do not over-tighten; you are forming, not clamping hard.
- Cure correctly: Maintain the repair area at the recommended cure temperature (often 70–95°F / 21–35°C). Use gentle, even heat. Observe full cure time (often 8–24 hours). Do not run the engine to “speed cure.”
- Disassemble and inspect: Remove the molded filter and release film. Inspect for flatness, voids, or pulled edges. If needed, conduct a second skim application and re-cure.
- Finish the surface: Lap the sealing land with 320–600 grit paper on a flat glass plate. Keep the paper wet with a compatible solvent. Use light, even pressure. The goal is a flat plane that feathers the repair into the original aluminum without low spots. Check with a small straightedge; aim for less than 0.002 in (0.05 mm) deviation across the sealing ring.
- Deburr and clean: Lightly break the inner and outer edges so they don’t cut the new gasket. Remove all masking and plugs. Vacuum thoroughly. Rinse the area with fresh solvent and allow to dry. Avoid blowing debris into galleries.
- Reinstall spud (if removed): Clean threads, inspect O-ring or seal (if used in your design), and torque per spec. In most cases no sealant is used unless specified by the OEM.
- Reassemble and test: Install a new oil filter with a lightly oiled gasket. Spin until the gasket contacts, then tighten per filter instruction (typically 3/4–1 turn by hand). Refill oil. Prime by disabling ignition/fuel and cranking until oil pressure builds, or start and idle while observing closely for leaks.
- Final checks: Warm to operating temperature, then shut down and inspect again. Recheck after the first short drive.
Step-by-Step: Aluminum Weld Build-Up and Refinish (Shop Method)
When a larger section is missing or the customer requires a metal-only repair, TIG weld build-up followed by stoning/lapping is robust. This is best performed by a shop experienced with casting repairs.
- Preparation: Drain oil, disconnect the battery, and protect electronics. Degrease and de-oil as in the epoxy procedure. Remove spud to maximize access.
- Pre-clean and preheat: Wire brush with stainless dedicated to aluminum. Preheat the area to reduce porosity. Choose a compatible filler (e.g., 4043 for general casting repair).
- Build the land: Stitch in small beads to rebuild the missing section, allowing for finishing. Avoid overheating. The goal is a solid, slightly proud pad where the sealing land was.
- Rough dress: After cooling, use a fine file to bring the surface near plane. Avoid grinding marks that could cut the gasket.
- Finish flat: Stone the surface, then lap with 320–600 grit on a flat plate. Verify flatness with a straightedge and feeler gauge.
- Clean and flush: Vacuum, then solvent flush. Consider a precautionary early oil and filter change after the first heat cycle in case of residual particulate.
- Reassemble and test: Install spud (if applicable), new filter, and oil. Pressure test and inspect for leaks as above.
Alternatives and When to Use Them
- Replace the bolt-on housing: If your engine uses a removable filter mount or cooler plate, replacement is typically fastest and most reliable.
- On-car facing/machining: Specialized jigs that index off the filter threads can reface the sealing land accurately. Machine shops may offer mobile service.
- Bonded ring insert: A thin, machined metal ring matched to the sealing diameter can be bonded with a high-strength, oil/heat-resistant adhesive. This can restore geometry and simplify future filter changes. Alignment and flatness are critical.
- Sandwich plates and relocation kits: These devices require an intact seal at the original location. They do not eliminate the need for a sound sealing land. In limited cases, an adapter can be permanently bonded and used only once, but this is non-standard and should be considered a last resort.
Preventing a Repeat: Removing Stuck Filters Correctly

- Verify basics: Ensure the old gasket is not stuck to the land (double-gasket is a common cause of leaks). Warm the engine slightly so the gasket is pliable.
- Use the right tool first: A cap-style filter socket that matches the can’s flutes, or a nylon strap wrench, applies even torque without crushing.
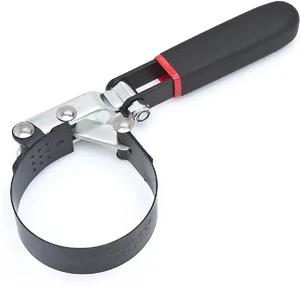
- Avoid stabbing the can: Puncturing often just tears the shell. If needed, use a robust band or chain wrench carefully, ensuring force is near the base.
- Remove the spud when possible: With the can removed, unscrew the center adapter (internal hex). This can free a stubbed base-plate without chiseling near the sealing land.
- Last-resort techniques: Slightly crush the can with a clamp to break the bond, or use a pipe wrench on the base-plate rim with controlled force. Protect the sealing land at all costs.
- Install correctly: Clean the land, lightly oil the new gasket, spin until it touches, then tighten per instructions (commonly 3/4–1 turn by hand). Do not wrench-tighten beyond spec.
- Torque drain plugs: Follow OEM spec; if unspecified, many aluminum pans are in the 18–25 ft-lb range with a fresh washer. Always verify.
Pre-Start Checklist After Sealing Land Repair
- Repair fully cured at correct temperature and time.
- Sealing land verified flat (target ≤0.002 in / 0.05 mm deviation).
- All masking/plugs removed; no debris present.
- Center spud installed and secure (if applicable).
- New filter installed with oiled gasket; tightened to spec.
- Oil refilled to spec; no drips observed at rest.
- Initial start/prime performed with eyes on the repair; no seepage under idle and at operating temperature.
FAQs
Will a metal-filled epoxy hold long-term on an oil filter sealing surface?
When the base metal is oil-free, the surface is properly keyed, and the compound is fully cured at the right temperature, these products can perform for years. They are widely used to restore gasket and flange faces in industrial service. It is not an OEM-approved fix and should be monitored at service intervals, but in automotive use a well-executed repair often becomes permanent.
Should I remove the center threaded spud to repair or finish the surface?
Yes, if your design allows it. Removing the spud provides crucial access for forming, filing, and lapping, and it reduces the risk of damaging threads or trapping adhesive. Look for an internal hex or Torx. Reinstall clean and torque per OEM guidance.
Can I just use RTV to stop the leak?
RTV is not a substitute for a flat sealing plane. Excess sealant can squeeze out and migrate into oil passages. A very thin film can sometimes assist after the land is restored and flat, but the primary seal should be the filter gasket against a flat, clean surface.
How flat does the sealing land need to be?
Spin-on filter gaskets are forgiving, but aim for a flatness deviation under 0.002 in (0.05 mm) across the sealing ring. Use a small straightedge and feeler gauges to verify. Remove raised lips and sharp edges; they cut gaskets and create leak paths.
What finishing grit should I use?
Dress with a fine file or stone, then lap with 320–400 grit and finish at 600 grit. The goal is a smooth, flat plane without deep scratches. Clean thoroughly between grits to avoid embedding abrasive.
Is it safe to run the engine to help the epoxy cure?
No. Engine heat and oil will contaminate uncured epoxy, and vibration can disturb the bond. Maintain the recommended cure temperature with external heat and allow full cure before introducing oil pressure.
Shop Paint & Finishing Tools
Need surface prep and finishing supplies for sealing-surface repairs? Explore our Automotive Paint & Finishing Tools to cleanly dress, mask, and finish the area after epoxy or weld work.
- Abrasives, sanding blocks, and scuff pads for stoning/lapping and scratch refinement.
- Masking materials and solvent-safe wipes to keep debris out of oil passages.
- Polishers and finishing tools to smooth and deburr edges without cutting gaskets.
Once you’ve repaired your oil filter housing sealing surface, proper maintenance and cleaning are essential to prevent future damage. Our cleaning supplies category offers everything you need to keep your engine components in top condition.
- Degreaser Cleaners: Heavy-duty formulas to remove oil buildup and contaminants from engine surfaces
- Lint-Free Rags & Shop Towels: Prevent fibers from contaminating your freshly repaired sealing surfaces
- Protective Coatings & Sealants: Additional protective barriers to extend the life of your repairs

The Toolsource Technical Team blends decades of real-world automotive service experience with up-to-date technical research. Our writers collaborate with professional mechanics, shop owners, and diagnostic specialists to deliver practical, workshop-ready guidance you can trust.


Follow us on social media