
Finding metal fragments in an oil filter right after a drain plug drill-and-tap or thread repair is a high-stress moment. The key is to separate what’s plausible from what’s not, verify the source, and protect the engine. This guide explains what can reach the filter, how to triage the finding, how to clean the oiling system, and how to prevent a repeat when repairing drain plug threads.
What Can and Can’t Reach the Oil Filter: Oiling System Realities
Before deciding the engine is failing, confirm the oil circuit facts:
- Pickup screen first: Oil is drawn from the sump through a pickup tube with a metal mesh screen. Typical screen openings are roughly 0.5–1.5 mm. Larger curls or chips are generally stopped here.
- Pump next: Most modern engines use gerotor or gear pumps. Clearances inside the pump are tight; chips large enough to be visible as defined curls would likely jam or score the pump before ever reaching the filter.
- Full-flow filter downstream: After the pump, oil passes through the full-flow filter (outside-to-inside on spin-on filters). The filter captures fine debris; large fragments normally don’t make it this far.
- What true internal failure looks like: Early bearing or valvetrain wear usually presents as very fine metallic “glitter” or paste-like deposits in the filter pleats, not large formed curls. Elevated copper/lead/tin in used oil analysis often accompanies bearing issues.
- How big chips appear at the filter: If you see obvious curls or thread-like pieces at the filter, common reasons include (1) chips that fell into the filter during the oil change from the drain pan, (2) small, thin aluminum chips that were fine enough to pass the screen, or (3) contamination from previous service. Treat it as a process control problem until proven otherwise.
Immediate Triage: Verify Material, Size, and Origin

z-nla Replacement Blade for AT3391 Oil Filter Cutter
Mfg: K-Line Industries
Part #: AT50102G
Move from speculation to facts with a quick, structured assessment:
- Photograph with scale: Re-shoot the debris with a coin or ruler for reference. Record approximate length and thickness of the largest and typical pieces.
- Magnet test: Use a strong shop magnet. Ferrous = likely steel/iron source (pump/rotating assembly components or coil insert). Non-magnetic or weakly magnetic = aluminum pan threads, or austenitic stainless (e.g., some thread inserts). Note: Some 300-series stainless can show weak magnetism after cold work.
- Chip morphology check:
- Tapping/drilling chips: Small crescents or short curls with bright sheared edges; thickness consistent with thread pitch; edges uniform.
- Turning chips: Longer, regular coils with chip-break marks.
- Bearing wear: Very fine flakes or mica-like specks; not formed curls.
- Filter autopsy (controlled): Use a filter cutter. Remove the media, lay pleats out on clean white paper, and inspect under bright light. Look for fine metallic sheen (“glitter”) versus a few discrete curls. Rinse a few pleats with solvent into a clean tray and pass a magnet through to separate ferrous fines.
- Inspect the repair: Check the drain plug area. Identify if it has an oversize plug, a thread insert (helicoil/Time-Sert), or visibly retapped aluminum. Check for fresh tool marks and thread quality.
- Boreshot through the drain: If the pan is still on, run a borescope through the drain hole to inspect for residual chips and the pickup screen condition.
- Baseline oil pressure: With a mechanical gauge, verify hot idle and 2,500–3,000 rpm oil pressure against spec. Abnormal oil pressure plus debris elevates concern; normal pressure suggests the pump and galleries aren’t obstructed.
- Noise survey: With engine at full operating temp, listen for knock, tick, or whine. Absence of abnormal noise reduces the likelihood of active catastrophic wear.
Root Cause Likelihoods and a Practical Decision Path
Based on common observations in the bay:
- Most likely: Chips from drilling/tapping the pan or installing a thread insert. Aluminum curls and short non-magnetic stainless fragments are consistent. If evidence shows the pan wasn’t removed, chip control may have been poor.
- Possible: Very small, thin aluminum chips fine enough to pass the pickup screen and reach the filter media. Usually these are tiny; large, defined curls are less plausible.
- Less likely: Internal engine failure. Typical engine wear shows as fine metallic paste, not large chips. Active failure would often correlate with noise, low oil pressure, or obvious performance symptoms.
- Process contamination: Chips stuck to the filter externally from the drain pan during the oil change. This happens if the filter or media is exposed to unstrained drain oil or the drain pan wasn’t clean.
Decision path:
- If chips are clearly machining swarf and the engine has normal oil pressure/noise: Plan a cleanup (drop pan, clean pickup, new filter/oil), then short-interval recheck.
- If any sign of low oil pressure or abnormal noise: Stop, drop pan immediately, inspect pump, pickup, and pan. Be prepared for deeper teardown.
- If debris looks like bearing material (fine glitter with copper/lead): Send used oil for analysis, cut another filter after a short interval, and consider bearing clearance checks depending on model and history.
Corrective Actions That Actually Fix the Problem
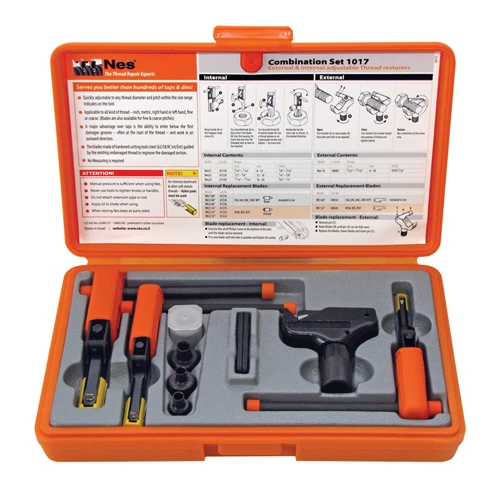
Combination Thread Repair Kit Ext 4-18mm 5/3two and eleven sixteen inch Int 8-20mm
Mfg: NES Thread Repair
Part #: NES 1017

Fastener Internal Thread Repair Kit - 8-20mm 5/16 to thirteen sixteen inch for Automotive and Industrial Use Replaces NES1004
Mfg: NES Thread Repair
Part #: NES 1007
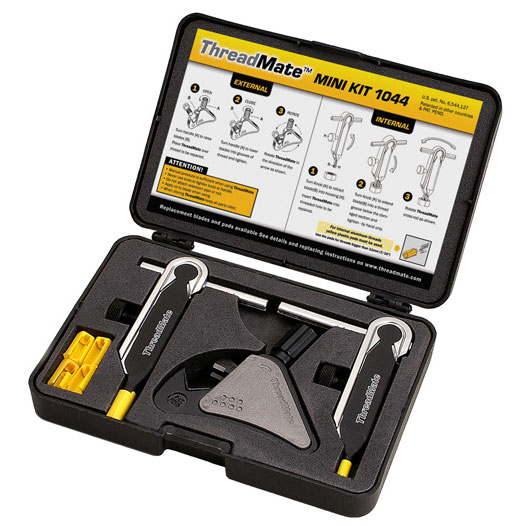
ThreadMate Mini Kit Set for Automotive and Industrial Use
Mfg: NES Thread Repair
Part #: NES 01044
Once you’ve identified debris consistent with thread repair swarf, clean and verify the system:
- Drop the oil pan:
- Disconnect battery (if required by procedure), lift vehicle safely, remove splash shields, and drain oil.
- Remove fasteners in sequence. Separate pan without prying on sealing surfaces.
- Inspect for chips in the sump and especially around the pickup screen.
- Clean the pan and pickup:
- Wipe out all chips with lint-free wipes. Use a parts washer or brake cleaner judiciously. Don’t blow chips deeper into the engine.
- Remove the pickup if accessible. Clean the screen from the outside-in using solvent and soft brush. Replace pickup O-ring/gasket; do not reuse a hardened seal.
- Assess the repair and correct it properly:
- If an oversize self-tapping plug was used and threads are marginal, upgrade to a solid insert (Time-Sert) or replace the pan.
- If a wire insert (helicoil-style) was used, verify correct length, proper installation, and no protrusion into the flow path. Consider a solid bushing insert for long-term durability.
- If threads are beyond reliable repair or the pan is contaminated/damaged, replace the oil pan.
- Reseal and torque:
- Prep sealing surfaces per service manual. Use the OEM-specified RTV/gasket. Observe cure times.
- Torque pan bolts in sequence to spec. Over-torqueing warps pans and causes leaks/comebacks.
- Refill and prime:
- Install a new filter. Pre-fill spin-on filters when orientation allows.
- Fill with correct oil grade and capacity. Crank to build pressure, verify no leaks, then run to operating temp and re-check pressure.
- Short-interval cleanup and verification:
- Change oil and filter again after 300–500 miles (or 10–20 hours on equipment) to capture any residual fines.
- Cut the second filter to confirm no ongoing debris generation.
- Optional: Send oil to a lab for wear metal confirmation (iron, aluminum, copper, lead, tin).
Preventing It Next Time: Best Practices for Drain Plug Thread Repair


215584 PP70102ZF Darex LLC DAR-PP70102ZF 13PC TITANIUM DRILL BIT SET
Mfg: Drill Doctor
Part #: PP70102ZF
Most of these incidents are preventable with chip control and proper tooling:
- Whenever practical, remove the pan for machining. It’s the cleanest way to manage chips.
- If in-vehicle repair is necessary:
- Pack the drill and tap flutes with heavy grease to capture chips.
- Use sharp tools, correct pilot drill, and proper speed. Back out frequently to clear chips.
- Position a capture device: magnetic pickup, small-diameter vacuum straw, or oil-safe funnel positioned to catch swarf under the hole.
- Rinse the area with a small volume of fresh oil after cutting, with drain open and a fine mesh screen under the stream to catch debris.
- Choose robust thread repair methods:
- Solid bushing insert (e.g., Time-Sert) excels in aluminum pans and resists pull-out.
- Wire inserts (helicoil-type) can work if installed correctly; choose proper length and installation technique.
- A new pan is often the fastest, most reliable fix on high-value vehicles or where access is tight.
- Use the correct drain plug torque and a fresh sealing washer. Many stripped pans start with overtightening.
- Consider installing a quality drain valve (e.g., Fumoto) after a proper repair to reduce future plug removal cycles and wear.
- Control contamination during service:
- Keep the drain pan clean; strain drain oil if you’re inspecting for debris.
- Never set opened filters where drain oil or grit can contaminate the media during inspection.
Documentation, Customer Communication, and Protection
Even if the filter “caught it,” protect the engine and your shop:
- Photograph findings with scale and document the steps you took (magnet test results, oil pressure readings, borescope images, chip morphology notes).
- Bag and label sample debris. Note magnetism and size.
- Explain the oil circuit to the customer and why machining swarf is the likely source if that’s what evidence supports.
- Offer good-better-best solutions (clean and monitor; insert or pan replacement; oil analysis add-on). Provide written estimates and realistic timelines.
- Recommend a short-interval oil/filter recheck to verify the fix.
- If you didn’t perform the original thread repair, avoid speculation. Present the evidence and your plan to restore reliability.
Quick Checklist: Metal Found at the Oil Filter After Drain Plug Repair
- Re-photo debris with scale; run magnet test.
- Cut and inspect the filter properly; look for fine glitter vs discrete curls.
- Borescope the sump and pickup; verify no screen blockage.
- Measure hot oil pressure with a mechanical gauge and listen for abnormal noise.
- Drop pan, clean sump and pickup, correct thread repair or replace pan.
- New oil and filter; pre-fill when possible; confirm pressure and leaks.
- 300–500 mile oil and filter recheck; consider used oil analysis.
FAQs
Could large chips really pass the pickup screen and oil pump?
Rarely. Pickup screens typically stop anything larger than about 0.5–1.5 mm. The pump’s internal clearances are tight enough that large curls would more likely jam or damage the pump than pass through intact. When large, formed chips appear at the filter, contamination during service or chips falling into the filter from the drain pan is often the culprit. Very thin aluminum fragments can occasionally make it farther than expected, but they’re usually tiny.
Will a magnetic drain plug help if the pan is aluminum?
It helps with ferrous debris only. Many aluminum pans use steel drain plugs or inserts; a magnetic plug will catch steel/iron fines but not aluminum chips. If the swarf is aluminum (non-magnetic), the magnet won’t capture it. The best prevention is proper chip control and post-repair cleaning.
Should I run an engine flush after finding chips?
A flush won’t remove curls sitting in the pan or on the pickup screen. Physical cleaning (dropping the pan and cleaning the pickup) is the correct approach for discrete fragments. If you choose to use a reputable flush to help carry out fine residuals after mechanical cleaning, follow the product’s instructions, use a fresh filter immediately, and recheck after a short interval. Never use harsh solvents that can damage seals or dislodge large debris unpredictably.
What does true internal wear look like in the filter?
Early bearing or valvetrain wear typically shows as fine metallic shimmer in the pleats, not large chips. Copper/lead/tin (from bearings) or elevated iron/aluminum (from rotating assemblies or pistons) in used oil analysis supports internal wear. Pair that with symptoms like low hot oil pressure, noise, or misfire for a higher-confidence diagnosis.
How should I perform a proper filter autopsy?
Use a dedicated filter cutter. Remove the can and carefully extract the media. Spread pleats on clean white paper. Under bright lighting, inspect for a metallic sheen, discrete fragments, and color cues. Rinse a section with clean solvent into a tray and pass a magnet through the rinse to separate ferrous fines. Record photos and findings. Avoid contaminating the media with drain oil from a dirty pan.
What’s the most durable way to repair a stripped drain plug in an aluminum pan?
A solid threaded insert (e.g., Time-Sert) installed correctly is robust and repeatable. Wire inserts (helicoil-type) can be effective when sized and installed properly, but a solid bushing insert provides better thread engagement in thin aluminum. If access is tight or prior repairs are compromised, replacing the pan may be the most reliable option.
Prevent Future Issues with Quality Thread Repair Tools
Metal shavings indicate your drain plug threads may need professional attention. Our curated Thread Repair category offers the exact tools and supplies technicians recommend for permanent fixes.
- Helicoil Thread Repair Kits — Industry-standard solution for stripped threads with precision inserts
- Drain Plug Socket Sets — Properly sized tools prevent cross-threading and future damage
- Thread Sealant Compounds — Professional-grade products ensure leak-free repairs
The Toolsource Technical Team blends decades of real-world automotive service experience with up-to-date technical research. Our writers collaborate with professional mechanics, shop owners, and diagnostic specialists to deliver practical, workshop-ready guidance you can trust.

Follow us on social media