When a customer rolls in complaining of noise or you spot a cracked transmission bell housing during an inspection, you’re looking at a repair that exists in a gray area between “drive it till it dies” and “pull the transmission now.” The bell housing—that bell-shaped casting connecting the engine block to the transmission and enclosing the clutch assembly or torque converter—doesn’t hold fluid, but it does protect critical rotating components from debris and keeps fingers out of dangerous places. Understanding when a crack requires immediate action versus when you can implement a temporary fix separates efficient shops from those that recommend unnecessary work or miss catastrophic failures waiting to happen.
Understanding Bell Housing Function and Failure Modes
The transmission bell housing serves several purposes beyond just being a protective cover. On manual transmissions, it houses the clutch assembly, pressure plate, and flywheel. On automatics, it encloses the torque converter and flexplate. The casting also provides critical structural support, maintaining proper alignment between the engine crankshaft and transmission input shaft. On modern transaxles—particularly front-wheel-drive applications—the bell housing is typically cast as an integral part of the transmission case, not a separate bolt-on component like you’d find on older rear-wheel-drive vehicles with separate bell housings.
Cracks typically occur from impact damage (improper jacking points, road debris, collision damage), stress fractures from engine/transmission movement on worn mounts, or in rare cases, catastrophic clutch or flexplate failure that sends shrapnel into the casting. The location and size of the crack determine your repair strategy. A small crack on the lower inspection cover area is vastly different from structural cracks extending around bolt bosses or the main case seam.
Before recommending any repair, verify what you’re actually dealing with. Is this the removable lower inspection cover (common on older GM trucks, some vintage transmissions), or is it the main bell housing casting? On vehicles where the lower section is a separate stamped steel or cast aluminum cover, replacement is straightforward—unbolt the old one, bolt on a new one, done in under an hour. On integral transaxle cases, you’re looking at transmission removal and potentially case replacement or welding repairs.
Initial Assessment and Diagnosis Protocol
Start with a thorough visual inspection with the vehicle on a lift. Clean the area around the crack with brake cleaner to remove oil, dirt, and road grime so you can see the actual extent of damage. Use a flashlight and inspection mirror to trace the crack—does it stop at a relief hole or casting feature, or is it actively propagating? Look for evidence of fluid seepage, though bell housings themselves don’t contain fluid. Any oil or ATF present is leaking from the rear main seal, front pump seal, or another source and simply draining through the crack.
Check transmission fluid level and condition. Pull the dipstick or remove the fill plug (depending on transmission type) and verify the level is correct and fluid looks normal. If the housing crack exposed the torque converter or clutch to road debris, you may find contamination. On manual transmissions, inspect the clutch through the crack if visible—look for broken springs, missing friction material, or damaged pressure plate fingers that might have caused the failure.
Examine the engine and transmission mounts. Failed mounts allow excessive drivetrain movement, which can stress the bell housing casting or allow the transmission to shift position and contact the subframe or crossmember. With an assistant operating the vehicle, watch for abnormal engine movement during acceleration and deceleration. Clunking, excessive rotation, or visible sagging indicates mount failure that must be addressed regardless of your bell housing repair approach.
Document everything with photos. Capture the crack from multiple angles, show its relationship to bolt holes and case seams, and photograph the overall area. This documentation helps with parts identification, insurance claims if applicable, and provides a baseline if the crack propagates before repair. If you’re considering a temporary fix, these photos establish the pre-repair condition.

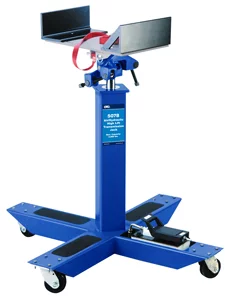
Transmission Jack Adapter for GM 125/440 and Ford E4OD
Mfg: OTC Tools and Equipment
Part #: 61516
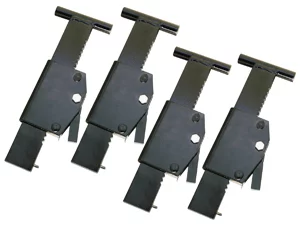
Transmission Jack Mounting Adapter Set of 4
Mfg: OTC Tools and Equipment
Part #: 223196
Temporary Repair Strategies for Non-Critical Cracks
If the crack is limited to the lower inspection area, doesn’t extend to structural sections, and the transmission is functioning normally, a temporary patch can extend the vehicle’s service life while the customer saves for a proper repair or replacement vehicle. This approach works best on older, high-mileage vehicles where transmission replacement cost exceeds vehicle value, or as a stopgap measure for customers facing financial hardship.
The most common field repair involves fabricating a cover plate from sheet aluminum or steel. Cut a piece of 16-18 gauge metal slightly larger than the damaged area. Deburr all edges and drill holes for attachment. Clean the bell housing surface thoroughly with brake cleaner, then rough it up with 80-grit sandpaper to improve adhesion. Apply a quality two-part epoxy (JB Weld, Permatex, or similar industrial adhesive) to both the housing and plate, then secure the plate with self-tapping screws into solid casting areas around the crack perimeter. The epoxy provides sealing and adhesion; the screws provide mechanical retention.
Some techs successfully use aluminum body filler or plastic welding compounds on non-structural cracks. Products like Alumalead or plastic repair epoxy can fill small cracks and be shaped to match the surrounding casting. This works for hairline cracks but won’t hold up on large breaks or areas subject to vibration and flexing. Whatever material you use, ensure it’s rated for 250°F+ temperatures—bell housings get hot from engine and transmission heat.
Before releasing the vehicle, set clear expectations with the customer. Document in writing that this is a temporary repair, explain the risks (potential for crack propagation, limited durability), and provide a realistic timeline. Some patches hold for years; others fail within months depending on driving conditions and crack severity. Recommend a follow-up inspection in 30-60 days to check patch integrity and look for crack growth.
When Transmission Removal Is Unavoidable
Structural cracks, cracks extending into the main case casting, or damage accompanied by transmission malfunction require removal and proper repair or replacement. On transaxle applications where the bell housing is integral to the transmission case, this means either replacing the entire transmission or attempting a welding repair if a suitable replacement case or transmission isn’t available or cost-effective.
Welding aluminum or magnesium transmission cases requires specific expertise. You’ll need a TIG welder, the correct filler rod for the casting alloy (often 356 or similar), and the skill to preheat properly and avoid warping the case. Most shops outsource this work to a specialized transmission rebuilder or machine shop with casting repair experience. The case must be completely disassembled, thoroughly cleaned of all oil residue (critical—any oil contamination will cause porosity and weld failure), preheated to 400-500°F, welded, then slowly cooled to prevent cracking. Success rates vary; older castings with unknown alloy composition and high mileage often crack again near the repair.
Replacement is typically more cost-effective and reliable. For common vehicles, remanufactured or used transmissions are readily available. A used transmission from a salvage yard runs $300-$800 for most applications; remanufactured units with warranty cost $1,200-$2,500 depending on vehicle. Labor for transmission removal and installation typically ranges from 4-8 hours for front-wheel-drive transaxles, less for rear-wheel-drive applications with separate bell housings.
If you’re replacing the transmission anyway, inspect and replace the clutch (manual) or torque converter (automatic) while you’re in there. Check the flywheel or flexplate for cracks and warping. Examine the rear main seal and front pump seal. Replace all transmission mounts, crossmember bushings, and any axle seals showing seepage. Taking the “while we’re in there” approach prevents comebacks and maximizes the value of the expensive labor already invested in transmission removal.
Special Considerations for Separate Bell Housing Designs
Older rear-wheel-drive vehicles, particularly those with traditional 3-speed automatics (TorqueFlite 904/727, GM TH350/400, Ford C4/C6) or manual transmissions, often feature bolt-on bell housings as separate components. These are significantly easier to replace without full transmission removal, though you’ll still need to support the transmission and work in tight quarters.
The procedure typically involves: draining the transmission, disconnecting the driveshaft, unbolting the crossmember to lower the transmission tail slightly for access, removing the starter, then unbolting the bell housing from both the engine block and transmission case. Some designs require removing the torque converter or clutch assembly first; others allow bell housing removal with these components in place. Consult factory service manual procedures for the specific application—bell housing bolt patterns, alignment dowel locations, and fastener torque specs are critical for proper installation.
When installing a replacement bell housing, verify you have the correct part. Bell housings vary by engine family, transmission model, and even within production year ranges. An incorrect housing may bolt up but position the transmission incorrectly, causing binding, vibration, or premature failure. Match part numbers when possible; when sourcing used components, verify the bell housing came from an identical engine/transmission combination.
Torque all fasteners to specification in the correct sequence. Bell housing bolts typically torque to 30-50 ft-lbs, but always verify. Use new gaskets or RTV sealant as specified—some applications use gaskets, others use sealant only, and using the wrong approach causes leaks. Check alignment after installation by verifying the transmission input shaft rotates freely and doesn’t bind when the clutch is disengaged (manual) or engine is running in park/neutral (automatic).
Prevention and Customer Education
Most bell housing cracks are preventable with proper vehicle care. Failed engine and transmission mounts are the leading cause of stress cracks, so include mount inspection in regular maintenance intervals. Worn mounts are inexpensive to replace and prevent expensive drivetrain damage. Educate customers about proper jacking points—many bell housing cracks result from DIY oil changes where the jack was placed on the transmission case instead of designated jacking points.
Vehicles operating in harsh conditions (off-road use, frequent rough road travel, commercial/fleet service) benefit from aftermarket skid plate installation. A quality aluminum or steel skid plate protects the oil pan, transmission case, and bell housing from impact damage. This is particularly important for trucks and SUVs used for hunting, rural property access, or job site work where undercarriage strikes are common.
For customers who’ve had a temporary patch installed, stress the importance of monitoring for symptoms: new noises from the transmission area, clutch engagement problems, unusual vibrations, or visible damage to the patch. Provide a written recommendation for replacement with a realistic timeline, and document that continued operation is at the customer’s discretion and risk. This protects your shop from liability while giving the customer options based on their financial situation and vehicle value.
Quick Reference Checklist for Bell Housing Crack Assessment
- Clean the area thoroughly and trace the full extent of the crack with good lighting
- Determine if the bell housing is a separate component or integral to the transmission case
- Check transmission fluid level and condition for signs of contamination or loss
- Inspect all engine and transmission mounts for wear, cracks, or separation
- Look for evidence of impact damage to surrounding components (oil pan, subframe, exhaust)
- Verify transmission operation—check for abnormal noises, shifting issues, or clutch problems
- Photograph all damage from multiple angles for documentation and parts identification
- Assess whether the crack is limited to non-structural areas or extends into critical casting sections
- Provide the customer with repair options ranging from temporary patch to transmission replacement
- Document all findings and recommendations in the repair order with clear explanations of risks
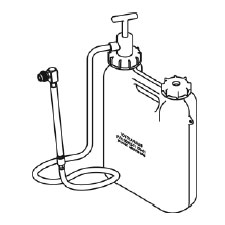
Transmission Fill System - Toyota
Mfg: OTC Tools and Equipment
Part #: 00002-11100-02
Frequently Asked Questions
Can you drive with a cracked transmission bell housing?
Yes, in most cases you can continue driving if the crack is limited to the inspection cover area and the transmission functions normally. The bell housing doesn’t contain fluid, so small cracks don’t cause leaks or immediate failure. However, the crack can propagate over time, and the opening allows road debris to contact the clutch or torque converter. Monitor the crack regularly and avoid aggressive driving that increases stress on drivetrain components.
How much does it cost to replace a transmission bell housing?
Costs vary dramatically based on vehicle and bell housing design. If it’s a separate bolt-on component, expect $200-$400 in parts and 2-4 hours labor ($300-$600), totaling $500-$1,000. For integral transaxle designs requiring transmission replacement, costs range from $1,500-$3,500 depending on whether you install a used, rebuilt, or new transmission. Always get a firm quote after proper diagnosis.
What causes a bell housing to crack?
The most common causes are impact damage from striking road debris or improper jacking, failed engine/transmission mounts allowing excessive movement and stress, or catastrophic internal failure (exploding clutch, broken flexplate) that sends metal fragments into the housing. Corrosion can weaken castings over time, making them more susceptible to cracking from normal stress.
Is it better to repair or replace a cracked bell housing?
For separate bolt-on bell housings, replacement is almost always better—it’s straightforward and provides a permanent solution. For integral transaxle cases, repair with a quality patch or welding may be acceptable on older, high-mileage vehicles where replacement cost exceeds vehicle value. On newer or valuable vehicles, transmission replacement with a warranty provides the most reliable long-term solution.
Will a cracked bell housing cause transmission problems?
Not directly, if the crack is limited to the housing itself. However, cracks often indicate or lead to other problems: failed mounts causing misalignment, debris contamination of the clutch or torque converter, or internal damage that caused the housing to crack in the first place. Always diagnose the root cause and inspect related components when you find bell housing damage.
Can you weld a cracked aluminum bell housing?
Yes, but it requires specialized skills and equipment. Aluminum and magnesium transmission cases must be TIG welded with proper filler material, preheating to 400-500°F, and controlled cooling to prevent additional cracking. The case must be completely clean of oil residue. Most shops outsource this work to transmission specialists or machine shops with casting repair experience. Success rates vary, and welded repairs may crack again under stress, so replacement is generally preferred when feasible.
Recommended Tools for Transmission Work
Proper diagnosis and repair of transmission bell housing damage requires the right equipment. Whether you’re assessing a crack, performing a temporary patch, or preparing for transmission removal, having specialized tools on hand keeps the job efficient and safe.
- Inspection tools—flashlights, mirrors, and magnification for accurate crack assessment
- Transmission removal and support equipment for safe vehicle positioning
- Seal and gasket replacement tools for reassembly and proper torque application
Browse our Drive Train – Transmission Tools selection to find what you need for the job.
The Toolsource Technical Team blends decades of real-world automotive service experience with up-to-date technical research. Our writers collaborate with professional mechanics, shop owners, and diagnostic specialists to deliver practical, workshop-ready guidance you can trust.


Follow us on social media