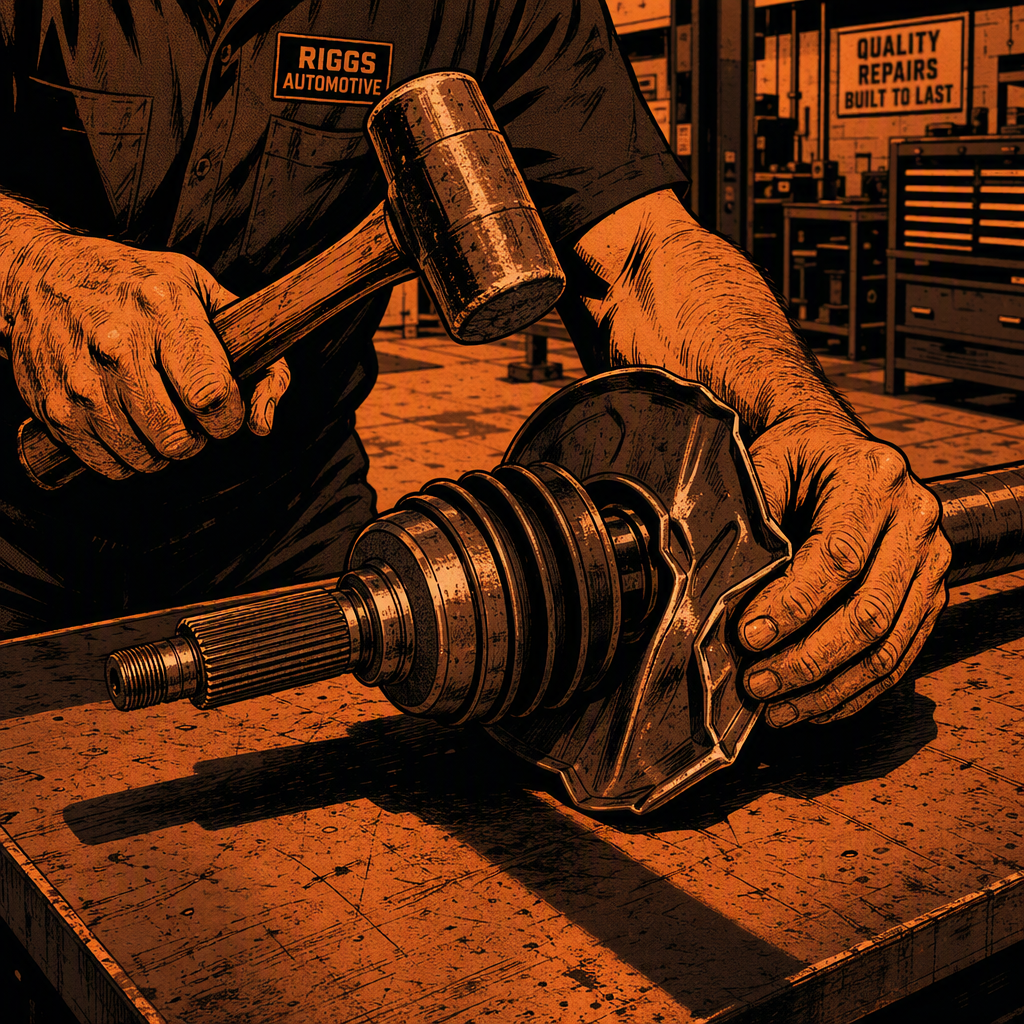
New axles, half shafts, and driveshafts don’t always arrive in perfect shape. A bent or dented dust shield — sometimes called a dust cap, slinger, or splash shield — is one of the most common cosmetic complaints after unboxing a replacement part, and it’s also one of the easiest to misjudge. Some techs reach straight for a hammer, others insist any deformity is grounds for a return. The right call depends on what the shield actually does, how bad the damage is, and whether it will clear the rotating components once it’s torqued into place. Here’s how to work through that decision without turning a five-minute fix into a comeback.
What the Dust Shield Is Actually Protecting
The dust shield isn’t a structural part, but it isn’t purely cosmetic either. Its job is to keep dirt, water, road salt, and abrasive grit away from the wheel bearing and the seal where the axle or driveshaft meets the hub or transmission. On most half-shaft and CV axle assemblies, this shield presses over a lip on the bearing housing or transmission case and relies on a snug, even fit to do its job. A shield that’s bent, dented, or slightly out of round from shipping damage generally isn’t a functional failure by itself — but if it’s damaged badly enough that it no longer seats fully or leaves a gap, it stops doing its job and dirt works its way past the seal over time. That’s the distinction that should drive your repair-or-replace decision, not how the part looks sitting on the bench.
Assess the Damage Before You Decide
Before doing anything else, dry-fit the part (or check it in place if it’s already installed) and look at three things: whether the shield still seats fully against its mounting lip, whether any deformed edge is going to contact a rotating surface like the axle shaft, hub, or brake rotor, and whether the metal is cracked or split rather than just bent. A shield that’s dented but still seats flush and spins freely with no contact is a cosmetic issue you can live with or correct with minor adjustment. A shield that’s crushed inward toward the shaft, has a torn edge, or won’t seat around the full circumference needs more attention — either a proper reshape or a replacement part, depending on severity. Spin the assembly by hand if possible and listen and feel for any drag or scraping before you commit to a final installation.
[PRODUCT_SEARCH: CV axle dust shield replacement]

Reshaping a Bent Shield: Tools and Technique
For minor to moderate bends, this is straightforward sheet-metal work, not a repair that requires special skill. A few approaches work well depending on the severity and location of the damage:
- Pliers or vice grips work fine for small, localized bends — grip the deformed edge and walk it back into its original curve in small increments rather than one aggressive pull.
- A dead-blow or rubber mallet is the safer choice for dents across a wider area. Tap gradually around the damaged section rather than striking one spot hard, which just creates a new low point.
- A heel bar or padded drift combined with light hammer taps gives more control when you need to work metal back under a lip or flange.
- Heat (a torch, used carefully) can help if the metal is work-hardened or resistant to bending, letting it reshape without cracking. Keep the flame well away from the shaft, seal, and any rubber boot — heat damage to a CV boot or seal turns a free fix into a real repair.
Work the metal slowly and check fit repeatedly rather than trying to get it perfect in one pass. The goal isn’t a factory-fresh shield — it’s a shield that seats fully and doesn’t contact anything that moves.
When a Return Makes More Sense Than a Repair
Reshaping is the practical answer most of the time, but it isn’t always the right call. If the shield is cracked or split rather than just bent, if the damage extends into the mounting flange itself, or if you can’t get it to seat without leaving a gap, don’t fight it — get a replacement. It’s also worth considering the job itself: if the vehicle is already up on the lift with the part half-installed and you’re on a schedule, a quick reshape and clearance check is usually faster and just as durable as boxing the part back up, dealing with a return authorization, and waiting on a replacement. But if you’re inspecting the part before installation and have time to exchange it, a shield with tool marks and hammer strikes on it is going to make a warranty claim harder to justify later if something else goes wrong with that axle. Weigh the time and shipping cost against the strength of your position if you need to return it down the road.
Confirming Clearance After the Fix
Once the shield is reshaped and reinstalled, this step is not optional. Rotate the axle or shaft by hand through a full revolution and check for any contact, drag, or noise. On a vehicle, that means turning the wheel by hand with it off the ground, or bumping the driveshaft by hand if it’s accessible. Look specifically for contact between the shield and the CV boot, the axle shaft itself, or the brake rotor/caliper if the shield sits near the hub. A shield that rubs intermittently often won’t show up until the vehicle’s been driven and the metal has had a chance to walk from vibration, so if you have any doubt, recheck it after a short test drive and re-tension or trim the edge as needed. A shield that’s rubbing won’t necessarily cause a drivability problem, but it will generate noise that brings the car back to your bay with a comeback complaint.
Common Mistakes That Turn a Simple Fix Into a Comeback
Most problems with this repair come from rushing it. Hammering one spot hard instead of working the metal gradually tends to crease it rather than reshape it, leaving a sharper edge that’s more likely to contact something. Skipping the spin-check after installation is the single biggest miss — a shield that looks fine sitting still can still be out-of-round enough to drag once it’s spinning. Applying heat too close to a CV boot or seal is another one worth flagging explicitly, since a warped boot or hardened seal is a real functional problem where a dented shield usually isn’t. And forcing a shield into place that’s cracked, rather than just bent, generally just accelerates failure — cracked metal doesn’t hold its new shape the way bent metal does.
Quick Checklist: Bent Dust Shield Decision
- Confirm whether the shield is bent (fixable) or cracked/split (replace)
- Check that it seats fully around the mounting lip with no gaps
- Reshape gradually with pliers, a mallet, or careful heat — avoid single hard strikes
- Keep heat and tools clear of the CV boot, seal, and shaft
- Spin the assembly by hand and check for contact or drag before final installation
- Recheck after a short test drive if there’s any doubt about clearance
- If damage affects the mounting flange or the part won’t seat, exchange it instead of forcing it
[PRODUCT_SEARCH: axle and driveshaft installation tools]
Frequently Asked Questions
Is a bent dust shield a safety issue?
Not directly — it doesn’t affect braking or steering. Its role is protecting the wheel bearing seal from contamination, so the real risk is long-term: accelerated bearing wear if dirt and water get past a shield that no longer seats properly.
Can I just remove the dust shield instead of fixing it?
You can, and the axle will still function, but you’re removing a layer of protection for the bearing seal. It’s a reasonable stopgap if you’re pressed for time, but plan to address it properly, especially on a vehicle that sees a lot of wet or unpaved driving.
Will a bent shield throw a code or trigger a warning light?
No. There’s no sensor monitoring the dust shield, so any issue it causes — bearing wear from contamination, or noise from rubbing — will show up mechanically, not electronically, and usually well after the fact.
What’s the risk of using heat to reshape the shield?
The shield metal itself can generally take moderate heat without an issue, but heat transfers fast to nearby components. Keep the flame off the shaft and well clear of any rubber CV boot or seal, which can harden, crack, or lose their fit if they get hot.
Should I document the damage before repairing it?
Yes, especially if the part was damaged in shipping. Photograph it before you touch it with tools. If you decide to reshape and install rather than return, you’ll have a record showing the damage existed before any tool marks were added.
How do I know if the shield is rubbing after installation?
A light metallic rubbing or scraping noise that changes pitch with wheel speed, often more noticeable at low speed or when turning, is the typical symptom. If you hear that after a repair, get the vehicle back up and recheck clearance rather than assuming it’ll wear in.
Shop Drive Train & Transmission Tools
Reshaping a bent dust shield often calls for the right set of tools. Our Drive Train – Transmission Tools selection includes pliers, mallets, drift tools, and specialized equipment to handle dust shield repair safely and effectively.
- Pliers, vice grips, and mallets for sheet-metal reshaping
- Drift bars, heel bars, and padded tools for precise adjustment
- Installation and removal tools for axles and driveshaft assemblies

The Toolsource Technical Team blends decades of real-world automotive service experience with up-to-date technical research. Our writers collaborate with professional mechanics, shop owners, and diagnostic specialists to deliver practical, workshop-ready guidance you can trust.


Follow us on social media