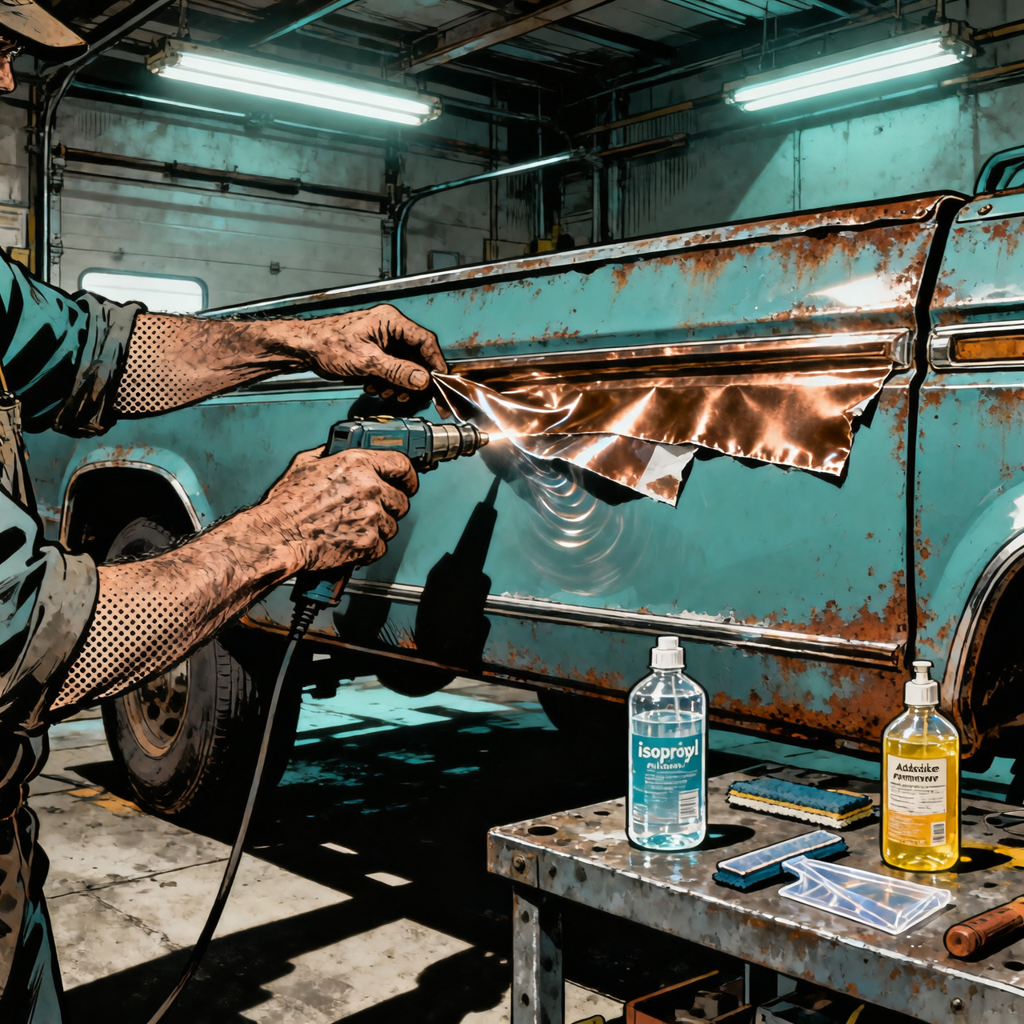
Retro vinyl stripe packages—particularly the bronze-and-cream sunset schemes popularized on 1970s trucks and the recent Toyota 4Runner 40th Anniversary editions—are gaining traction in both OEM and aftermarket markets. As a technician, you’ll field questions about durability, paint compatibility, and removal. Unlike powder-coated trim or factory two-tone paint, vinyl graphics present unique challenges: UV degradation, adhesive residue, and color-fade masking under the film. This guide synthesizes field observations and addresses the practical concerns shops encounter when customers request installation, need bodywork on graphics-equipped vehicles, or want to remove aged decals without damaging the base coat.
Understanding Vinyl Graphic Longevity and Failure Modes
Cast vinyl graphics from reputable manufacturers (3M, Avery Dennison, Oracal) typically carry 5–7 year outdoor durability ratings when applied correctly. In practice, expect 3–5 years before visible degradation in full-sun climates, 5–8 years in temperate regions with garage storage. The primary failure modes are:
- UV oxidation: Vinyl dries out, loses plasticizer content, and develops surface cracks. Bronze, red, and yellow pigments fade faster than black or white.
- Adhesive bleed: Heat cycles cause adhesive to migrate to the film edges, creating dark halos visible on light-colored paint.
- Edge lift: Inadequate surface prep, contamination, or application over fresh paint (less than 30 days cured) leads to premature peeling at stripe edges.
- Color mismatch from sun fading: The covered area retains original paint gloss and color while exposed panels fade. Removing a five-year-old stripe reveals a sharp outline where the paint remained protected.
Factory-applied graphics on vehicles like the 4Runner TRD Pro or Bronco Heritage editions use the same vinyl chemistry as aftermarket kits but benefit from controlled application environments and immediate post-production curing. Aftermarket installations depend entirely on surface prep and ambient conditions during application.
Surface Preparation and Installation Best Practices
Proper installation extends graphic life and simplifies future removal. Follow this protocol whether installing OEM replacement kits or custom aftermarket stripes:
Pre-Application Checklist:
- Verify paint has cured minimum 30 days (60 days for waterborne base coats)
- Wash vehicle with isopropyl alcohol (IPA) solution (50/50 mix with distilled water), not wax-and-grease remover, to avoid residue
- Clay-bar treatment to remove embedded contaminants that create adhesion failure points
- Ambient temperature 60–80°F; surface temperature 70–75°F (use infrared thermometer)
- Humidity below 70% to prevent moisture entrapment under film
Application Technique: Use the hinge method for stripes longer than 24 inches. Tape the graphic in final position, create a hinge line with masking tape along the center axis, peel one half of the liner, squeegee from hinge outward at 45-degree angle with overlapping strokes, then repeat for the second half. For complex curves (wheel arches, body lines), pre-heat vinyl to 90–100°F with heat gun to improve conformability—overheating (above 120°F) activates adhesive prematurely and causes silvering. Post-application, heat edges to 110°F and re-squeegee to maximize bond.
Avoid these common errors: applying over wax or sealant residue (causes edge lift within weeks), stretching vinyl more than 5% during application (creates memory stress and shrinkage), and applying in direct sunlight (surface temps exceed safe range and cause adhesive flow issues).
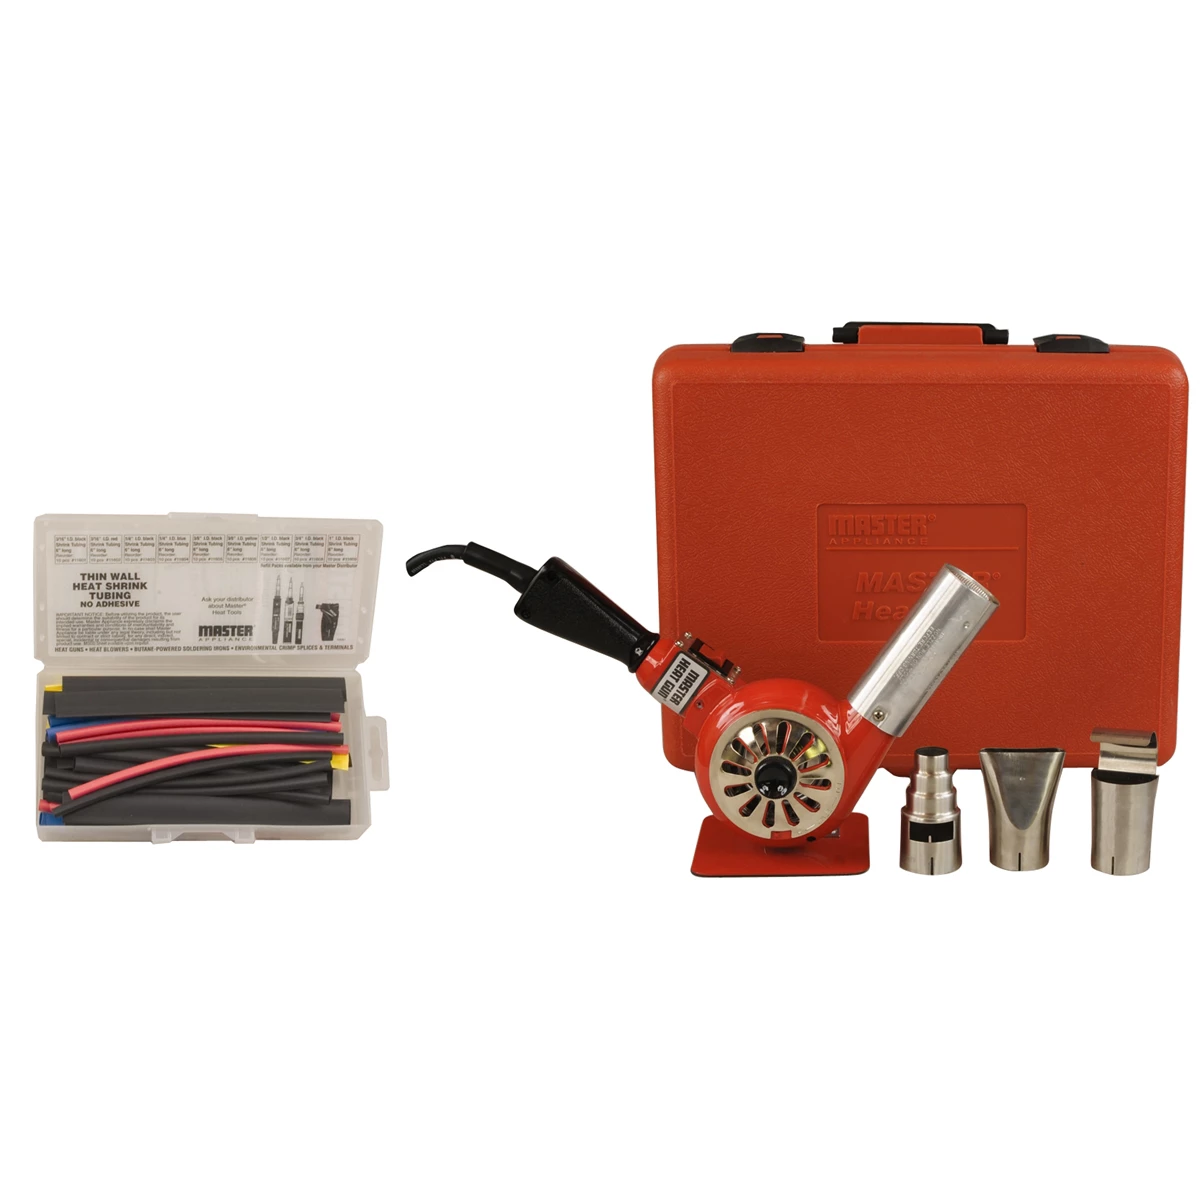

EcoHeat Dual-Setting Heat Gun Kit with Nozzle Attachments
Mfg: Master Appliance
Part #: EC-100K
UV Protection Strategies to Extend Graphic Life
The single greatest threat to vinyl longevity is ultraviolet exposure. Customers who garage-park vehicles can expect double the outdoor life, but most trucks see daily sun exposure. Implement these protection strategies:
Clear coat overlaminate: Factory graphics often receive a clear UV-protective laminate (3M 8518, Avery DOL 6460) that adds 2–3 years of protection. This is a 2-mil clear film applied over the printed or colored vinyl. For aftermarket installations, recommend laminate on any graphic with expected 5+ year service life. The laminate also simplifies cleaning—it’s more chemical-resistant than bare vinyl.
Ceramic coatings and sealants: Graphene-based or SiO₂ ceramic coatings bond to vinyl surfaces and provide sacrificial UV protection. Test compatibility on a scrap piece first—some coatings react with plasticizers in lower-grade vinyl. Avoid wax products, which contain petroleum distillates that soften vinyl adhesive over time.
Parking orientation: For customers in southern climates, advise parking with the driver’s side facing north to minimize direct UV exposure on the most visible body panels. This is especially relevant for asymmetric stripe designs.
Regular maintenance extends life: wash with pH-neutral soap, avoid automatic car washes with stiff brushes (use touchless or hand wash), and apply vinyl protectant spray (303 Aerospace Protectant or equivalent) every 60 days. Do not use tire shine or degreasers on or near graphics—they dissolve adhesive bonds.
Bodywork Considerations: Paint Repair on Graphics-Equipped Vehicles
Collision repair or paint correction on vehicles with vinyl graphics presents three scenarios, each requiring different approaches:
Scenario 1: Damage does not affect graphic area. Repair as normal, but protect existing graphics during sanding and buffing. Overspray and compound dust migrate onto vinyl texture, requiring solvent cleanup that can damage the film. Mask graphics with low-tack tape and plastic sheeting.
Scenario 2: Damage intersects graphic, replacement graphics available. Remove the affected stripe section, perform repair, allow paint to cure 30+ days, reinstall new graphic. For OEM packages (4Runner 40th Anniversary, Bronco Heritage), replacement graphics are available through dealer parts networks but expect 2–4 week lead times and costs of $200–$600 per kit. Document graphic removal as a separate line item—insurance may cover replacement as part of the repair.
Scenario 3: Damage intersects graphic, replacement unavailable. This is common with discontinued models or custom work. Options: (a) remove all graphics and refinish in solid color; (b) digitally photograph the existing graphic, have a vinyl shop recreate the design (expect $400–$800 for custom plotting and color-matching); (c) repair the panel and apply a complementary graphic that doesn’t require exact matching (e.g., a simpler racing stripe in one of the original colors).
Critical paint-matching issue: If you remove a 3+ year old graphic to repair the underlying panel, the newly painted area will be noticeably brighter and less faded than the surrounding original paint that was UV-exposed. You’re not matching the factory color—you’re matching the aged, faded version. Pull color from an unexposed area (inside door jamb) or, if the graphic covered a large area, consider blending into adjacent panels to feather the color transition. Reinstalling a new graphic over the fresh paint will eventually create a reverse shadow effect: the new paint under the new graphic will fade slower than the old paint that was previously protected.
Proper Removal Technique and Adhesive Cleanup
Removing aged vinyl graphics without clear coat damage requires patience and heat. Never dry-peel at ambient temperature—you’ll leave adhesive residue and risk pulling clear coat on softer single-stage paints. Follow this procedure:
- Heat application: Use a heat gun or steamer to raise vinyl temperature to 120–140°F (use IR thermometer). Heat a 6-inch section at a time. The goal is to soften the adhesive, not melt the vinyl.
- Peel at 45-degree angle: Start at a corner, pull slowly at a 45-degree angle to the surface, maintaining tension. If the vinyl tears, reheat and continue. Peeling too fast causes thin vinyl films to shred, leaving adhesive behind.
- Adhesive removal: Remaining adhesive responds to heat and citrus-based removers (3M General Purpose Adhesive Remover 08984, Goo Gone Pro-Power) or isopropyl alcohol. Apply remover, let dwell 2–3 minutes, then use a plastic squeegee or microfiber towel to roll the adhesive into balls. Avoid metal scrapers or abrasive pads—both scratch clear coat.
- Final polish: After adhesive removal, wash with car soap, clay-bar to remove any embedded residue, then polish with a finishing compound to restore gloss. The previously covered area will be noticeably glossier and darker than the surrounding faded paint—this is unavoidable on vehicles with 3+ years of sun exposure.
Dealing with the ghost outline: Customers often don’t realize that removing old graphics will reveal a sharp color/gloss difference. Set expectations during the estimate: “Your truck’s paint has faded over five years. Removing the stripes will show the original color underneath, which will be darker. To eliminate the outline, we’d need to wet-sand and buff the entire panel—or the whole vehicle—to level the fading.” This turns a $150 removal job into a $600–$1,200 paint correction job. Document this in writing before starting work.
Advising Customers on Design Choices and Long-Term Value
When customers ask about adding graphics or selecting color schemes, provide data-driven guidance:
Color durability: Dark colors (black, dark gray, dark blue) and white retain appearance longest. Metallics, bronzes, oranges, and reds fade fastest—expect 30–40% color shift in 3–5 years of sun exposure. If a customer wants the retro bronze-and-cream look, recommend laminated vinyl or plan for replacement at the 3–4 year mark.
Resale considerations: Controversial in online discussions, but field data shows custom graphics generally reduce resale appeal unless they’re factory-style or enthusiast-specific (TRD, Raptor, Mopar). A well-executed retro stripe package on a 4Runner or Bronco may be neutral-to-positive for buyers seeking that aesthetic, but a custom “flames and skulls” design limits your buyer pool. If a customer plans to sell within 3–5 years, recommend conservative designs that can be easily removed.
Profile and recognition: Some customers specifically avoid graphics because they make the vehicle memorable to law enforcement or in parking lots. Others embrace it. This is a personal preference item, but it’s worth mentioning during consultation—a bright stripe package increases vehicle recognition by an order of magnitude.
Wheel and trim coordination: Graphics look intentional when coordinated with wheel finish. Bronze stripes pair well with bronze or gold wheels (like the 4Runner 40th Anniversary setup); black stripes work with black or machined wheels. Mismatched combos look aftermarket and reduce perceived value. If a customer wants stripes, suggest wheel refinishing or swaps as part of the package.
Frequently Asked Questions
How long do vinyl stripes last before they need replacement?
Expect 3–5 years in full-sun climates (Southwest, Florida) and 5–7 years in temperate regions with regular garage parking. High-quality cast vinyl with UV laminate can reach 7–8 years, but color fade and edge lift typically appear after year 5. Budget for replacement or removal around the 4–5 year mark.
Will removing old stripes damage my truck’s paint?
Properly applied and removed vinyl should not damage factory paint or quality aftermarket refinishes. The risk comes from improper removal (dry-peeling without heat) or application over fresh paint (less than 30 days cured), which can pull clear coat. The bigger issue is the color/gloss difference revealed when you remove graphics from a sun-faded vehicle—the covered area will be noticeably darker and glossier.
Can I apply graphics over a ceramic coating or paint sealant?
No. Vinyl requires direct contact with the paint’s clear coat for proper adhesion. Ceramic coatings and sealants create a barrier that prevents bonding, leading to edge lift and premature failure. If your vehicle has a coating, it must be polished off in the graphic area before application. Conversely, you can apply ceramic coating over vinyl graphics after installation—just test compatibility on a scrap piece first.
What’s the cost difference between OEM and custom vinyl stripe kits?
OEM replacement kits (like Toyota’s 4Runner Heritage stripe package) run $250–$600 for materials, plus 2–4 hours labor at $80–$120/hr shop rate. Total: $500–$1,100 installed. Custom-designed stripes from a vinyl shop cost $400–$1,200 depending on complexity and vehicle size, plus similar installation labor. Pre-cut aftermarket kits (from companies replicating popular designs) run $150–$400 for materials. Quality and fit vary—OEM and custom shop kits use thicker, more durable vinyl than budget pre-cut kits.
Do I need to tell my insurance company if I add stripes to my truck?
Vinyl graphics under $1,000 in value typically don’t require disclosure, but policies vary. If you install a $2,000 custom wrap or graphic package, notify your insurer and request it be added to your policy. This ensures replacement cost coverage if the vehicle is damaged. For simple stripe kits, it’s generally not necessary, but check your policy language on “modifications.”
Can I install vinyl stripes myself, or should I hire a professional?
Simple straight stripes on flat panels (hood, rocker panel, tailgate) are DIY-friendly if you follow proper surface prep and have patience. Complex designs with curves, body lines, or multi-piece patterns are best left to professionals—mistakes are expensive (you ruin a $300 kit) and the result looks amateurish. If you’ve never installed vinyl graphics before, practice on a removable panel or buy an inexpensive test kit. Budget 3–5 hours for your first installation and expect some learning curve on alignment and bubble elimination.
Vinyl Striping Supplies & Tools
Proper installation and removal of vinyl graphics require the right materials and techniques. Browse our Vinyl Striping selection for heat guns, squeegees, adhesive removers, and application aids.
- Heat guns and temperature monitoring tools for safe application and removal
- Squeegees, masking tape, and surface preparation products
- Adhesive removers and cleanup supplies for graphics removal

The Toolsource Technical Team blends decades of real-world automotive service experience with up-to-date technical research. Our writers collaborate with professional mechanics, shop owners, and diagnostic specialists to deliver practical, workshop-ready guidance you can trust.


Follow us on social media