Battery Terminal Corrosion: Safe Cleanup, Testing, and When to Replace
Battery terminal corrosion is more than a nuisance—it increases resistance, causes intermittent no-starts, and can point to deeper problems like acid leakage, loose hold-downs, or an overcharging alternator. This article gives working techs a concise playbook: how to contain and neutralize the mess safely, restore clean low-resistance connections, test the battery and charging system, and make a call on repair vs. replace before winter strands anyone.
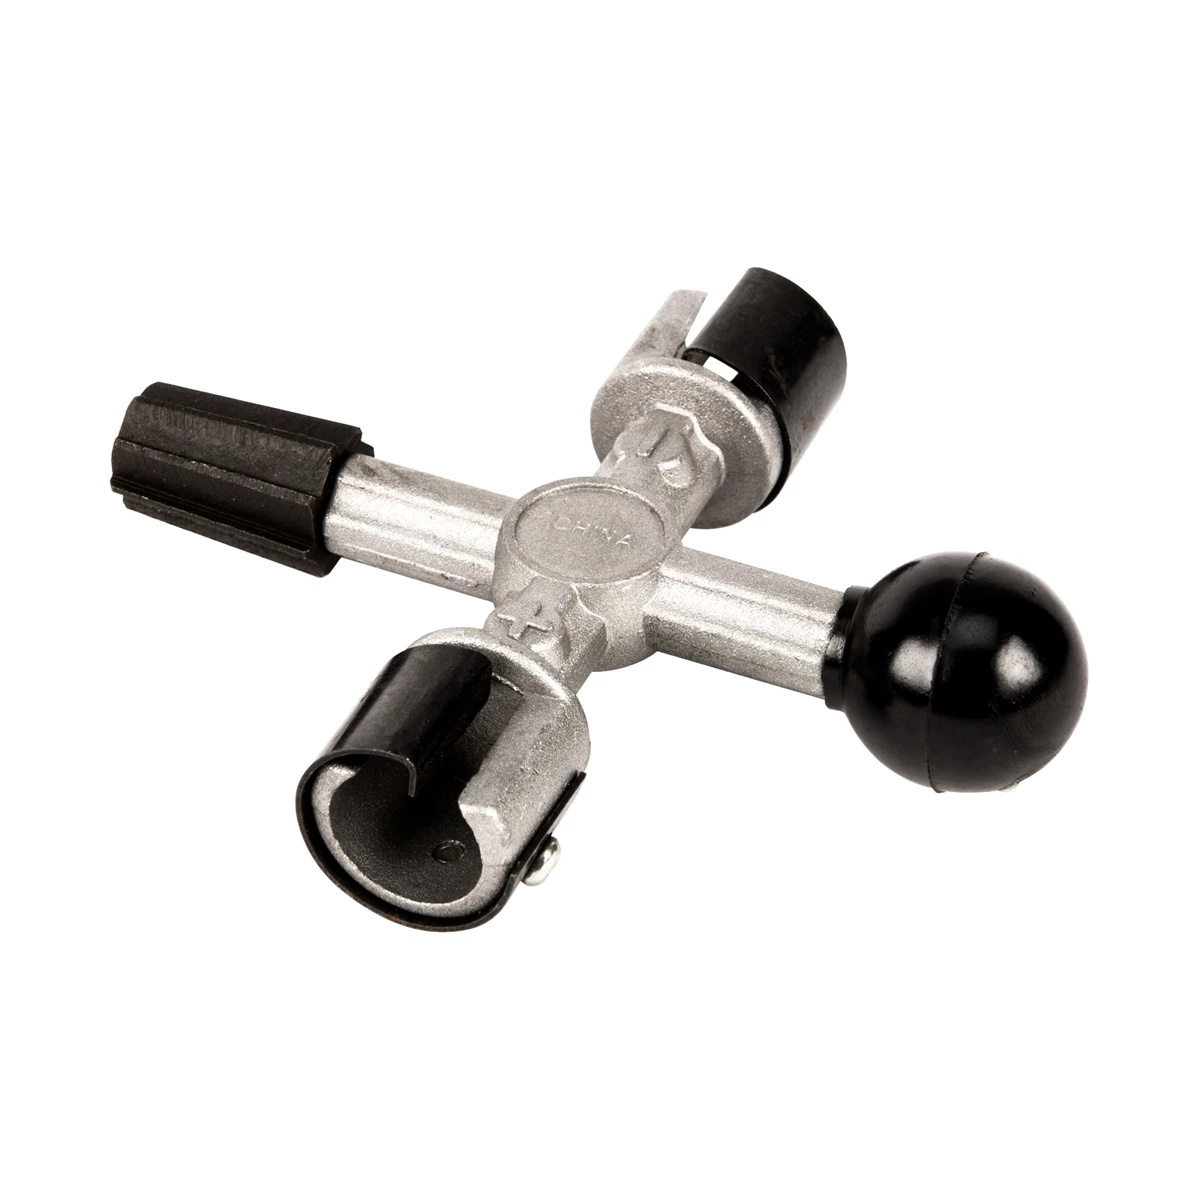
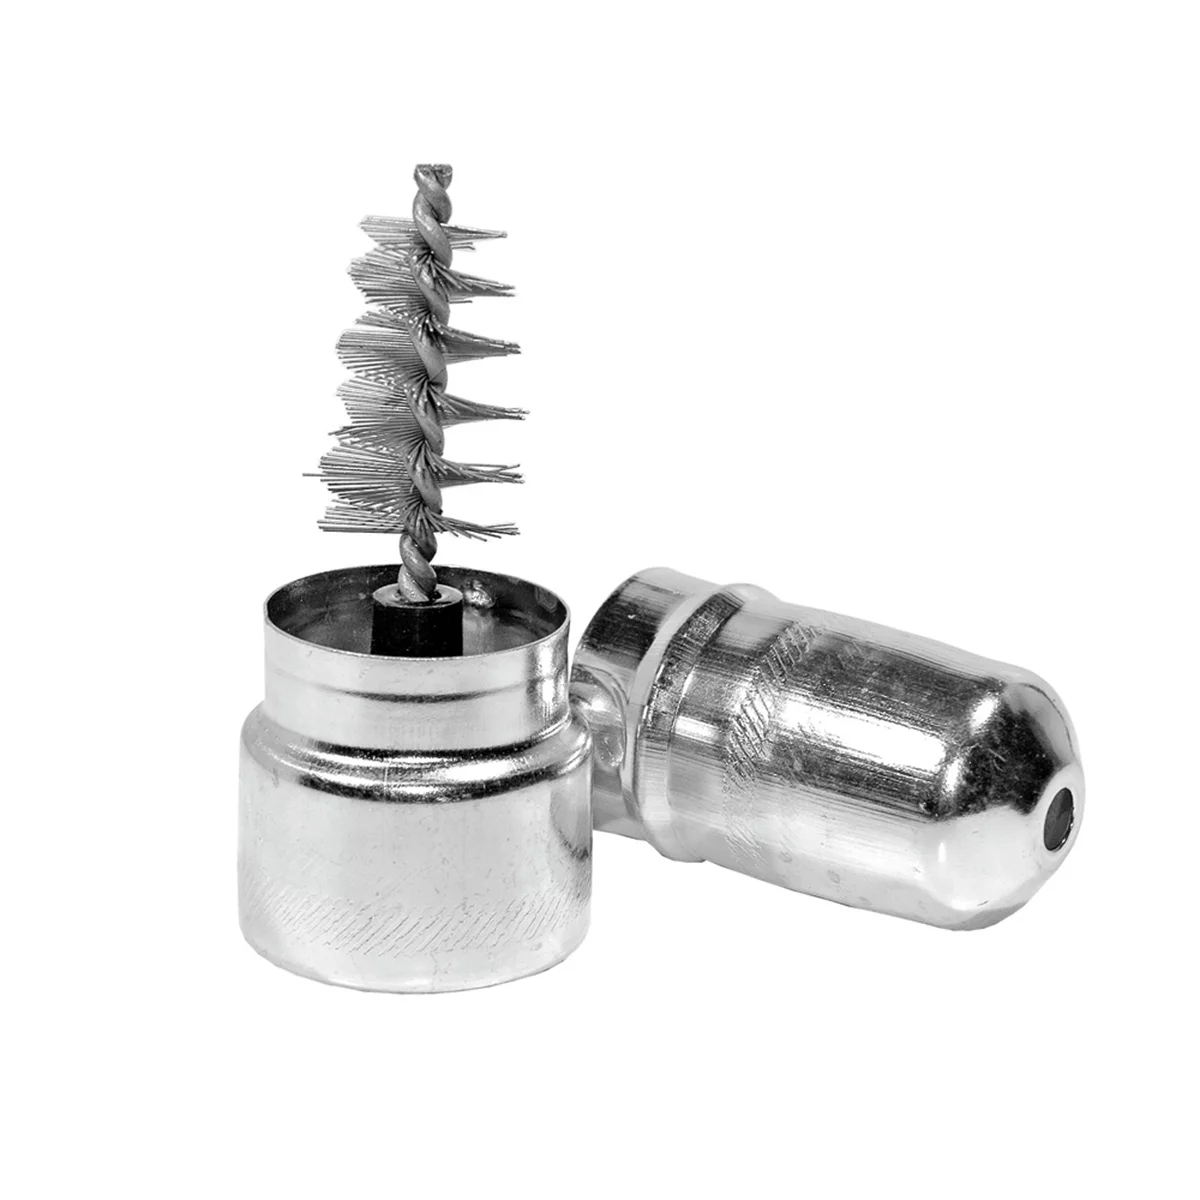
159026 W152C Wilmar - Performance Tool WLMW152C 4 Way Battery Post Clnr
Mfg: Wilmar - Performance Tool
Part #: W152C
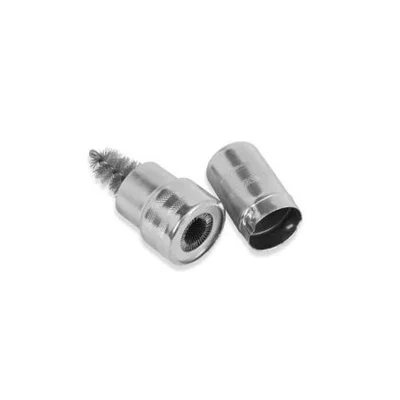

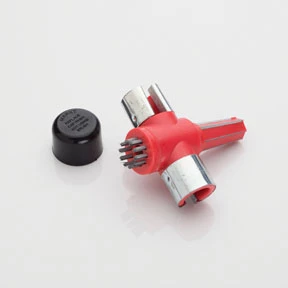
153019 BK541 EZ Red EZRBK541 EZR-BK541 4 in 1 Battery Post Cleaner / Reshaper
Mfg: EZ Red
Part #: BK541
What you’re seeing—and why it matters
Common corrosion types and what they suggest:
- White/gray fluff (lead sulfate/lead oxide): Often starts at the posts/case and spreads across the top. Indicates acid vapor or leakage reacting with lead surfaces.
- Blue/green crystals (copper salts): Forms on copper cable lugs under the clamp and wicks under insulation. Often from acid vapors and humidity; can signal damaged sealing or chronic venting.
- Wet, etched top cover or crust near a seam/cap: Signs of electrolyte seepage. Overcharging (high voltage/regulator fault), case damage, or missing/loose hold-downs that allow vibration can cause this.
Why it matters to starting reliability:
- Corrosion increases contact resistance, robbing the starter of voltage under load.
- Acid creep can wick under insulation, hidden from view, and severely degrade the copper.
- Overcharging and leakage can destroy a new battery quickly if the root cause isn’t addressed.
Bottom line: Clean what you can, but always test the battery and charging system before declaring victory. If the battery is older, visibly leaking, or fails testing, replace it—then verify the alternator/regulator.
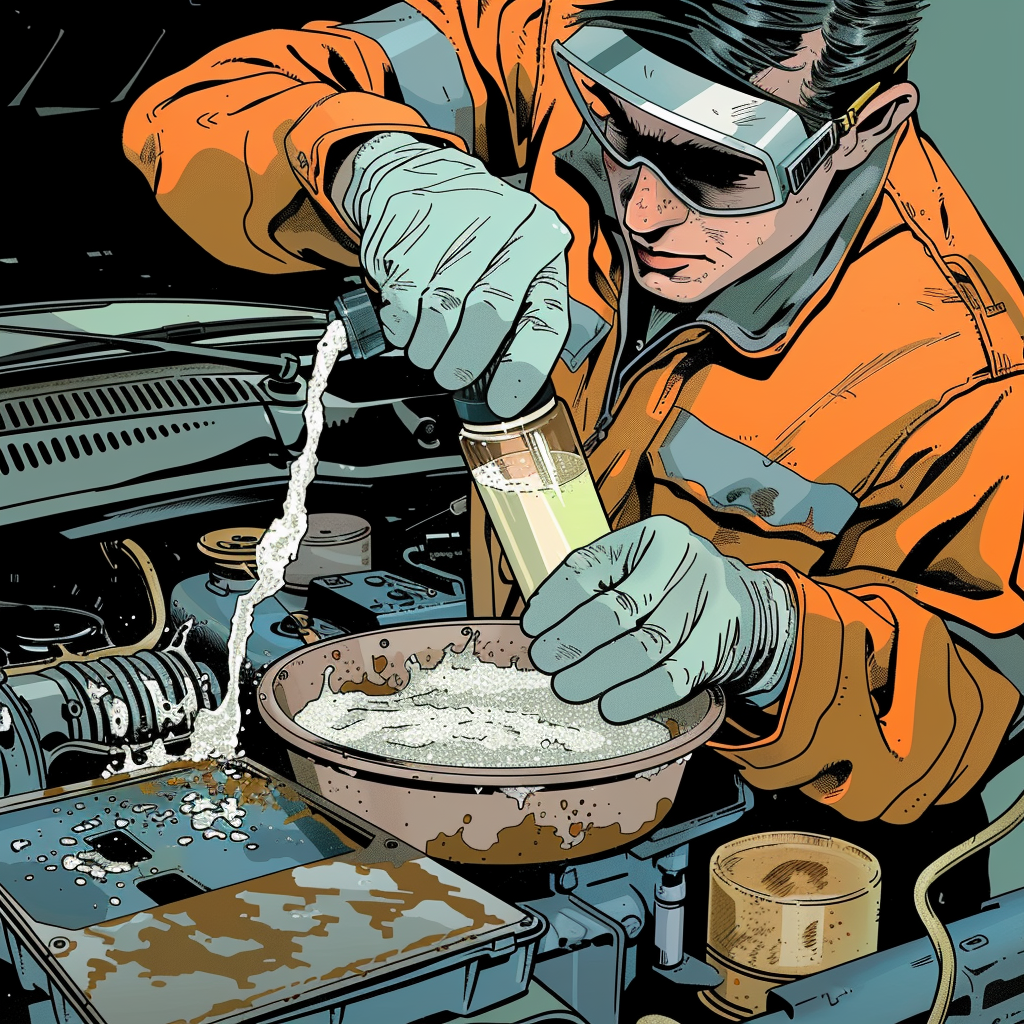
Prep, PPE, and containment
Battery corrosion contains lead compounds and acid residue. Treat it like a hazardous cleanup.
Tools and supplies:
- PPE: chemical-resistant gloves, splash goggles, and a P2/P95 dust mask or respirator.
- Catch pan or disposable tray; baking soda solution (about 1 tbsp per cup of water) or dedicated battery acid neutralizer.
- Hot water in a pourable container (kettle or squeeze bottle).
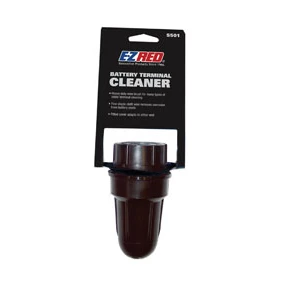
- Battery terminal/post brushes (male/female), small wire brush, plastic scraper, old toothbrush.
- Terminal cleaner spray and terminal protectant spray (or anti-corrosion compound/felt washers).
- Replacement terminals (zinc or tinned brass) and heat-shrink ring lugs if needed.
- Socket set/wrenches (commonly 8–10 mm for clamps/hold-downs), torque wrench if available.
- Digital multimeter; battery conductance/load tester if available.
- Shop towels, baking soda for spill response, and clean water for final rinse.
Containment and surface protection:
- Work in a well-ventilated area, ignition OFF, no smoking/open flames.
- Place a catch pan under the battery area. Acidic runoff can etch concrete/asphalt and harm paint.
- Protect adjacent painted surfaces with plastic and towels. Keep baking soda solution and clean water handy for immediate neutralization of any splashes.
Quick safety checklist
- Wear gloves, goggles, and a mask.
- Disconnect negative cable first; reconnect it last.
- Keep all corrosion damp while brushing to prevent dust.
- Do not let baking soda into battery cells.
- Neutralize and contain runoff; dispose of waste properly.
Step-by-step: Clean and restore the connection
- Record presets and prepare modules (optional). If the vehicle is sensitive to power loss, connect a memory saver per OEM guidance. If you’re unsure or the car has airbag/pyro issues that could be affected by backfeeding, skip the saver and reinitialize systems afterward.
- Disconnect the battery safely. Turn everything off. Remove the negative terminal first, then the positive. If clamps are seized, use a terminal puller—do not pry against the case. Remove the hold-down and lift the battery out if the mess is severe or if you need to clean underneath. Avoid tilting a flooded battery.
- Neutralize surface acid. Lightly pour baking soda solution over the corroded areas. It will fizz as it neutralizes acid residues. Keep it on the outside surfaces only. Do not open caps or allow solution into vent openings.
- Rinse with hot water. A controlled stream dissolves salts and helps release stubborn build-up. Use the catch pan to collect runoff. Repeat the neutralize/rinse cycle until fizzing stops and surfaces are visually cleaner.
- Mechanical cleaning. With everything still damp, use a battery post brush on the posts and a terminal brush or small wire brush on the clamps/lugs. Avoid aggressive grinding on soft lead posts. For heavy build-up, use a plastic scraper first. Inspect cable lugs; if you see green corrosion creeping under insulation or the wire strands are blackened/brittle, plan on cable repair or replacement.
- Dry thoroughly. Compressed air at low pressure or clean towels work. Ensure the battery top is completely dry before reassembly; moisture tracks can cause micro-current leakage between posts.
- Inspect components. Check: case cracks, bulges, acid staining near seams/vents, loose/missing caps, deformed or thinned terminals, and missing/damaged hold-downs. Verify the tray and hold-down hardware (many Fords use a base wedge with a long 8 mm bolt) are intact and secure.
- Reassemble with protection. If reusing parts, assemble clean, dry metal-to-metal contact surfaces. Do not coat contact faces with grease. After tightening, apply terminal protectant spray or anti-corrosion compound around the outside of the clamp-to-post interface and install felt washers if used. A light smear of dielectric grease can be applied on the exterior to seal out moisture only.
- Torque and order. Install the battery and hold-down first. Fit the positive terminal, then the negative. Tighten just enough that the clamp cannot be rotated by hand. Typical top-post clamp torque is in the 5–7 N·m (45–62 in-lb) range; side-post bolts are often around 13 N·m (115 in-lb). Always verify the spec for the vehicle.
- Final rinse and cleanup. Lightly rinse any remaining baking soda residue off the case and tray. Neutralize the catch pan contents with additional baking soda until fizzing stops; dispose per local regulations.
Repair vs. replace: Make the right call
If corrosion was minor and there’s no evidence of leakage, a thorough clean and protect may be sufficient. Replace components when any of the following are found:
- Battery replacement:
- Age ≥ 3–5 years and showing leakage, bulging, or chronic low capacity.
- Open-circuit voltage (after sitting 12+ hours) below 12.2 V repeatedly, or unable to hold charge.
- Fails a conductance or load test (e.g., voltage drops below ~9.6 V during a 15-second load at half the rated CCA at 70°F/21°C).
- Visible acid seepage at posts/case seam or heavy corrosion returning quickly.
- Terminal replacement: If the clamp is thinned, cracked, or pitted beyond cleaning; consider heavy-duty zinc or tinned-brass replacements. For multi-cable positives, choose terminals that accommodate stacked lugs securely.
- Cable repair/replacement: If corrosion has wicked under the insulation (green up the strands), cut back to clean, bright copper and install a new lug with adhesive-lined heat shrink—or replace the cable. High-resistance cables will defeat a new battery.
- Hold-down hardware: If missing or loose, install correct hardware. A moving battery chafes, leaks, and can short against the hood or body in a crash.
Battery selection tips:
- Match group size, terminal orientation, and venting requirements. In trunk/interior locations, ensure the replacement supports vent tubes.
- Meet or exceed OEM CCA and reserve capacity; don’t undersize to save cost.
- For vehicles with smart charging or battery monitors (IBS), follow OEM procedures for battery registration/coding after replacement.
Verify the charging system and check for parasitic draw
Cleaning and replacing parts won’t stick if the alternator is overcharging or there’s an excessive key-off draw.
Basic charging system check (multimeter):
- Measure battery voltage engine OFF after a rest: ~12.6 V (100%), ~12.4 V (75%), ~12.2 V (50%). Very low readings indicate charging issues or a failing battery.
- Start the engine. At idle with minimal loads, expect ~13.8–14.7 V. Below ~13.3 V suggests undercharge; above ~14.8–15.0 V suggests overcharge/regulator fault.
- Turn on headlights, blower, rear defogger. Voltage should remain ≥ ~13.5 V. A large dip that doesn’t recover may indicate a weak alternator or poor grounds.
- If equipped, check AC ripple on the battery with the meter in AC mode; excessive ripple (often > ~0.5 V AC) points to bad alternator diodes.
Parasitic draw quick screen:
- Fully charge the battery. Let the vehicle go to sleep (often 20–45 minutes).
- Use a clamp meter on the negative cable or insert an ammeter in series (with care). Typical draw after sleep is ~20–50 mA. Anything above ~100 mA needs diagnosis (glovebox/hood lamps, stuck modules, aftermarket add-ons).
- Use fuse pulls or a low-amp clamp to isolate the circuit.
If charging is over-spec, correct the alternator/regulator before releasing the vehicle. An overcharging system will boil electrolyte, vent acid vapor, and recreate corrosion quickly—ruining a new battery.
Prevent the comeback
- Keep it tight and still: Verify the hold-down keeps the battery from moving in any direction. Vibration causes case damage and cracked posts.
- Seal the exterior: After clean assembly, use terminal protectant spray or anti-corrosion compound and felt washers. Reapply after service washes.
- Keep the top dry: Wipe the case during oil services. Dirt plus moisture forms conductive paths that slowly discharge the battery.
- Avoid “homebrew” acids: Don’t use cola or sugary drinks. They may dissolve deposits but leave residue and don’t reliably neutralize acid.
- Charge health: If the vehicle sees short-trip duty or sits, recommend a smart maintainer to reduce sulfation.
- Inspect seasonally: Before winter and peak summer heat, check battery state of health, terminal torque, and charging voltage.
FAQs
1) Hot water or baking soda—what’s best?
Hot water dissolves crystalline deposits fast and helps free parts. Baking soda solution neutralizes acid, which stops ongoing chemical attack. Use both: neutralize first (avoid getting it into cells), then rinse with hot water, then dry.
2) Can I pour cola on the terminals?
It can dissolve surface crusts, but it leaves sticky residue and doesn’t properly neutralize acid. Use baking soda solution or a purpose-made battery cleaner instead.
3) Do I need dielectric grease on the contacts?
Dielectric grease is non-conductive. Do not apply it between the post and clamp. Make the metal-to-metal connection clean and dry, tighten properly, then use protectant spray or a thin film of dielectric grease on the outside to seal out moisture.
4) Which cable do I disconnect first?
Always remove the negative cable first and reconnect it last. This reduces the risk of shorting a tool from the positive to the body.
5) How long should a battery last?
Most last 3–5 years depending on climate, usage, and charging health. Extreme heat/cold, short trips, and chronic under/overcharging shorten life. If a battery is leaking or repeatedly fails tests, replace it regardless of age.
6) The corrosion keeps coming back—what now?
Confirm proper charging voltage, replace any leaking battery, verify the hold-down, and inspect/replace corroded terminals or cables. Install anti-corrosion pads and protectant. If cables show corrosion under the insulation, repair or replace the cable.
Shop Battery Service Tools
Finish the job with Battery Service Tools—from brushes and cleaners to protectants, terminals, and hold-down hardware.
- Terminal/post brushes, neutralizers, and protectants to remove and prevent corrosion.
- Replacement clamps, ring lugs, and adhesive-lined heat shrink for reliable repairs.
- Battery testers and multimeters to verify state of health and charging performance.
The Toolsource Technical Team blends decades of real-world automotive service experience with up-to-date technical research. Our writers collaborate with professional mechanics, shop owners, and diagnostic specialists to deliver practical, workshop-ready guidance you can trust.

Follow us on social media