
This field guide distills common shop questions into actionable procedures: when to pull vs. replace, how to plan and section a B-pillar/outer rail correctly, which welding method to use, how to manage ecoat and corrosion protection, why color matching (and bumper matching) is harder than it looks, and how to estimate and document so insurers and peers take you seriously.
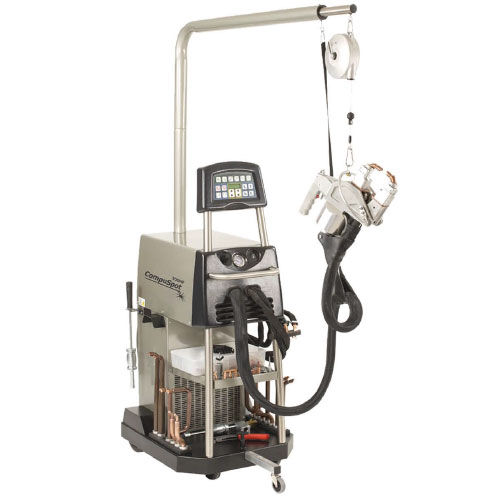
CompuSpot 700 Liquid Cooled w G Clamp, 208-230V, 3-Phase, 60A Free Shipping
Mfg: AMH Canada LTD
Part #: 28CPS723


Repair vs. Replace: Make the Call Using Structure, Steel Grade, and OEM Procedure
Before you touch a clamp or a welder, decide whether the part can be straightened or must be sectioned/replaced. Use OEM repair instructions and material specs, not just your eye, to determine the correct path.
- Identify materials and restrictions: Pull the OEM repair manual (VIN-specific where possible). Note steel grades (mild, HSS, AHSS, UHSS, boron). If a component is labeled as martensitic/UHSS, it typically cannot be straightened or heated; sectioning/replacement is required and restricted to OEM-approved locations.
- Measure before you judge: Baseline the vehicle on a bench or with a 3D measuring system. Document datum, cross, and height points. A panel that “looks minor” may hide intrusion into the safety cage.
- Differentiate a bend from a kink: Cosmetic bends on mild steel skins can be pulled. Kinks, tears, and sharp buckles in reinforcement or pillar structures are replacement conditions.
- Check attachment strategies: If the OEM uses adhesives plus spot welds or SPRs in that area, you must duplicate the joining method. If you can’t, plan for the correct equipment or sublet.
- Account for SRS and ADAS: Any work near B-pillars (curtain airbags, pretensioners) and roof rails triggers battery disconnect protocols, component removal, and post-repair calibrations. Build those into the plan and estimate up front.
Bottom line: “Pull it out” is not a plan when the material or the damage severity says no. Follow the book, measure everything, and choose a repair path you can execute with the right tools and environment.
Planning and Executing a B-Pillar/Outer Rail Section
Sectioning today’s pillars is about controlled cuts at OEM-prescribed locations, precise fixture/measuring, corrosion protection, and door aperture management. The typical sequence below assumes a steel B-pillar outer/inner with an intermediate reinforcement and factory spot welds.
- Research and pre-measure:
- Pull OEM body repair manual, sectioning location drawings, weld counts, joint configurations (butt with backing, sleeve insert, or staggered joints), and corrosion protection notes.
- Record pre-repair measurements on a computerized system or a tram gauge. Photograph and save screenshots.
- Power-down and strip:
- Disable SRS per OEM (battery disconnect and wait times). Remove front/rear seats and adjacent interior trim. Seats are not “optional”—they protect from spatter, and many curtain airbag and seatbelt components live in the pillar base.
- Remove doors, belt moldings, weatherstrips, and glass as required. Tag and bag fasteners.
- Fixture and brace:
- Anchor the vehicle. Use pinch-weld stands or a bench with dedicated fixtures.
- Install temporary body bracing to lock the roof and rocker relationship if the pillar is compromised. Window aperture braces keep gaps true while you section.
- Expose and mark:
- Drill or mill factory spot welds. Use a spot weld cutter to separate skins without thinning the underlying layer.
- Mark OEM sectioning lines. Avoid cutting through reinforcement overlaps unless the OEM permits.
- Corrosion control before the cut:
- Clean mating surfaces. Apply weld-through primer (zinc-rich) only where spot welds or MIG plug welds will occur.
- Prime the internal faces with epoxy/ecoat-equivalent on areas that will be trapped after assembly. Many techs color-match the ecoat so inspection sees correct coverage.
- Cut and prepare joints:
- Make clean, square cuts at the prescribed locations (often at the top of the door aperture rather than mid-pillar). Avoid sectioning in the middle of high-stress zones unless OEM allows a 3/4-height option.
- Fabricate backing/sleeves if required by the procedure. Trial-fit the replacement section; verify joint gaps and fit-up.
- Trial fit doors before final welding:
- Clamp the new section in place with low-profile panel clamps or Clecos.
- Hang doors and set hinges/strikers to establish gaps and flush. If clamps obstruct fitment, tack in strategic locations, remove interfering clamps, and refit. Use aperture gauges and gap tools.
- Join with the specified process:
- If OEM calls for STRSW (squeeze-type resistance spot welding), use an approved spot welder with the correct arm geometry. Dress tips, verify clamping force, and perform destructive nugget tests on coupons that match the stack-up.
- Where MIG plug welds are allowed, drill proper hole size, use a copper backer, and control heat input. For galvanized stacks, MIG brazing (silicon bronze) may be specified to reduce HAZ embrittlement.
- Follow weld count, pitch, and sequence. Don’t weld through primers that aren’t designed for it; keep weld-through primer thin.
- Adhesives and seam sealing:
- Apply structural adhesives where specified (often in combination with welds). Observe open and clamp times and temperature requirements.
- Seal exterior seams to OEM appearance. Texture as needed.
- Post-assembly corrosion protection:
- Epoxy prime exposed metal. Flood cavities with cavity wax using a wand—rocker, pillar, and roof rail interiors should drip.
- Replace foam blocks, NVH pads, and anti-flutter where removed.
- Final measurement and calibrations:
- Re-measure the body points. Adjust if necessary.
- Reconnect battery, clear DTCs, and perform required ADAS calibrations and SRS checks.
Document every stage with clear photos: joint prep, primer application, weld nugget tests, weld counts, and cavity wax application. This protects you on insurer audits and validates structural quality.
Welding and Bonding Choices: STRSW vs. MIG Plug vs. MIG Brazing
Joining modern steel requires matching the OEM’s method to preserve material properties and crash performance.
- STRSW (Spot Welding):
- Preferred for HSS/AHSS/UHSS stack-ups when OEM specifies it. It replicates factory welds, limits HAZ, and maintains strength.
- Requirements: Calibrated welder, correct arm/tip reach, tip dressing, pressure verification, and destructive testing. Record settings and coupons.
- MIG Plug Welding:
- Use only where OEM allows substitution. Good for accessible flanges on mild/HSS when STRSW access is limited.
- Control heat: Proper hole size, short arc length, correct wire diameter, and backer to avoid burn-through. Space plugs per OEM pitch.
- MIG Brazing (Silicon Bronze):
- Used when OEM specifies to protect zinc coatings and reduce HAZ in thin, coated steels.
- Requires clean joints, tight fit-up, and parameter control. Not a structural replacement for high-load joints unless specified.
- Adhesive Bonding with Mechanical Fasteners:
- Some mixed-material joints rely on adhesives plus spot welds or rivets. Follow bead size, pattern, clamp time, and cure temperature. Never substitute panel bond for a structural weld unless permitted.
Quality control items: nugget size and tear-out on coupons, gap verification, weld pitch, spatter protection on glass/interior, and post-weld corrosion coverage. If you can’t hang doors during fit-up due to clamps, plan the tack sequence so you can test gaps before final welding.
Color Matching and Blending: Why Bumpers and Panels Don’t Always “Match”
Customers notice a “shade off.” Techs know materials, textures, and sun fade make perfect matches rare without proper process. Set expectations and execute the paint plan correctly.
- Start with OEM code and variant selection:
- Use a variant deck or spectrophotometer to identify the closest formula. Many colors have multiple production variants; aged finishes can shift further.
- Note substrate differences: Flexible plastics (bumpers) scatter light differently than metal. Texture and primer color alter appearance.
- Control undercoat and texture:
- Use the recommended ground coat/undercoat shade for the color. Keep bumper primers uniform.
- Match bumper texture. Too much or too little texture changes the flop.
- Blend adjacent panels:
- Blend into adjacent panels per industry standard, especially for metallics/pearls. Edge-matching a single panel often fails under different lighting.
- For bumpers, tint as needed and adjust spray technique to match panel orientation and curvature.
- Lighting and verification:
- Check under multiple light sources (daylight, LED, fluorescent). Use a sun gun and view at different angles.
- Document the blend plan and approvals with the customer/insurer.
If a bumper looks “73 shades off,” revisit variant selection, ground coat, texture, and whether blending was authorized. Explain that plastics age/fade differently and that blending is the proven path to an acceptable visual match.
Estimating Structural Work: What Drives Hours and How to Get Paid
Structural jobs often exceed a dozen labor hours because the work spans multiple operations and disciplines. Clear line items and documentation keep supplements down and justify the invoice.
- Disassembly and safety:
- Battery disconnect procedures and wait times for SRS.
- Seat and interior removal, glass R&I, belt systems, airbags. Note one-time-use fasteners.
- Measuring and set-up:
- Initial and post-repair measurements (frame rack or 3D system). Include printouts.
- Anchoring/fixturing time and rental/usage fees if applicable.
- Panel removal:
- Spot weld count and removal time (include bits and abrasives). Access time for layered constructions.
- Adhesive removal and surface prep.
- Sectioning and joining:
- Fit-up, bracing, door trial fits, tacking, final welds, and weld quality tests.
- Adhesive bead application and clamp times.
- Corrosion protection and finishing:
- Weld-through primers, epoxy, ecoat-equivalent coverage, cavity wax flooding, seam sealers, NVH restoration.
- Texture/appearance matching on seams.
- Refinish and blend:
- Substrate prep, primer-surfacer, masking, base/clear, blending adjacent panels, denib/polish.
- Flexible additive and texture adjustments for bumpers.
- Diagnostics and calibration:
- Pre/post scans, DTC documentation.
- ADAS calibrations (static/dynamic), SRS initialization, seat weight mat resets.
- Materials and supplies:
- Weld tips, spot weld cutters, abrasives, gas, wire/rod, adhesives, seam sealer, primers, cavity wax, masking materials.
Attach photos of every critical stage and save OEM procedure pages with highlights. Insurers pay for what’s proven; vague descriptions and dim, blurry photos invite pushback.
Posting Your Repair for Useful Peer Feedback: What to Include
When you share jobs online or submit supplements, make it easy for reviewers to understand the situation. Good documentation gets real answers and approvals.
- Vehicle specifics: Year, make, model, VIN (mask last digits if needed), trim, drivetrain, plant if relevant. Include material callouts (HSS/AHSS/UHSS, aluminum).
- Damage overview: Clear, well-lit photos from multiple angles; note hit direction and measurements showing misalignment.
- Procedures: OEM sectioning diagrams, weld counts, joint types, and adhesive specs.
- Measurement evidence: Pre/post screenshots or rack printouts.
- Process proof: Ecoat/epoxy application photos, weld nugget coupon tests, cavity wax wands in action, seam sealer beads.
- Paint plan: Variant selection, blend map, undercoat shade, texture notes.
- Calibrations: List modules scanned and calibrations performed with proof.
Quick Pre-Weld Checklist
- Battery disconnected and SRS disabled per OEM
- Seats/trim removed, fire blankets and spatter protection in place
- Mating surfaces cleaned; weld-through primer applied correctly
- Ecoat/epoxy on enclosed surfaces applied and cured
- Fixture/measurements locked; door trial-fit plan set
- Welder settings verified; coupon tests passed and recorded
FAQs
Is this a total loss?
A vehicle totals when the repair cost plus supplemental factors (diminished value, rental, admin) meet or exceed the actual cash value (ACV) per the insurer’s threshold. Structural repairs, multiple blends, and calibrations add cost quickly. Provide a complete estimate with procedures and measurements; the numbers will answer the question.
Can I fix structural damage at home for free, in the cold?
No. Structural work requires controlled environment, power, fixturing, welding equipment, adhesives with temperature/humidity windows, and safety protocols. Cold temperatures prevent adhesive cure and paint crosslinking. Attempting it without equipment and training risks occupant safety and liability.
Why does this cost so much?
You’re paying for specialized labor, diagnostics, fixturing, welders, corrosion materials, paint processes, and post-repair calibrations. Structural jobs span body, paint, and electronics. Time adds up across removal, measuring, joining, finishing, and validating.
Do I have to remove the seats for pillar work?
Yes. Seats and interior must be removed to protect components from heat/spatter and to access SRS, wiring, and fasteners. Side curtain airbags and pretensioners are adjacent to pillar work. Leaving seats in risks fire and contamination.
Was a spot welder required for my pillar section?
If the OEM specifies STRSW on that joint, use it. Alternative plug welds or MIG brazing are only acceptable if the manual allows. Always verify with nugget tests and document settings.
Why doesn’t my bumper match my quarter/fender?
Bumpers are flexible plastics; panels are metal. Different substrate, texture, and heat histories combined with age/sun fade create visible differences. Match variant, control ground coat and texture, and blend adjacent panels to minimize the mismatch.
Shop Collision & Body Repair Tools
Need gear for structural sectioning, welding, measuring, and corrosion protection? See our Auto Body & Collision Repair Tools for equipment that supports OEM-compliant repairs.
- STRSW spot welders, MIG/MIG brazing setups, tips, and arms.
- Spot weld cutters, panel clamps/Clecos, backing bars, and bracing.
- Measuring and fixturing: tram gauges, pinch-weld stands, cavity wax wands, and seam sealing tools.
The Toolsource Technical Team blends decades of real-world automotive service experience with up-to-date technical research. Our writers collaborate with professional mechanics, shop owners, and diagnostic specialists to deliver practical, workshop-ready guidance you can trust.

Follow us on social media