
When a vehicle returns with damage and a vague story, you need a factual process to determine what happened and how to repair it correctly. This guide gives a technician-oriented workflow to differentiate deer strike signatures from paint transfer and low-speed impacts with posts, barriers, or other vehicles. It also covers how to map mixed-mechanism damage across multiple panels, plan repairs, and document findings for an insurance claim or customer discussion.
1) Initial stabilization and baseline checks
Before you chase cosmetic clues, ensure the vehicle is safe to move, inspect, and repair.
- Power down and secure: Disable ignition, set parking brake, and chock wheels if panels or suspension may interfere with rolling. If any airbag deployed, disconnect the battery (negative first) and wait OEM-specified time before handling SRS connectors.
- Fluids and cooling: Check for coolant leaks (radiator, condenser, trans cooler) common after front-corner impacts. Pressure-test cooling system if the condenser/radiator support shows movement. Use a UV dye/UV light if needed.
- Steering and suspension: Verify steering sweep without binding. Inspect tie rods, control arms, and knuckle on the impacted corner(s). Low-speed barrier rubs can still bend brackets or shift subframes.
- Electrical pre-scan: Use a bidirectional OBD-II scan tool to pull DTCs across modules (SRS, ABS, ADAS, BCM). Front impacts may set front radar or camera alignment codes even if cosmetics look minor.
- Lighting and mirror function: Test headlamps, corner markers, mirror power adjustments, heating, and turn signals. Note any inoperative items in the baseline report.
2) Clean, illuminate, and map the damage
Accurate evidence needs clean, well-lit surfaces.
- Wash and decontaminate: Remove dirt with pH-neutral soap. Use an iron remover if needed. This avoids confusing road grime with transfer marks.
- Lighting: Use a high-CRI inspection light and a cross-lighting technique to reveal scratch directionality and substrate changes. A polarized light can reduce glare on glossy panels.
- Height references: Measure from ground to the centerline of notable scrapes/creases. Compare to common barrier heights (curbs ~4–6 in; parking stops ~6 in; bollards ~36–48 in; pickup/SUV bumper centerlines ~18–24+ in). Record heights for each contact patch.
- Damage mapping: On a printed vehicle outline or digital RO, indicate each panel with distinct codes (e.g., PT = paint transfer, CR = crack, DS = deep scratch to metal/plastic, DL = dent/crease). Note scratch direction (e.g., front-to-rear) to infer vehicle and object motion.
- Gap and fastener checks: Measure panel gaps and note shifted fasteners, stretched clip holes, or torn plastic tabs on bumper cover corners. Displaced holes typically indicate load direction.
3) Paint transfer vs. exposed primer: confirm what the “white” is
White on a dark bumper or fender can be either foreign paint transfer or the vehicle’s own primer/undercoat showing through. Confirm before concluding the source.
- Fingernail test: Lightly scrape perpendicular to the mark. If material lifts as residue, it’s likely foreign transfer. If it feels flush and uniform, it may be exposed primer/undercoat.
- Solvent test (small, inconspicuous spot first): Start with isopropyl alcohol on a clean microfiber. If residue lifts, escalate carefully to a dedicated paint transfer/adhesive remover or a small amount of mineral spirits. Avoid lacquer thinner or acetone on painted plastics; they can soften the substrate and clearcoat.
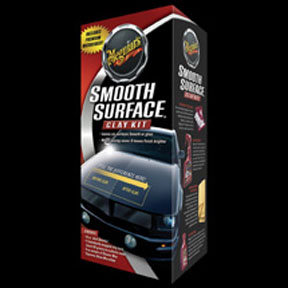
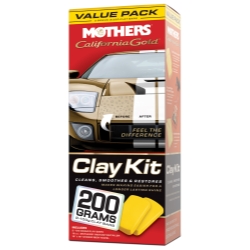
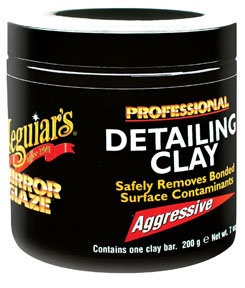
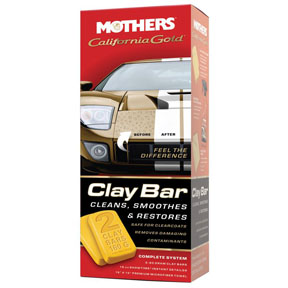
- Clay bar/decon: Use a clay bar with lubricant to shear off surface transfer without abrading clearcoat. If the white fades or lifts, you had foreign material. If it remains and edges show feathered paint layers, the topcoat is likely abraded through to primer.
- Magnified edge inspection: Under 10x magnification, foreign paint transfer appears as a film above clearcoat with distinct boundaries; exposed primer shows feathering and a visible color stack (clear/base/primer).
- Paint thickness gauge: Measure microns across a control area and the damaged area. A large drop coupled with visible substrate suggests loss of topcoat; normal readings with white residue suggests transfer.
Conclusion of this step: If the “white” is soluble/lifts with clay or mild solvent, it’s paint from another object (vehicle, pole, barrier). If not, it’s likely your own exposed primer from abrasion. Document with close-up photos and notes.
4) Deer strike indicators vs. inanimate object contact
Animal strikes tend to leave biological and mechanical signatures that differ from poles, walls, or other vehicles.
- Biological trace evidence:
- Hair/fur: Inspect grille, bumper gaps, headlamp seams, hood-to-bumper gap, inner fender liners, radiator fins, and undertray. Use a borescope for tight areas. Even low-speed deer contacts commonly leave a few hairs trapped in edges or cracks.
- Debris/fluids: Organic residue (dust/dirt embedded with fine hairs) may adhere to damaged clearcoat. Use a disposable swab to collect trace; bag if needed for documentation.
- Damage pattern and deformation:
- Height and spread: Deer shoulder mass typically strikes between ~20–35 inches on many sedans/SUVs, often across the grille/headlamp/hood edge. Side impacts from a running deer can dent door skins higher than typical curb or parking stop marks and may produce softer, broader creases with fewer sharp fold lines.
- Component failures: Deer impacts frequently break headlamp housings, grille clips, bumper energy absorbers, and can buckle the hood’s leading edge. Mirrors can be damaged by a glancing shoulder/antler, but are rarely the only affected part.
- Directionality: Deer strikes often show a single-direction sweep with tapering scratches and diffuse debris spatter; barrier/vehicle contacts commonly show uniform height bands and clear linear transfer.
- Olfactory/contamination cues:
- Persistent odor: Biological strikes may leave lingering organic odor near the front clip until thoroughly cleaned.
- Electronic outcomes:
- ADAS calibration faults: A direct front hit that moves the bumper fascia or support can misalign radar/camera sensors, setting DTCs. While not proof of a deer, it corroborates a front-center impact.
Bottom line: Absence of hair or biological trace, plus clear white paint transfer at a consistent height, strongly indicates contact with a painted object (vehicle or barrier), not a deer. A deer-only incident rarely produces clean, paint-colored transfer without any trace evidence.
5) Reconstruct the event(s): single vs. multiple impacts
Different sides, different heights, and different mechanisms often mean separate incidents. Use a structured approach.
- Compare side-to-side: If the right-front bumper corner shows paint transfer at ~14–18 in (typical bumper-to-bumper contact or low wall), while the left fender shows a higher, sharp crease (~24–28 in) with lateral directionality, you likely have two distinct impacts.
- Scratch direction analysis: Micro-scratches running front-to-rear indicate the vehicle was moving forward along a stationary object (e.g., concrete pillar during parking). Scratches rear-to-front suggest backing along an object.
- Mirror clues: A sheared or folded driver-side mirror, especially with scuffing at mirror cap height matching another vehicle’s mirror, suggests a sideswipe or close-quarters pass. Check the mirror pivot and housing fracture line; brittle fracture without other panel deformation can indicate a glancing blow.
- Fastener/clip stress: Torn tabs and stretched holes at a bumper corner often indicate a snag-and-pull contact, typical of scraping past a pole or barrier during parking maneuvers.
- Tire and wheel evidence: Look for fresh curb rash on wheels or tire sidewall scuffs aligned with body scrapes. This helps confirm contact geometry.
- Sequence hypothesis: Document a likely sequence (e.g., forward scrape on left fender against a post; reverse out and graze right-front bumper against a white-painted barrier; separate sideswipe damages the driver mirror). Note confidence level for each.
6) Repair planning, cost control, and documentation for claims
Once you’ve identified mechanisms and mapped damage, build a repair plan that aligns with safe, OEM-compliant practices.
- Structural and alignment checks:
- Tram gauge measurements: Verify distances between strut towers, radiator support points, and apron landmarks. Even low-speed corner impacts can skew soft mounts.
- Alignment: Perform a quick thrust-angle check. If steering wheel is off-center or readings show cross-caster/camber shifts, inspect subframe mounts.
- Front bumper/fender repair or replace:
- Plastic bumper cover: If cracked near mounting points or torn at corners, replacement is preferred. Minor gouges may be plastic-welded and refinished with adhesion promoter and flexible primer.
- Left fender: Sharp creases near the body line often require replacement for a durable result. If repairable, use PDR only for non-stretched metal; otherwise, conventional metal work and skim filler followed by refinish.
- Mirror assembly:
- Replace broken housings. Transfer OE components (cap, indicator, camera) as required. Torque mounting fasteners to spec; confirm power functions and blind-spot LEDs post-install.
- Lighting and ADAS:
- Headlamp mounts/grille clips: Replace broken tabs; improper retention will cause aiming issues and wind noise.
- ADAS calibration: If bumper, grille, radar bracket, or camera mount is disturbed, perform static/dynamic calibration per OEM. Use proper targets, level floor, set tire pressures, fuel load, and alignment.
- Refinish strategy:
- Blend adjacent panels where required to meet color match standards. Use flexible additive on bumper covers. Observe OEM mask-off points around sensors.
- Labor/time guidance (typical ranges; verify per platform):
- Bumper cover R&I/R&R: 2.5–4.0 hr
- Mirror assembly R&R/program: 0.5–1.0 hr
- Fender R&R and align: 3.0–5.0 hr (plus refinish)
- ADAS calibration: 0.7–2.0 hr depending on systems
- Parts and materials:
- New bumper cover, energy absorber if crushed, clips/retainers
- Side mirror assembly (with correct options: heating, memory, BSM, camera)
- Fender (OE or certified aftermarket), fasteners, seam sealer
- Adhesion promoter, primer, basecoat, clear, flex additive
- Documentation for claims/liability:
- Photograph every contact patch with a ruler for scale and a ground-to-mark measurement.
- Close-ups of paint transfer before and after small test cleanup to show foreign material.
- Biological trace (if any) bagged/tagged; note absence if none found.
- Pre- and post-scan DTC reports, alignment printouts, and calibration certificates.
- Note that multiple distinct damage mechanisms may represent separate loss events. Insurers may split them across incidents; document accordingly.
Checklist: When a vehicle returns with suspicious front/side damage
- Stabilize: fluids, steering/suspension, electrical pre-scan
- Clean and light the surfaces; map damage and measure heights
- Differentiate paint transfer vs. exposed primer (clay/solvent/magnifier)
- Search for hair/debris in gaps and on undertray; note presence/absence
- Analyze scratch direction and mirror damage for motion/side indications
- Build repair plan; verify ADAS needs; estimate labor and parts
- Document with photos, measurements, DTCs, and calibration records for claims
FAQs
How can I tell if the white on the bumper is transfer from another object or my own primer?
Try a clay bar and mild solvent (IPA first). If the white lifts from the surface, it’s transfer. If it doesn’t and you see feathered paint edges, it’s likely your primer or undercoat exposed by abrasion. A paint thickness gauge and 10x magnification help confirm.
Do genuine deer strikes always leave hair or biological evidence?
No, but most do. Hair commonly lodges in grille and lamp seams, bumper gaps, and radiator/condenser fins. Absence of hair plus uniform paint-colored transfer at a consistent height strongly points to a non-animal contact.
Why is the driver-side mirror damaged if the right-front has paint transfer?
Mixed, opposite-side damage patterns typically indicate multiple contacts. A left mirror strike may come from a close pass or sideswipe, while right-front paint transfer often results from contact with a barrier or another vehicle during parking maneuvers.
Can insurers treat this as one claim if there are multiple damage mechanisms?
Not always. Distinct heights, sides, and directions can suggest separate incidents. Provide thorough documentation (photos with measurements, transfer analysis, scan/alignment reports) and let the carrier determine coverage per loss event.
What’s the safest way to remove paint transfer without harming the base vehicle finish?
Start least aggressive: wash, then clay bar with lubricant. If needed, use a dedicated paint transfer remover or mild solvent on a microfiber, testing a small area first. Avoid hot solvents like lacquer thinner on plastic; finish with a light polish if clearcoat is intact.
Do I need ADAS calibration after a minor front-corner scrape?
If the bumper cover, grille, radar bracket, or camera mount was removed, replaced, or shifted, follow the OEM procedure. Even small changes can misalign sensors. Perform static/dynamic calibration and save the certificates with the repair file.
Shop Paint & Body Tools
For confirming paint transfer, mapping impact heights, and planning safe repairs, see our Paint & Body Tools.
- High-CRI inspection lights, UV lamps, and borescopes for trace evidence.
- Paint thickness gauges, tram bars, rulers, and gap gauges for measurement.
- Clip/fastener tools, plastic repair tools, and panel handling aids.
The Toolsource Technical Team blends decades of real-world automotive service experience with up-to-date technical research. Our writers collaborate with professional mechanics, shop owners, and diagnostic specialists to deliver practical, workshop-ready guidance you can trust.

Follow us on social media