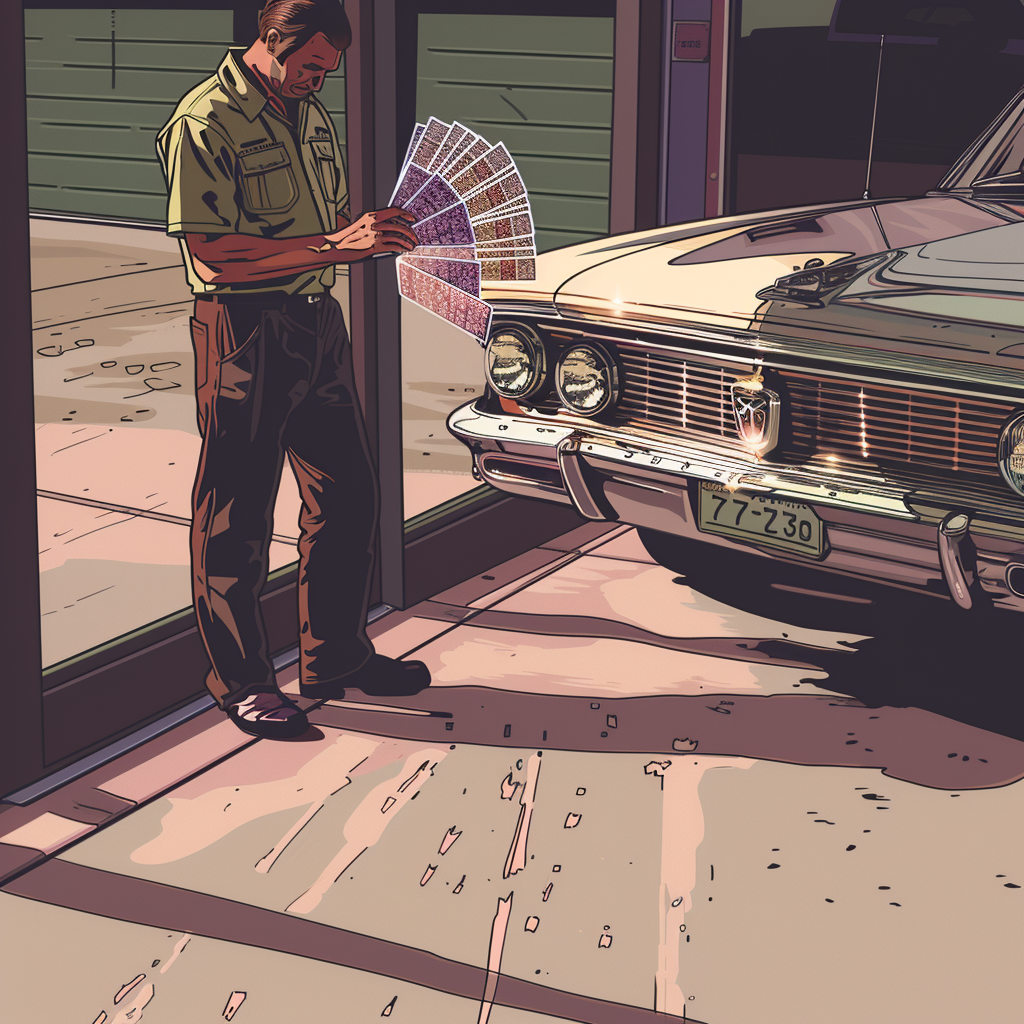
Nothing undermines a collision repair faster than a bumper that clearly doesn’t match the adjacent fender or hood. Whether the vehicle is a few years old, has prior paintwork, or you’re dealing with plastic vs. metal color shift, a poor match is avoidable when you follow disciplined color management. This guide provides a step-by-step process to diagnose the mismatch, choose the correct variant, control the undercoat and application variables, blend properly, and document everything so you can defend the repair and get reimbursed for the work performed.


Ceramic Spacer for S1000 Cure-Tek Short Wave Curing Lamp
Mfg: H & S Auto Shot
Part #: HWD9070
Spectratek Short Wave Infrared Curing Lamp 220V Single Phase 8000 Watts
Mfg: AMH Canada LTD
Part #: 28SPT8000SD

Speed Ray 2 Iridium Short Wave Curing System
Mfg: Infratech Automotive
Part #: 17-1015
1) Diagnose the Mismatch the Right Way
Before you jump to re-tint or re-spray, confirm what you’re actually seeing and why. A structured diagnosis saves time, materials, and reputation.
- Inspect under multiple light sources: Evaluate outside in daylight, under a high-CRI color-match light (e.g., 5000–6500K), and shop lighting. Color shift that looks acceptable under fluorescents may fail in sun or LEDs.
- Check from multiple viewing angles: For metallics and pearls, observe face, mid, and flop angles. Even blacks can have a subtle metallic or pearl that changes flop.
- Confirm adjacent panel condition: Is the fender or hood previously repainted? Check for blend edges, tape lines, or texture differences. Measure paint thickness with a mil gauge to identify prior refinish (typical OEM total film ~3–6 mils; repaints often 7+ mils).
- Assess substrate differences: Plastic bumpers can read differently than metal due to film build, flex, heat, and texture. A slight difference is typical; a dramatic difference indicates variant or process error.
- Look for undercoat influence: If coverage is thin or sealer color is wrong, it can wash out the topcoat (e.g., black over a light sealer may look milky/gray; too-dark sealer can over-deepen a sensitive color).
- Texture and gloss parity: A mismatch in orange peel or gloss can trick the eye into reading a color difference. Ensure consistent clearcoat texture and full cure before final judgment.
2) Build the Correct Color: Scan, Select Variants, and Prove It With Spray-Outs
Going straight to the OEM code without validation is a common failure point—especially on older vehicles or those with prior paintwork. Use your system’s tools to identify the best variant and verify it before you load the gun.
- Use a calibrated spectrophotometer: Clean, polish a palm-sized area, and take multiple reads from clean, representative spots on the adjacent panel. Average the reads per manufacturer guidance. Popular systems include Axalta Acquire, PPG RapidMatch, and AkzoNobel Automatchic.
- Start with the right code and VIN: Pull the OEM code, then review all alternates/variants in your mixing system. Cross-check the scan’s top matches against those variants.
- Select 2–4 likely variants: Avoid defaulting to “prime” or “MPV” without proof. Consider whether the existing finish has shifted warmer/cooler or lighter/darker, and whether it has metallic or pearl content.
- Mix small test quantities and make spray-out cards: Apply sealer to the cards matching your intended sealer shade, then basecoat, then clear. Spray in the same orientation and gun setup planned for the car. Mark each card with formula and settings.
- Evaluate spray-outs on the car: Tape the cards to the car in daylight; view at face, mid, and flop. Choose the closest. If nothing is close enough, tint the nearest candidate incrementally (e.g., add trace blue, violet, or black to correct hue/value) and repeat a targeted spray-out.
- Document the choice: Save photos of the cards on the panel and record the selected variant and any tint adjustments; this supports insurer approvals and future comebacks.
Pre-spray color match checklist (short)
- Spectro read completed and averaged
- 2–4 variant spray-outs cleared and labeled
- Sealer shade on spray-outs matches job plan
- Gun, pressure, distance, and orientation recorded
- Chosen card verified outdoors at multiple angles
- Photos and notes saved to the RO
3) Control the Variables: Substrate, Sealer Shade, Orientation, and Application
Even the right formula can present wrong if the foundation or technique is off. Lock down the controllables before you commit to the bumper.
- Substrate prep (plastic): Clean with plastic-safe cleaner, scuff thoroughly (e.g., 600–800 grit or scuff pad + paste), apply adhesion promoter per TDS, then a uniform sealer. Bake or flash as directed. Avoid solvent entrapment.
- Sealer/primer shade matters: Use the manufacturer’s recommended gray scale (e.g., G1–G7). Blacks typically prefer a darker sealer (G5–G7) to avoid a milky cast. Keep film build even—thin or patchy sealer will telegraph.
- Gun setup and environment: Use a proven gun set for base (e.g., 1.2–1.3 tip, correct cap), correct atomization pressure, and compatible reducer for booth temperature. Maintain consistent distance and overlap.
- Orientation and effect: Spray the bumper in the same orientation it lives on the car. A horizontal application can alter metallic lay and flop vs. a vertical fender/hood. If possible, test-fit and spray in position or on a stand mimicking the installed angle.
- Coverage and flash: Achieve full hiding with controlled, even coats. Respect flash times; over-wet coats can darken or streak; too dry can lighten or grain. Keep blends wet enough to melt but not flooded.
- Clearcoat selection and texture: Different clears can subtly shift perceived color (warm vs. cool cast). Stick to a consistent clear system where possible. Match the factory peel using gun speed, distance, and optional texture adjustments.
- Don’t expect buffing to fix color: Polishing can equalize gloss or minor haze, but it won’t correct a formula, sealer, or orientation error.
4) Blend Adjacent Panels Correctly (When Needed)
Blending is not an excuse for poor variant selection, but it’s often necessary—especially on aged paint, sensitive colors (reds/blacks), or plastic-to-metal transitions. If your spray-outs show a very close match, blending will make the repair invisible.
- Decide to blend early: If the car is older, shows fade, or has sensitive colors, estimate blends on the hood and/or fenders up front. Insurers are more receptive when the rationale is documented and supported by OEM/paint TDS.
- Prep adjacent panels: Clean, de-nib as needed, scuff blend areas (e.g., 800–1000 grit or gray scuff + paste). Feather masking with soft-edge foam tape where appropriate.
- Basecoat blending technique: After covering the bumper, fog a reduced base into adjacent panels, tapering away from the repair edge. Keep a soft, well-diffused edge. Use blending additive per system guidance as needed.
- Clearcoat strategy: Clear the entire bumper. For adjacent panels, either full-panel clear or a controlled blend with proper melt-in edges. Full-panel clears provide most consistent peel and gloss.
- Verify under multiple lights before de-masking: If the blend still flashes a shade difference, stop and correct before bake/cure.
5) Estimate, Documentation, and Insurance Coordination
If the job comes through an insurer or DRP, documentation is your leverage. Record your process so you can justify tint time, spray-outs, and blends—and secure rework if the result isn’t acceptable.
- Write the estimate to cover the process: Include line items for color tint/time and spray-out cards (0.5–1.0 hr typical), sealer/primer, adhesion promoter, and blends on adjacent panels when warranted. Attach paint system documentation that supports blends for color-critical matches.
- Save proof of process: Photos of spectro readings on the vehicle, spray-out cards taped to panels in daylight, variant labels, and notes on sealer shade/gun settings support your decisions and payment.
- Communicate early with the adjuster: Explain why a blend is required (age/fade, plastic-to-metal shift, metallic/pearl sensitivity) and show your test results. Adjusters are more likely to approve when they see objective evidence.
- Handling rework: If the color is clearly unacceptable, disassemble as needed, sand the bumper (e.g., P600–P800 wet), re-seal with the correct shade, apply the selected/tinted variant, and re-blend as authorized. Document time and materials for the supplement.
- Prior refinish considerations: If an adjacent panel was previously repainted in a non-factory shade, document findings (mil gauge, tape lines) and align on the target: match the larger, more dominant adjacent panel (often the hood), not a poorly matched prior repair.
- Final QC and sign-off: Inspect in sun and with a color-match light, confirm texture parity, and obtain written acceptance. Store records with the RO for warranty and future jobs.
6) FAQs: Color Matching and Blending
Q1: Why do plastic bumpers and metal panels read differently even with the same paint?
Plastic retains heat, often has different film build and texture, and can slightly alter how metallics lay and how light reflects. Clearcoat texture and gloss on plastic can also differ from metal. Good variant selection plus proper sealer shade and blending minimizes the difference.
Q2: Can I rely on the OEM paint code alone?
Not reliably—especially on aged vehicles or those with prior work. Codes have multiple variants, and different paint lines (PPG, Axalta, AkzoNobel, etc.) each have their own formula sets. Always validate with a spectrophotometer and spray-out cards.
Q3: Will buffing fix a color mismatch?
No. Buffing can improve gloss and reduce haze but won’t change hue, chroma, or value. If the color is off, revisit the variant, sealer shade, and application, then re-spray and blend as needed.
Q4: How many variants can a “simple” black have?
Often several. Blacks can skew warm/cool, deep/milky, and may include subtle metallic or pearl. Primer/sealer shade and clear selection further affect perceived depth. Treat black like any other color: scan, spray-out, and verify.
Q5: Do I always have to blend?
No, but blending is the safest route when the match is close but not perfect, the vehicle shows age/fade, or the color is sensitive. If your spray-out is indistinguishable at all angles, you might not need a blend. Follow paint manufacturer guidance and document your decision.
Q6: Does primer/sealer shade really change the final color?
Yes. Incorrect sealer shade can lighten, darken, or wash out the base—especially with transparent or low-hiding colors. Match the sealer shade to the paint system’s recommendation and keep sealer uniform.
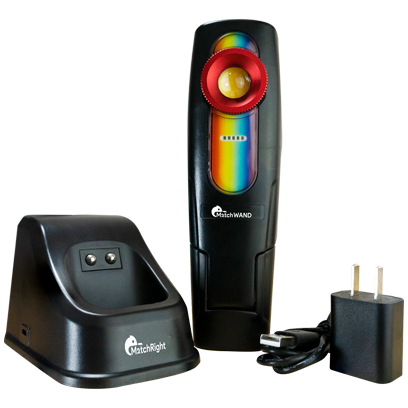
Shop Color Match Lights
To verify hue, value, and flop before you clear, use color match lights that reveal differences standard shop lighting can miss.
- Handheld inspection lights for spray-outs and panel comparisons
- High-CRI, daylight-range options for consistent evaluation
- Rechargeable wands and panels for booth or mobile use
The Toolsource Technical Team blends decades of real-world automotive service experience with up-to-date technical research. Our writers collaborate with professional mechanics, shop owners, and diagnostic specialists to deliver practical, workshop-ready guidance you can trust.
Follow us on social media