
Missing a lug nut isn’t rare, but it’s never ideal. Wheel retention depends on clamp load from all fasteners working together. When one is gone—or a stud is broken—the remaining fasteners see more load, can loosen, and in worst cases you can damage the wheel, brake rotor/drum hat, hub, or lose the wheel entirely. This guide explains what’s truly safe in the short term, what to inspect, how to replace hardware correctly, and torque best practices to prevent a repeat failure.
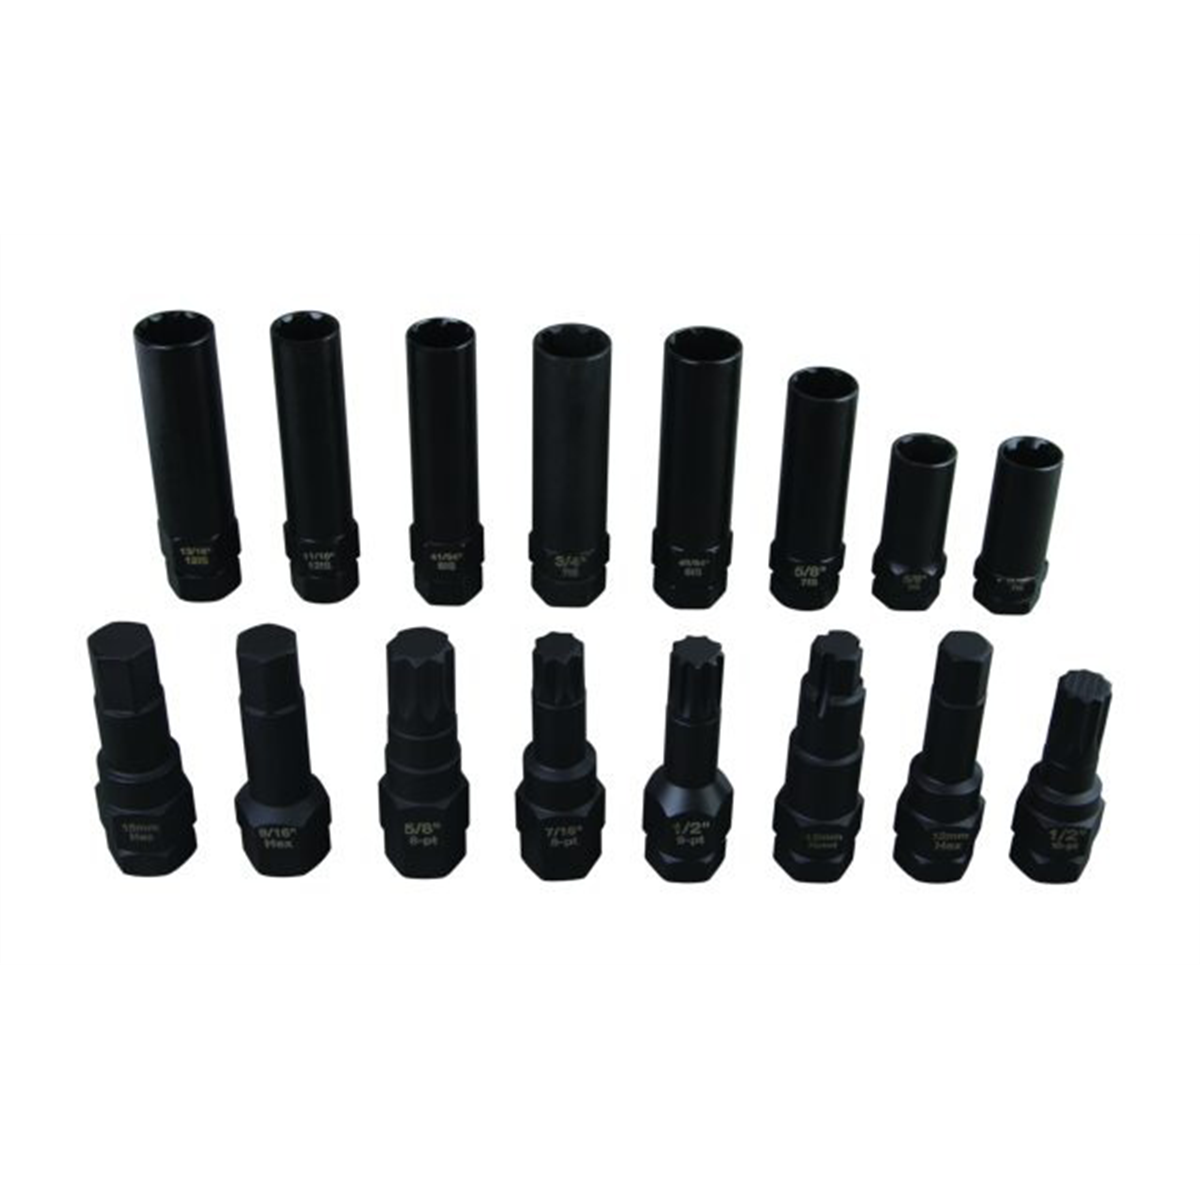

one two inch Dr Extra-Thin Wall Wheel/Nut Protector Impact Socket Set - 5-Pc
Mfg: Grey Pneumatic
Part #: 1505TP
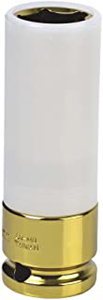
one two inch Drive x 19mm, Extra Thin Wall Wheel/Nut Protector
Mfg: Sunex Tools
Part #: 284919
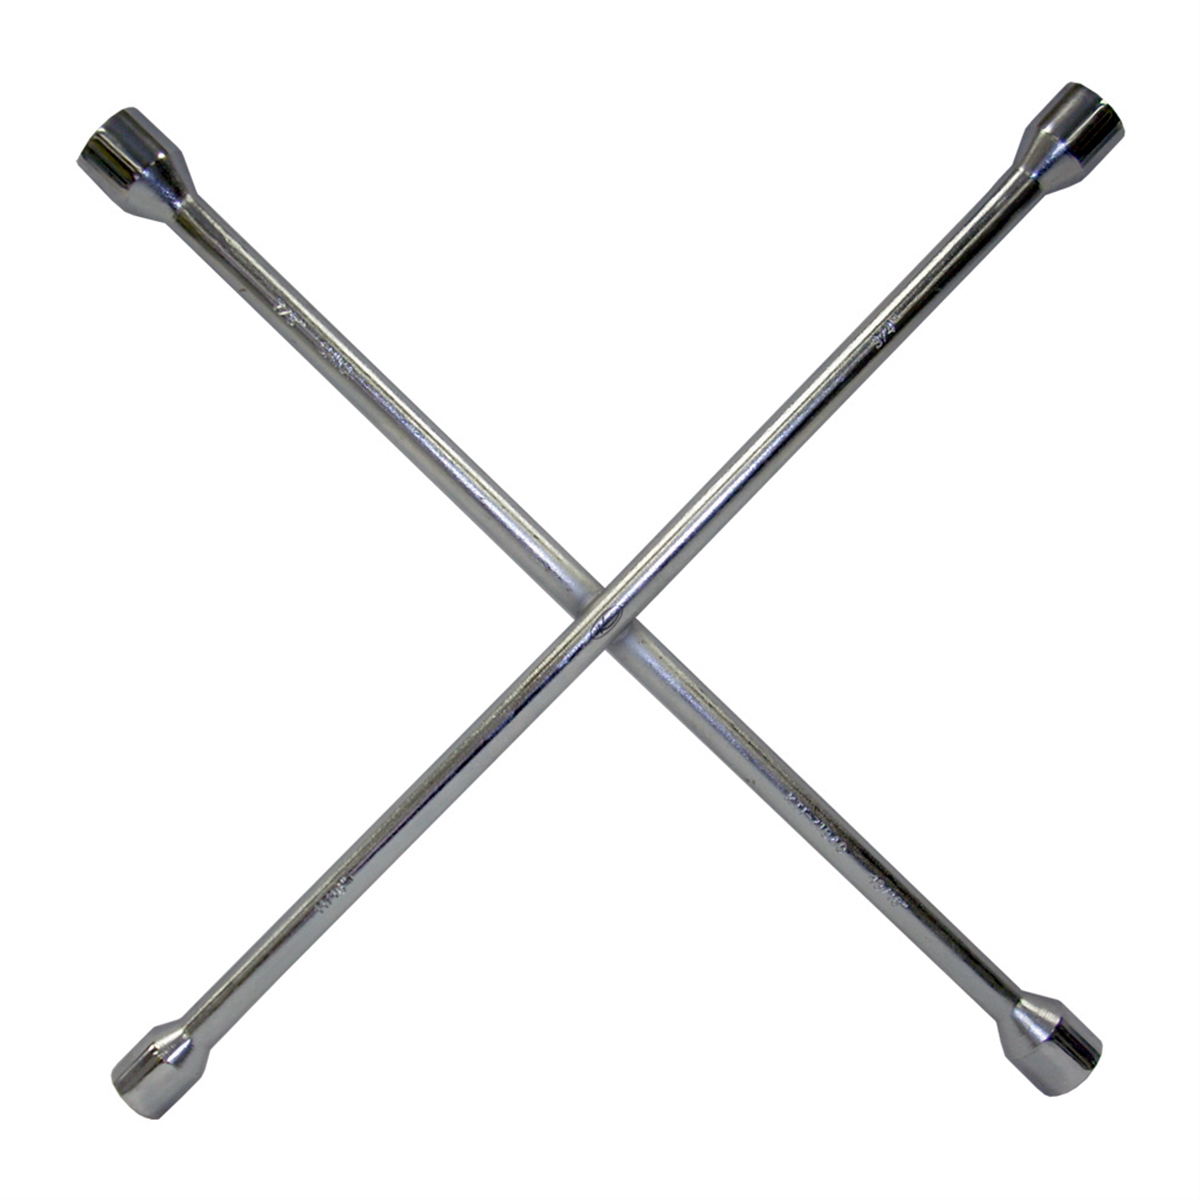
one two inchch Drive Dual Sided Socket Lugnut Removal Tool Set
Mfg: Lock Technology LTI by Milton
Part #: LT-1230

Is It Safe to Drive With One Missing Lug Nut?
Short answer: it’s a short-term compromise at low speeds only. On a 5-lug passenger car, one missing lug reduces total clamp load and increases cyclic loading on the remaining four. That can loosen them, fatigue studs, and oval the wheel or rotor hat holes. Safety margins vary by vehicle, wheel design, and use.
- One missing on a 5-lug wheel: Generally acceptable only for a brief, local drive (low speed, smooth roads) to get to a shop. Avoid heavy braking, hard acceleration, potholes, or high speeds.
- Two missing on a 5-lug wheel, or one missing on a 4-lug wheel: Do not drive. Tow it. The risk of loosening and stud shear increases sharply.
- Front vs. rear: A missing lug on the front (steer) axle can be more critical due to steering loads and brake torque distribution. Treat it with extra caution.
- Wheel bolt systems (common on European vehicles): Missing bolts are especially risky because clamp load is distributed over fewer fasteners without studs to guide the wheel. Same rule: one missing is short-hop only; two missing—don’t drive.
- Aftermarket wheels: Incorrect seat type (conical vs. ball vs. mag) or washers can exacerbate the risk even with all lugs present. Verify compatibility before driving.
Bottom line: if a customer or your own car arrives with one missing lug, it’s a red flag. Tighten the remaining lugs properly, perform a thorough inspection, and replace the missing hardware as soon as possible.
Common Reasons Lug Nuts Go Missing or Studs Fail
- Improper torque: Over-torque stretches studs and crushes seating surfaces. Under-torque allows movement that frets and loosens hardware. Impact guns without torque control are frequent culprits.
- Cross-threading or galling: Misaligned nuts or bolts destroy threads. The fastener may feel tight but has inadequate clamp load and will loosen or fail.
- Corrosion: Rust weakens studs and nuts, increasing friction and the torque needed to achieve clamp load. Studs then twist and shear during service or driving.
- Two-piece capped lug nuts: Some OEM-style chrome-capped nuts swell or deform, leading to wrong socket fit, damaged caps, and improper torque. Replace with one-piece solid nuts when issues appear.
- Roadside spare changes: Stress, poor lighting, and basic tools lead to misalignment and under/over-torque. Re-torque after any roadside work.
- Wheel/hub interface corrosion: Rust on the hub face, hub pilot, or wheel seat prevents proper mating, causing uneven clamp and loosening.
- Theft or missing wheel locks: Locks encourage thieves to target lugs; missing keys lead to damaged hardware during removal. Use quality locks sparingly and keep the key accessible.
On-Vehicle Inspection and Triage: What to Check Before You Drive
- Secure the vehicle: Park on level ground, apply the parking brake, and chock the opposite wheel.
- Identify what’s missing: Is it a lug nut/bolt, or is the stud/bolt itself broken? A broken stud usually leaves a flush or recessed shank in the hub.
- Torque check the remaining fasteners: Loosen and retorque in a star pattern to the correct spec (consult OEM data). If any bind, strip, or turn without tightening, stop and plan for hardware replacement.
- Inspect wheel seat and holes: Remove the wheel if possible. Look for ovaled holes, fretting, cracks around the seat, or damage to the rotor/drum hat holes.
- Check stud/bolt threads: Use a thread gauge or pitch check (common sizes include M12x1.5, M12x1.25, M14x1.5; SAE sizes like 1/2-20). If threads are stretched, rusty, or galled, replace.
- Assess stud protrusion and engagement: Full nut engagement should be at least equal to the stud/bolt diameter in threads. Too short? Replace studs or use correct-length hardware.
- Spin and feel: With the wheel off, rotate the hub. Listen for roughness (bearing issues). With the wheel on, check for lateral runout or wobble as it rotates. Excess indicates bent wheel or compromised seating.
- Verify seat type: Ensure the nut/bolt matches wheel seat (60° conical, ball/R12–R14, or mag/shank). Mismatched seats don’t center or clamp correctly.
- Hub face and pilot: Clean rust from the hub face and pilot with a wire brush. Light surface prep ensures proper mating.
- If damage is present: Plan for replacement of studs/bolts, possibly the hub assembly, affected rotor/drum, and suspect wheel hardware.
Quick Roadside Checklist
- Tighten remaining lugs in a star pattern to OEM spec using a torque wrench.
- Avoid highways and hard braking; drive only to the nearest shop.
- Visually confirm wheel is fully seated and centered on the hub.
- Recheck torque after 5–10 minutes of driving if you must continue short distance.
- Schedule immediate repair of the missing or damaged hardware.
Replacing a Wheel Stud or Lug Bolt: Tools, Tips, and Procedures
Replacement difficulty varies by vehicle. Some studs can be pulled in on-vehicle; others require hub removal due to clearance.
Recommended tools and supplies:
- Lug studs or bolts (correct diameter, pitch, knurl size/length, and seat type)
- Matching lug nuts (prefer one-piece solid nuts if available)
- Torque wrench and appropriate socket (thin-wall for tight wells)
- Breaker bar, penetrating oil, wire brush
- Ball joint press or stud installer tool with hardened washers
- Thread chaser/tap and die (to clean threads; do not cut new threads on studs unless specified)
- Caliper hanger, jack stands, and basic brake service tools
- Anti-seize for hub pilot only (if OEM allows), never on threads unless specified by manufacturer
Pressed-in wheel studs (common on many hubs):
- Remove the wheel and brake caliper/rotor or drum to access the stud heads.
- Knock out the broken stud with a hammer or use a press. Support the hub flange to avoid bearing damage.
- Clean the hole, confirm knurl diameter matches new stud. Do not enlarge the hole unless using an OEM-specified oversize stud.
- Install the new stud from the back. If clearance is tight, rotate the hub to a position with more room; some vehicles require pulling the hub assembly for clearance.
- Pull the stud into the flange using a stud installer tool and a sacrificial open-ended lug nut with stacked hardened washers. Tighten gradually while ensuring the stud head seats fully and squarely against the flange. Do not use an impact gun to seat; use hand tools to feel seating.
- Reassemble brakes, clean hub face and pilot, and reinstall the wheel. Torque lug nuts to spec in a star pattern.
Wheel bolt systems (BMW/Mercedes/VAG and others):
- Support the rotor/hat to prevent misalignment when bolts are removed.
- Chase the threads in the hub with a thread chaser to remove debris and corrosion.
- Install correct-length, correct-seat bolts. Verify at least the bolt diameter in thread engagement—too long can contact parking brake hardware; too short reduces clamp load.
- Torque bolts in a star pattern. Recheck after 50–100 miles.
When hub removal is required:
- Some front-wheel-drive and late-model vehicles require hub removal to insert new studs. Follow OEM procedures. Hub assemblies often have torque-to-yield axle nuts and specific torque/angle specs—replace single-use hardware.
- If the rotor hat holes or wheel holes are elongated or cracked, replace the affected parts. Don’t reuse damaged components.
Cost and labor guidance (typical, varies by model):
- Studs: $2–$10 each; nuts $1–$8 each; wheel bolts $3–$15 each.
- Labor: 0.5–1.0 hour per stud if accessible; 1.5–2.5 hours if hub removal is needed or rust is severe.
- Hub assembly: $100–$300+, plus alignment if suspension components are disturbed.
Torque and Retorque: Do It Right
- Clean and dry: Hardware and wheel seats should be clean and dry. Lubricating threads changes the torque–clamp relationship and can over-stretch studs. Only lubricate if the OEM explicitly calls for it.
- Hub prep: Remove rust on the hub face and pilot. Apply a very thin film of anti-seize to the pilot only if allowed. Do not coat the entire face; it can reduce friction and alter clamp load.
- Correct torque: Use OEM torque specs. Typical passenger cars are often in the 80–110 ft-lb range; trucks/SUVs can be 120–150 ft-lb+. Always check service data.
- Pattern: Tighten in a star/crisscross pattern in 2–3 stages to evenly seat the wheel.
- Torque sticks: Useful with an impact for preliminary snug, but always finish with a calibrated torque wrench.
- Retorque: Recheck torque after 50–100 miles, especially after wheel service, stud replacement, or when using new wheels.
- Thread engagement: Aim for at least one full fastener diameter of thread engagement. If using spacers or thick wheel centers, move to extended studs/bolts as needed.
Prevention and Parts Selection
- Replace suspect hardware in sets: If one stud broke from over-torque or corrosion, the rest on that wheel may be compromised. Replace as a set when in doubt.
- Upgrade from two-piece capped nuts: If swelling or deformed caps are present, switch to one-piece solid nuts with the correct seat and finish.
- Match seat type to wheel: Conical (60°) vs. ball vs. mag/shank with washer. Using the wrong seat prevents proper centering and clamp.
- Use quality tools: Thin-wall impact sockets to avoid scarring wheels, and a calibrated torque wrench for final torque.
- Document torque on the RO: For shops, record torque values and recheck instructions. Offer a complimentary retorque visit.
- Customer education: After roadside spare use or tire service, advise a retorque and quick visual check. Keep wheel lock keys in an accessible location in the vehicle.
- Inspection compliance: Many jurisdictions will fail inspection for missing or broken wheel studs/bolts. Don’t send a vehicle out with missing hardware.
FAQs
How far can I drive with one missing lug on a 5-lug wheel?
Only as far as necessary to reach a nearby shop at low speed on smooth roads. Avoid highways, heavy braking, and hard cornering. Two missing lugs or any missing lugs on a 4-lug wheel—don’t drive; get a tow.
Is a missing lug more critical on the front axle?
Often yes. Steering and braking loads on the front wheels are higher and can accelerate loosening and component damage. Treat any missing front lug as urgent.
Should I use anti-seize on lug studs/bolts?
Unless the OEM specifies otherwise, do not lubricate lug threads or seats. Lubrication changes torque-to-clamp correlation and can lead to over-stretching and failure. A tiny amount of anti-seize on the hub pilot is acceptable on some vehicles; check OEM guidance.
Do I need to replace all studs on that wheel if one broke?
If the failure was due to corrosion or over-torque, the others may be compromised. At minimum, inspect and measure each. Replacing all studs and nuts on the affected wheel is often prudent and inexpensive insurance.
What are signs my wheel is loosening?
Clicking or knocking that changes with speed, a burning smell from fretting, vibration, shiny metal dust around the seats, or witness marks indicating wheel movement. Stop and inspect immediately.
Do I need an alignment after replacing a stud?
Not typically, unless suspension components were loosened or replaced during the procedure. If the hub or bearing assembly was replaced, an alignment check is wise.
How do I identify the correct lug nut or bolt seat?
Check the wheel manufacturer or OEM documentation. Conical seats have a 60° taper. Ball seats are rounded (R12/R13/R14 radii). Mag/shank nuts use a flat seat with a shank and washer. Match the seat exactly for proper centering and clamp.
Shop Wheel Hardware & Safety Essentials
Need replacement studs, nuts, or torque tools after finding a missing lug? See our wheel hardware and torque-control tools to restore proper clamp load and prevent repeat failures.
- Hub-prep brushes, anti-seize for pilots, stud installers, and safety accessories
- OEM-spec lug nuts, wheel bolts, studs, and thread-repair tools
- Torque wrenches, torque sticks, thin-wall sockets, and breaker bars
The Toolsource Technical Team blends decades of real-world automotive service experience with up-to-date technical research. Our writers collaborate with professional mechanics, shop owners, and diagnostic specialists to deliver practical, workshop-ready guidance you can trust.

Follow us on social media