If you’re staring at a 0.8-hour labor line for a 2020 Volkswagen Jetta radiator support and wondering how to make the job pencil, you’re not alone. On late-model vehicles, published replacement times for the support itself typically exclude the time to remove all necessary bolted-on parts. That means the 0.8 (or similar) is only for swapping the support after complete access has been established. The rest of the work—front-end teardown, R&I of cooling and A/C components, aim/calibration, adjustments, and fluids—must be itemized and supported with documentation.
This guide gives technicians and estimators a practical playbook to blueprint the job, capture each operation, and assemble a clean, defensible estimate that reflects the actual work performed.


Blueprint First: Decode, Research, and Plan Your Access
Blueprinting avoids missed operations and multiple supplements. Start with a complete picture before turning a wrench.
1) Decode the VIN and options
- Confirm engine, transmission, cooling layout, and any options affecting the front end: fog lamps, active grille shutters, adaptive lighting, front radar in the emblem (ACC), parking sensors, and block heater provisions.
- Note ADAS features that may require pre/post-scans and calibrations if disturbed.
2) Pull OEM procedures and torque specs
- Use factory service info (VW erWin) or an OEM-licensed provider (ALLDATA, Mitchell) for the radiator support replacement, front-end carrier/lock carrier removal, cooling system drain/refill, A/C handling, and fastener torque specs.
- Check for one-time-use fasteners, clips, or stretch bolts and add them to the parts list.
3) Review the labor database line notes
- In CCC/MOTOR, Audatex, or Mitchell, read the part’s line notes and P-Pages. For this operation, the typical note states that replacement time is after all necessary bolted-on parts are removed. That clarifies what is not included.
- Highlight non-included ops: bumper cover, grille assemblies, absorber, reinforcement, air guides/deflectors, active shutter, headlamps (and aiming), fog lamps (and aiming), latch, latch support, hood release cable, ambient temp sensor, horns, upper sight shield, under-shields, cross bars, radiator, condenser, cooling fan module, coolant drain/refill/bleed, A/C evacuate and recharge, and related adjustments.
4) Decide your access strategy
- Determine whether the radiator and condenser can remain attached and be supported while the carrier is swapped, or if removal is more efficient for this configuration. On many Jetta models, the radiator and condenser are clipped to the carrier, making R&I or robust support necessary.
- Plan support points, protection for fins, and harness routing to avoid damage.
5) Pre-authorize scans and calibrations
- Document pre-scan findings. If front sensors, cameras, or emblem radar will be removed or disturbed, plan for calibration per OEM specifications and verify target availability or sublet arrangements.
Itemize Every Access and R&I Operation
The 0.8-hour replacement time only covers the support swap after access is established. Itemize each step needed to get there and to restore the vehicle to pre-loss condition.
Common R&I operations to add (verify per VIN and procedures)
- Front bumper cover, grille, and trim components
- Energy absorber and front reinforcement (impact bar)
- Air guides/ducts, deflectors, and shutter assemblies (if equipped)
- Upper sight shield/upper cover, under-shields/splash shields
- Headlamps R&I plus aiming (required after removal/disturbance; consult OEM)
- Fog lamps R&I plus aiming (if equipped)
- Hood latch, latch support, and hood release cable (include adjustment)
- Ambient temperature sensor and bracket
- Horns, hood prop bracket, air intake snorkel/ducting near the lock carrier
- Radiator assembly with fan module (R&I or support in situ where permitted)
- A/C condenser R&I (or secure/support if OEM allows clip-off/transfer)
- Coolant drain, refill, and bleed (vacuum-fill strongly recommended)
- A/C evacuate and recharge at mechanical rate; include refrigerant, oil balancing if required
- Wire harness set-back, clip transfers, hose bracket transfers, one-time-use fasteners
- Panel gap verification and latch/hood height adjustment
Materials and smalls
- Coolant, A/C refrigerant, PAG oil (as applicable), new O-rings/seals, plastic clips, rivets/retainers
- Corrosion protection where coatings are disturbed; seam sealer/adhesive if specified
Scanning, calibrations, and verification
- Pre-scan and post-scan with printouts attached to the file
- ADAS calibrations for front radar (if equipped), and any camera/sensor requiring calibration post-disturbance, per VW procedure
- Headlamp and fog lamp aiming (aim aimers or aiming screen/procedure as required)
Build these items from the database with associated labor times and rates (body vs. mechanical). If the database provides component-specific R&I times (e.g., shutter, under-shields, cross bars), select those exact lines rather than lump-sum “time add-ons” to maintain clarity and defendability.
Build a Defensible Estimate in CCC/Mitchell/Audatex
Clear structure and references reduce friction with reviewers and adjusters.
1) Start with the core replacement line
- Add the radiator support (lock carrier) replace line. Attach an estimate note citing the database line note that replacement time begins after all necessary bolted-on parts are removed.
2) Add all required access R&I lines
- Enter bumper cover, grille, absorber, reinforcement, air guides, shutter, shields, headlamps, fogs, latch support, latch and cable, horns, temp sensor, etc., as discrete R&I operations with their own times.
- Include aim operations for headlamps and fog lamps per OEM guidance.
3) Add cooling and A/C operations at the correct rate
- Coolant drain/refill/bleed (include coolant), vacuum-fill tool usage to eliminate air pockets.
- A/C evacuate and recharge (at mechanical rate). Add refrigerant quantity from the under-hood label and oil balance as specified by OEM. If the condenser must be opened, add new O-rings and caps.
4) Transfer parts and single-use items
- Add clip transfers, bracket swaps, hose guides, and any single-use fasteners or retainers as parts and labor where applicable.
- List corrosion protection or coatings if factory coatings are disturbed.
5) Include adjustments, scans, and calibrations
- Hood latch adjustment and panel gap check/adjustment lines.
- Pre- and post-scans with attached reports. Add ADAS calibration lines where the OEM requires them after removal or disturbance.
6) Support with documentation
- Attach OEM procedure excerpts, torque specs, and line-note screenshots to the file.
- Add photos of each step requiring R&I. Label images to match line numbers on the estimate.
7) Communicate authorization and supplements
- Get customer authorization for the full blueprint. If an insurer disputes non-included operations, inform the customer that these steps are required to return the vehicle to pre-loss condition per OEM process.
- Submit a concise supplement referencing specific P-Page language and OEM lines.
Shop-Floor Tips to Execute Efficiently
Smart setup and the right tooling reduce come-backs and time lost to rework.
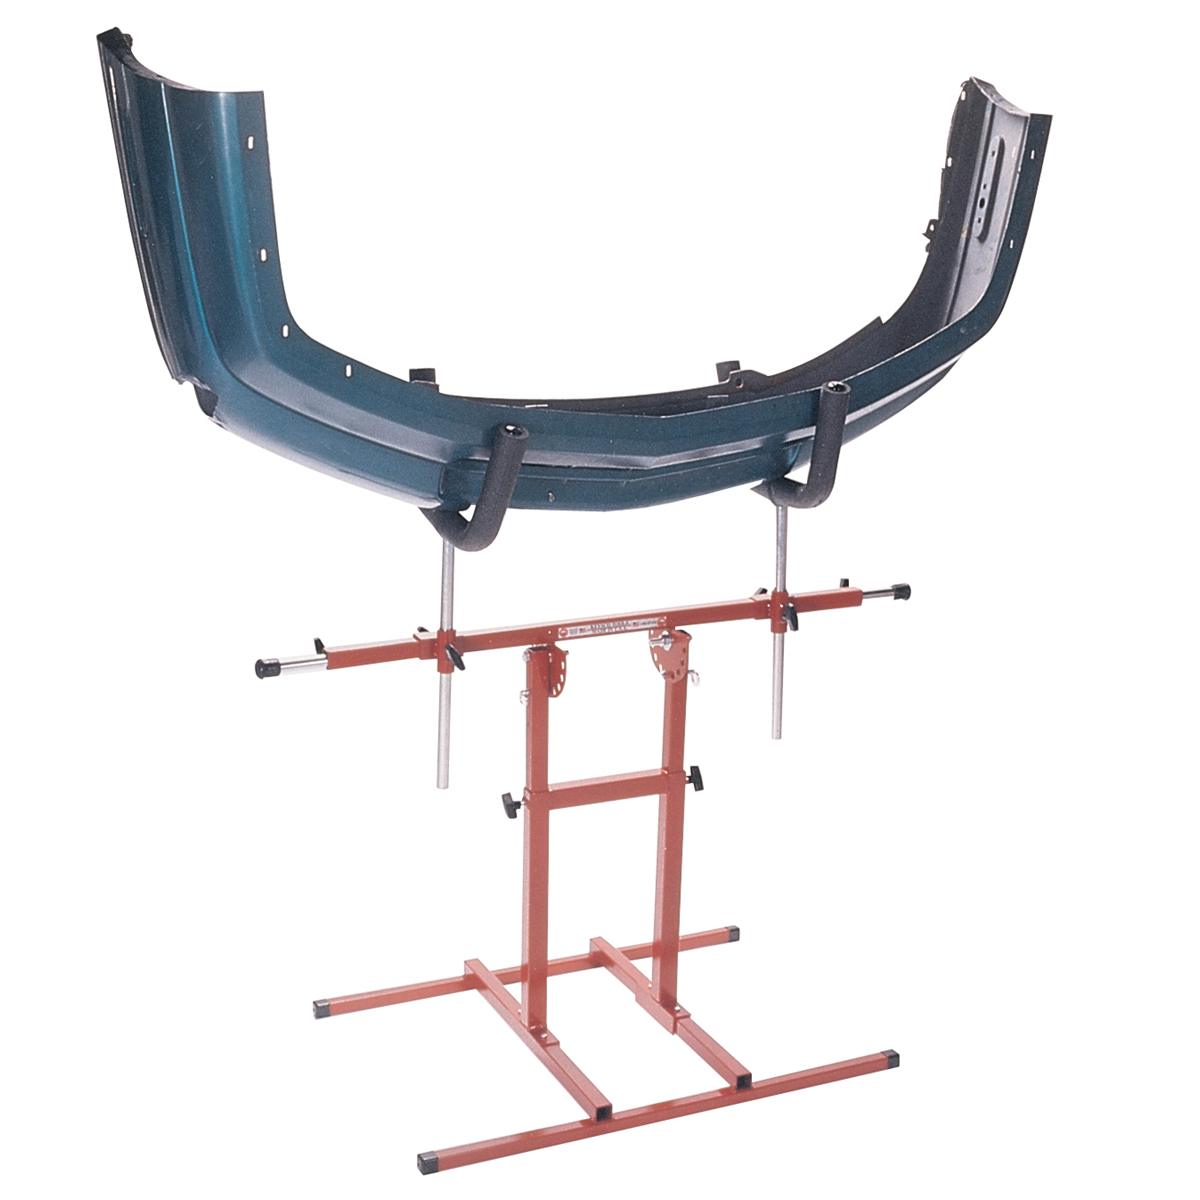
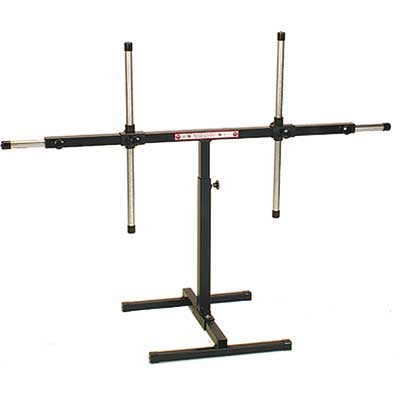
- Support the assembly safely: If leaving the radiator/condenser attached, use an adjustable support bar or temporary carrier stands to prevent stress on lines and cores.
- Protect soft components: Use foam/cardboard over condenser/radiator fins and route harnesses away from pinch points.
- Bag-and-tag hardware: Label zip bags by component. Photograph hardware location and clip orientation for quick reassembly.
- Mark latch and hinges: Paint-pen the latch and hood fastener positions to speed final alignment. Still verify and adjust as needed.
- Replace one-time-use fasteners: VW specifies various single-use bolts and clips; install new hardware and document it on the parts invoice.
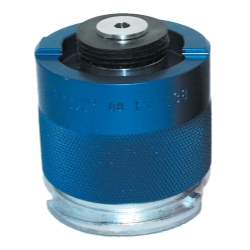
- Vacuum-fill the cooling system: Use a vacuum coolant filler to eliminate air pockets and reduce bleed time on turbocharged engines.
- Leak-check A/C and cooling: After reassembly, pressure-test cooling and confirm A/C performance. Inspect O-rings and joints.
- Headlamp/fog lamp aiming: Perform aiming on a level surface with a calibrated aimer or OEM-specified method. Document pre/post photos of beam patterns if possible.
- Final scan and ADAS checks: Complete post-scan and required calibrations. Clear codes, road test, and verify cruise/ADAS functions.
Documentation That Gets Paid
Good paperwork supports both safety and reimbursement.
- Photos: Take before, during, and after photos that show each removed component and any hidden damage. Include close-ups of the shutter, air guides, latch support, sensor brackets, and hose/clip transfers.
- OEM procedures: Attach procedure pages with highlighted steps requiring removal or calibration. Include torque charts for latch/support and front-end carrier bolts.
- Line notes and P-Pages: Screenshot or cite the labor guide language clarifying that the replacement time is after removal of bolted-on parts.
- Scan/calibration reports: Save and attach pre/post-scan PDFs and calibration confirmations.
- Materials receipts: Coolant, refrigerant, O-rings, single-use hardware, clips, corrosion protection—attach invoices.
- Customer communication: Document approvals and any insurer denials. If a payer declines OEM-required steps, inform the customer and pause work until resolved.
Quick checklist
- Pull OEM procedures, torque specs, and calibration requirements
- Add R&I for all front-end components (cover, lamps, reinf., shutter, shields)
- Include coolant drain/refill/bleed and A/C evac/recharge (mech rate)
- Add headlamp/fog lamp aiming and latch adjustment
- Plan scans and required calibrations if sensors/emblem are disturbed
- Document with photos, line notes, and receipts; get customer authorization
FAQs
Why does the labor guide show about 0.8 hours for the radiator support?
That time is typically for replacing the support itself after all necessary bolted-on parts have already been removed. It excludes access-related R&I, fluids, aiming, calibrations, and adjustments. Those items must be added individually per the labor guide and OEM procedures.
Are bumper cover, headlamps, shutter, and reinforcement included in the support replacement time?
No. These are separate R&I operations. The line note clarifies that the replacement time is after bolted-on parts are removed. Add each component’s R&I time as listed in the database and include any adjustments (e.g., latch alignment, headlamp aiming).
Can I leave the radiator and condenser attached when replacing the support?
It depends on the specific vehicle configuration and OEM instructions. On many 2020 Jetta models, the radiator and condenser are clipped or bolted to the carrier. You may either R&I them or support and transfer them per OEM guidance. If A/C lines are disconnected, add evacuate/recharge and new O-rings. If left sealed and supported, document the method and protective measures.
When are headlamp and fog lamp aiming required?
If the lamps are removed or disturbed, aiming is generally required per OEM procedures. Add aiming time for headlamps and fog lamps (if equipped) and document the aiming method and results.
What if the insurer only wants to pay the 0.8-hour line?
Provide a supplement that cites the labor guide’s line note and OEM procedures, itemizing each R&I, fluid service, scan, calibration, and adjustment. Communicate with the customer if payers decline necessary operations, and pause work until proper authorization is obtained.
Do pre- and post-scans and ADAS calibrations apply on this job?
Yes if sensors, cameras, or the radar in the grille emblem are removed or disturbed, or if the OEM requires scanning as part of the repair process. Follow VW procedures for calibrations and include documentation in the file.
Any commonly missed operations on this job?
Frequent misses include fog lamp aiming, ambient temperature sensor transfer, air guide/deflector R&I, shutter R&I and initialization (if required), latch support R&I separate from the latch, hood latch adjustment, under-shields, and coolant bleed time. Also verify single-use fasteners and clip replacements.
Should mechanical-rate items be separated?
Yes. A/C evacuate/recharge and certain cooling operations typically bill at mechanical rate. Use the correct rate category to avoid review pushbacks and to reflect actual technician skills and equipment used.
Shop Cooling System Service Tools
For radiator support work that involves coolant drain/refill, bleeding, and leak checks, see our Cooling System Service Tools.
- Vacuum-fill kits and pressure testers for reliable bleeding and diagnostics
- Hose clamp pliers, line plugs, and spill-free funnels for cleaner R&I
- Adapters and caps compatible with VW cooling systems
The Toolsource Technical Team blends decades of real-world automotive service experience with up-to-date technical research. Our writers collaborate with professional mechanics, shop owners, and diagnostic specialists to deliver practical, workshop-ready guidance you can trust.


Follow us on social media